
In this article, we will show you how to install SOPlanning on a Debian 9 server.
 SOPlanning is an open-source and free-to-use online planning tool that is designed to organize tasks and projects easily and efficiently. SOPlanning provides users with many features, such as built-in PDF export, email notifications, .XLS or .CSV export, synchronization with Google Calendar and Outlook, and lots more.
Since SOPlanning is an open source software, we can make modifications, change colors, customize the company logo etc. This application is commonly used in IT Project Management, Industrial Production, Material Reservation, Online booking systems and more.
1. Log in via SSH on the Debian server
Log in via SSH to your server as user root (or user with sudo privileges)
ssh root@Server_IP_Address -p Port_Number
Do not forget to replace the Server_IP_Address and Port_Number fields with your actual server IP address and SSH port number. The default port for SSH is 22, so try that first if you don’t know yours. Also, if you want to connect with a user that has root privileges, simply change the ‘root’ user with the user that you would like to use.
2. Update all Packages
The first thing to do when you are logged in is to make sure that all the installed packages are up to date:
sudo apt update
sudo apt upgrade
That shouldn’t take too long, and it’ll ensure that everything is secure and ready.
3. Install LAMP Server
A LAMP setup is required in order for SOPlanning to work. If you don’t already have a LAMP (Apache, MySQL (or MariaDB) and PHP) server installed on your server or VPS, you can install it with the next few steps. To install Apache and MariaDB, you can execute the following command to install both at the same time:
sudo apt-get install apache2 mariadb-server -y
Once the installation is complete, you will need to add the Ondrej PHP repository to your system so that you can install the required PHP version. We need a third-party repository since the PHP version that we need isn’t included in the built-in repositories:
sudo apt install ca-certificates apt-transport-https
wget -q https://packages.sury.org/php/apt.gpg -O- | sudo apt-key add -
echo "deb https://packages.sury.org/php/ stretch main" | sudo tee /etc/apt/sources.list.d/php.list
The latest version of PHP for this application is PHP version 7.3. To install this version of PHP with all of the necessary modules, run the following commands:
sudo apt update
sudo apt-get install php7.3 php7.3-mysql php7.3-curl php7.3-json php7.3-cgi php7.3-recode php7.3-intl libapache2-mod-php7.3 php7.3-xmlrpc php7.3-gd php7.3-mbstring php7.3 php7.3-common php7.3-xmlrpc php7.3-soap php7.3-xml php7.3-intl php7.3-cli php7.3-ldap php7.3-zip php7.3-readline php7.3-imap php7.3-tidy -y
After all packages are installed, run the Apache and MariaDB services and allow them to start on boot with the commands:
sudo systemctl start apache2
sudo systemctl enable apache2
sudo systemctl start mariadb
sudo systemctl enable mariadb
4. Create a Database
To create a database, you need to log in to the MySQL console:
mysql -u root -p
By using the following query, you can create a database. We chose the name soplanning, but you can name it however you want:
CREATE DATABASE soplanning;
You then need to add a separate user that will be able to interact with your ‘soplanning’ database with the query:
GRANT ALL PRIVILEGES ON soplanning.* TO 'soplanning'@'localhost' IDENTIFIED BY '5tr0ng_PaS5w0rD';
Please do not forget to change the ‘5tr0ng_PaS5w0rD‘ with an actual strong password.
To apply the privileges that you set, you need to run this command:
FLUSH PRIVILEGES;
After we finish, we can exit from the MySQL session with the command:
quit
5. Install SOPlanning
First, download the latest stable version of SOPlanning in the /opt directory on the server and extract it in the /var/www/html/ directory:
cd /opt
wget https://sourceforge.net/projects/soplanning/files/soplanning/v1.44/soplanning-1-44.zip
unzip soplanning-1-44.zip -d /var/www/html/
Next, you need to set the appropriate ownership and file permissions (in this example it’ll be www-data because you are using the Apache web server) to the files:
sudo chown -R www-data: /var/www/html/soplanning/
6. Configure the Apache Web Server
In this step, you will set up a new virtual host on the web server in order for Apache to be able to serve the SOPlanning directory. To do this, you need to create a new configuration file using your preferred text editor:
sudo nano /etc/apache2/sites-available/soplanning.conf
Now add and modify the following lines:
<VirtualHost *:80>

   ServerName your_domain.com
   ServerAdmin admin@your_domain.com
   DocumentRoot /var/www/html/soplanning/

     <Directory /var/www/html/soplanning/>
       AllowOverride All
       Order allow,deny
       allow from all
     </Directory>

    ErrorLog /var/log/apache2/soplanning_error.log
    CustomLog /var/log/apache2/soplanning_custom.log combined

</VirtualHost>
Do not forget to change all mentions of your_domain.com with your actual domain name. Save and exit.
Enable the Apache SOPlanning configuration by executing this command:
sudo a2ensite soplanning.conf
To disable the Apache default configuration, run this command next:
sudo a2dissite 000-default
Also, make sure that the mod_rewrite Apache module is enabled:
sudo a2enmod rewrite
Once you make all the changes above, you need to restart the Apache web server:
systemctl restart apache2
6. Access SOPlanning
You can now open your favorite web browser and enter the domain you added as your_domain.com in the above configuration file.
http://your_domain.com/
You should be able to see the SOPlanning Installation Assistant page.
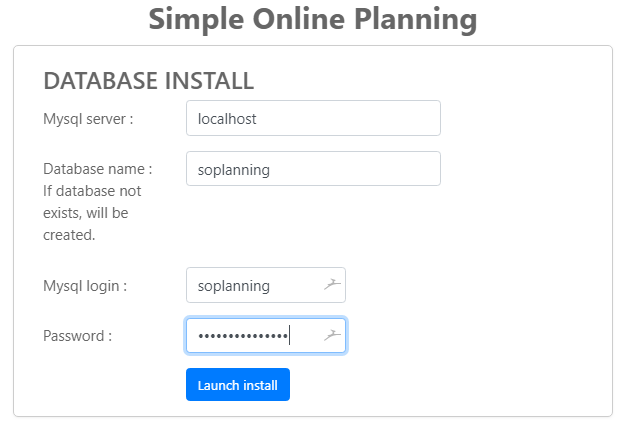
Enter the information about the database that we created in step 4 of this article.
Mysql server: localhost

Database name: soplanning

Mysql login: soplanning
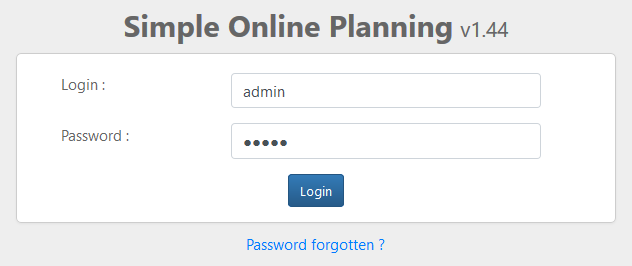
Once the installation is complete, you can click on ‘Click here’ button and you will be redirected to a login page where you will be able to log in as an administrator user by using ‘admin’ for both username and password.
Congratulations, the installation is now complete and you should be able to see the SoPlanning dashboard as shown in the following screen:
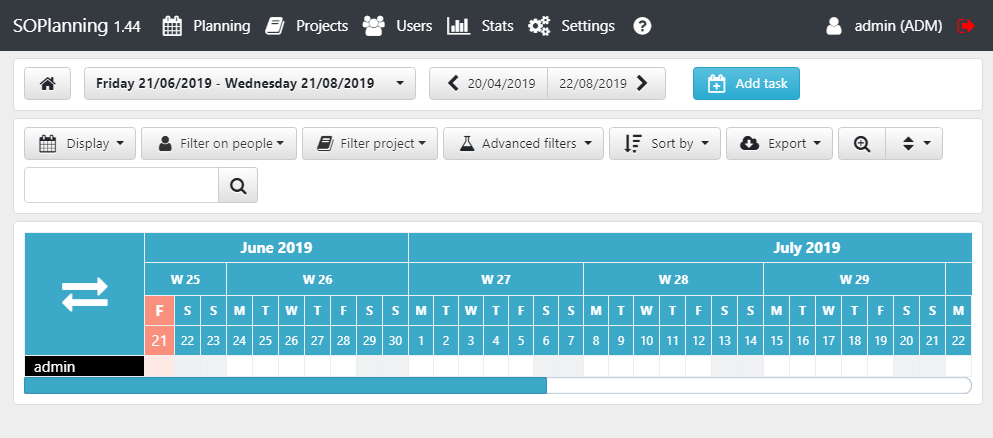
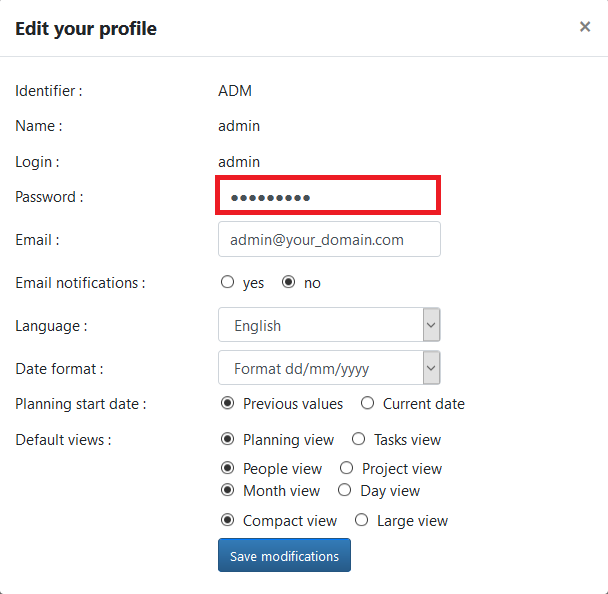
It is recommended to change the password for the username ‘admin’ and use a strong password. You can do that from the SOPlanning dashboard by modifying your admin profile.
Now you can continue to explore this useful application by organizing your time and your projects.
 Of course, you don’t have to install SOPlanning on Debian 9 if you use one of our Managed Linux Support services, in which case you can simply ask our expert system administrators to install SOPlanning on your Debian 9 server for you, using the LAMP stack or any other web hosting stack of your choice. They can also help you with almost any other aspect of your server’s functions and maintenance. They are available 24×7 and will take care of any requests immediately.
If you liked this post on how to install SOPlanning on Debian 9, please share it with your friends on the social networks using the share shortcuts, or simply let us know how the installation went in the comments section below. Thank you.
