
In this tutorial, we will show you how to install Cockpit on an Ubuntu 18.04 Server.
 Cockpit is a web-based system administration service used to manage server services, server storage, configure networks, inspect logs, update server OS packages, and much more. Thanks to its web-based management, keeping track of what’s going on with your server is easier than ever. Cockpit also makes it easier for users that don’t have much experience with servers to better manage their systems without having to learn to use the command line. Let’s begin with the installation.
Requirements
- An Ubuntu 18.04 Server
- Access to the root user account (or access to an admin account with root privileges)
Step 1. Log in to the Server & Update all Server OS Packages
Log in to your Ubuntu 18.04 server via SSH as the root user:
ssh root@IP_Address -p Port_number
You will need to replace ‘IP_Address‘ and ‘Port_number‘ with your server’s respective IP address and SSH port number (if using a custom port number). Additionally, replace ‘root’ with the username of the admin account if necessary.
Before we can start with the Cockpit installation, we have to make sure that all Ubuntu OS packages installed on the server are up to date. We can do this by running the following commands:
sudo apt-get update
sudo apt-get upgrade
Step 2. Install Cockpit
Run the following command to install the latest version of Cockpit available in the official Ubuntu repositories:
sudo apt-get install cockpit
In order to access Cockpit only by using your domain name, e.g. https://your-domain.com, and without the port number 9090 in the URL, we need to install a web server, an SSL certificate on that domain and set Cockpit behind a reverse proxy. Don’t worry, we’ll be covering those steps in this tutorial as well.
Step 3. Install Apache
Check if Apache is already installed and running on the server:
dpkg -l | grep -i apache2
ps aux | grep apache2
If it is not installed, run the following command to install the Apache web server:
apt-get install apache2
Enable Apache service to start automatically upon server boot with:
systemctl enable apache2
We can also check the status of the Apache service with the following command. It should already be running, but let’s check:
systemctl status apache2
The output should look something like this:
● apache2.service – The Apache HTTP Server
Loaded: loaded (/lib/systemd/system/apache2.service; enabled; vendor preset: enabled)
Drop-In: /lib/systemd/system/apache2.service.d
└─apache2-systemd.conf
Active: active (running) since Sun 2019-06-30 11:12:05 CDT; 9min ago
Main PID: 9277 (apache2)
Tasks: 7 (limit: 2321)
CGroup: /system.slice/apache2.service
├─ 9277 /usr/sbin/apache2 -k start
├─ 9280 /usr/sbin/apache2 -k start
├─ 9281 /usr/sbin/apache2 -k start
├─ 9282 /usr/sbin/apache2 -k start
├─ 9283 /usr/sbin/apache2 -k start
├─ 9284 /usr/sbin/apache2 -k start
└─22386 /usr/sbin/apache2 -k start
Step 4. Install a Let’s Encrypt SSL certificate
Install Certbot, a program that automates SSL/TLS certificate installation using Let’s Encrypt Free SSL. This allows your website to be secure for free. Run this command to install the necessary packages for Let’s Encrypt:
sudo apt-get install certbot python-certbot-apache
Install a Let’s Encrypt SSL certificate on your domain. Certbot will automatically configure your Apache config file to use SSL:
sudo certbot --apache -d your-domain.com -d www.your-domain.com
Make sure to enter a valid e-mail address as that is where notifications about your certificate status (e.g. an expiring certificate) will arrive. During the installation, choose to redirect HTTP traffic to HTTPS.
Step 5. Set a Reverse Proxy in Apache
We can now set a reverse proxy in Apache. In order to do so, we need to enable some additional proxy modules in Apache. Run the following commands:
a2enmod proxy
a2enmod proxy_http
a2enmod proxy_wstunnel
Restart Apache for the changes to take effect:
systemctl restart apache2
Once mod_proxy, mod_proxy_http and proxy_wstunnel are enabled in Apache, create a new configuration file for your domain with the following command:
NOTE: It’s very important you replace “your-domain.com” at ALL locations where it shows up in the config file and all other locations. If you don’t, your configuration may not work.
nano /etc/apache2/sites-available/your-domain.com.conf
And enter the following lines:
<VirtualHost *:80>

ServerName your-domain.com
ServerAlias www.your-domain.com

RewriteEngine on
RewriteCond %{SERVER_NAME} =www.your-domain.com [OR]
RewriteCond %{SERVER_NAME} =your-domain.com
RewriteRule ^ https://%{SERVER_NAME}%{REQUEST_URI} [END,NE,R=permanent]
</VirtualHost>

<IfModule mod_ssl.c>

<VirtualHost *:443>

ServerName your-domain.com
ServerAlias www.your-domain.com

ProxyRequests Off
<Proxy *>
Order deny,allow
Allow from all
</Proxy>

RewriteEngine On
RewriteCond %{HTTP:Upgrade} =websocket [NC]
RewriteRule /(.*) ws://127.0.0.1:9090/$1 [P,L]
RewriteCond %{HTTP:Upgrade} !=websocket [NC]
RewriteRule /(.*) http://127.0.0.1:9090/$1 [P,L]

ProxyPass / http://127.0.0.1:9090/
ProxyPassReverse / http://127.0.0.1:9090/
<Location />
Order allow,deny
Allow from all
</Location>

SSLCertificateFile /etc/letsencrypt/live/your-domain.com/fullchain.pem
SSLCertificateKeyFile /etc/letsencrypt/live/your-domain.com/privkey.pem
Include /etc/letsencrypt/options-ssl-apache.conf

</VirtualHost>

</IfModule>
Remember to replace your ‘your-domain.com‘ with your actual domain name. Save the file, close it and disable the default Apache configuration:
a2dissite 000-default
Enable the “your-domain.com.conf” configuration in Apache using:
a2ensite your-domain.com
Optionally, we can use this command to enable it:
ln -s /etc/apache2/sites-available/your-domain.com.conf /etc/apache2/sites-enabled/your-domain.com.conf
Then restart Apache for the changes to take effect:
systemctl restart apache2
Edit the Cockpit configuration file and add the following lines:
[WebService]
Origins = https://your-domain.com http://127.0.0.1:9090
ProtocolHeader = X-Forwarded-Proto
AllowUnencrypted = true
Restart Cockpit and enable it to start on server boot:
sudo systemctl restart cockpit.socket
sudo systemctl enable cockpit.socket
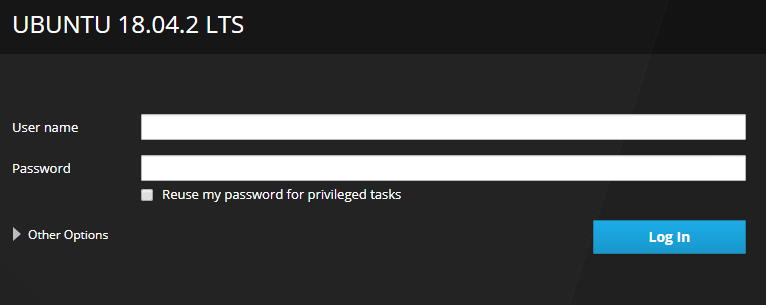
Now we can access Cockpit without needing to use port 9090 in a web browser – we can now access it using https://your-domain.com.
Log in as root, or use an existing system user account on the server.
If there are no user accounts created on the server yet, we can create it using this command:
adduser username
Replace username with the actual name of the new user account, and you will be prompted to set and confirm the new user account password. Make sure to use a strong password for the new account.
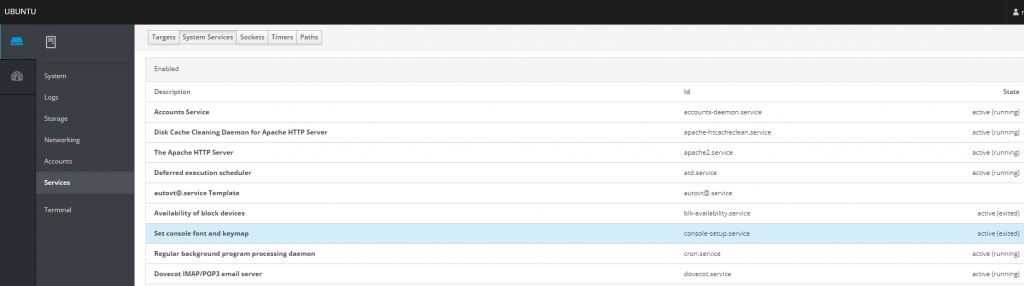
That’s it – you now have a working Cockpit installation running on your Ubuntu 18.04 server.
 Of course, you don’t have to install Cockpit on Ubuntu 18.04, if you use one of our Managed Ubuntu Support solutions, in which case you can simply ask our expert Linux admins to setup Cockpit on Ubuntu 18.04 for you. They are available 24×7 and will take care of your request immediately.
PS. If you liked this post on how to install Cockpit on an Ubuntu 18.04 VPS, please share it with your friends on the social networks using the share buttons below, or simply leave a comment down in the comments section. Thanks.
