
ERPNext is one of the best open-source ERP systems you will ever see. Unlike traditional ERP systems, which are often expensive and rigid, ERPNext offers greater flexibility at a more affordable cost, making it suitable for businesses of all sizes. ERPNext is built using Python and MySQL as the database backend. It is a free, open-source software that you can use to manage your business. ERPNext has a Model-View-Controller architecture that, together with metadata modeling tools, provides flexibility: users can customize the system to their unique business goals without requiring custom programming. In this article, we will show you how to install ERPNext on Ubuntu 26.04.
Prerequisites
- A fresh Ubuntu 26.04 VPS
- SSH root access, or a user with sudo privileges
Conventions
# – given commands should be executed with root privileges either directly as a root user or by use of sudo command
$ – given commands should be executed as a regular user
Step 1. Update the System
First of all, we need to log in to our Ubuntu 26.04 VPS through SSH:
ssh root@IP_Address -p Port_numberReplace “root” with a user that has sudo privileges. Additionally, replace “IP_Address” and “Port_Number” with your server’s respective IP address and SSH port number. Next, let’s make sure that we’re on Ubuntu 26.04. You can verify it with this command:
# lsb_release -aYou should get this as the output:
No LSB modules are available.
Distributor ID: Ubuntu
Description:    Ubuntu Resolute Raccoon
Release:        26.04
Codename:       resolute
Then, run the following command to make sure that all installed packages on the server are updated to their latest available versions:
# apt update That’s it, the system package information should be updated now.
Step 2. Install Dependencies
Almost every package we install relies on other packages to run properly or to enable installation. Before proceeding with the other steps, we need to install the dependencies.
# apt install ca-certificates curl gnupg git sudo python3-dev default-libmysqlclient-dev build-essential pkg-config software-properties-common xvfb libfontconfig pkg-config redis-serverStep 3. Add a System User
Let’s create a new system user called ‘frappe’, run this command:
# adduser frappeYou will be prompted to create a password. Make sure to use a strong password when prompted.
Step 4. Add User to Sudoer
On Ubuntu systems, administrative privileges are typically granted by adding users to the sudo group. To give a regular user full sudo access (i.e., the ability to run commands as root with sudo), add them to the sudo group using one of these commands:
# usermod -aG sudo frappeStep 5. Install Python
Note: Frappe v16 officially requires Python 3.14, and it’s officially recommended to install and manage Python virtual environments using the new uv package manager. In Frappe v15 and earlier versions, we used the standard pip package manager and venv for managing virtual environments. This still works, but we will follow the official guidelines and use UV as follows:
# su - frappe
$ curl -LsSf https://astral.sh/uv/install.sh | sh
$ source ~/.bashrc
$ uv python install 3.14 --default
Step 6. Install wkhtmltopdf
Frappe uses the wkhtmltopdf library to generate PDF documents. This is an outdated library, so Frappe v16 now also supports Chrome-based PDF generation. However, for compatibility purposes, we will still install wkhtmltopdf.
$ sudo wget https://github.com/wkhtmltopdf/packaging/releases/download/0.12.6.1-2/wkhtmltox_0.12.6.1-2.jammy_amd64.deb
$ sudo dpkg -i wkhtmltox_0.12.6.1-2.jammy_amd64.deb
You will see an error message. Let’s fix it with the command below:
$ sudo apt-get -f install -yStep 7. Install MariaDB Server
Frappe v16 requires MariaDB 11.8 or higher. In this step, we will install the MariaDB server, then secure the installation
$ sudo apt install mariadb-server mariadb-client -yOnce installed, we need to run the command below to create a password for our MySQL root user.
$ sudo mariadb-secure-installation Follow the steps and type the password when you are prompted to create a new one. Make sure to create a strong password.
Then, let’s edit the MariaDB config file.
$ sudo nano /etc/mysql/my.cnfInsert these lines into the file.
[mysqld]
character-set-client-handshake = FALSE
character-set-server = utf8mb4
collation-server = utf8mb4_unicode_ci
[mysql]
default-character-set = utf8mb4
Restart MariaDB to apply the changes.
$ sudo systemctl restart mariadbStep 8. Install Node, NPM, and Yarn
At the moment, Frappe 16 is the latest version available to install, and it requires Node 24. We will install it using Node Version Manager (nvm) as follows:
$ cd /home/frappe-user
$ curl https://raw.githubusercontent.com/creationix/nvm/master/install.sh | bash
$ source ~/.profile
$ nvm install 24
$ nvm use 24
Then, we need to install the Node Package Manager.
$ sudo apt install npm -yFinally, we can install yarn
$ sudo npm install -g yarnStep 9. Install Frappe Bench
According to the documentation, Frappe v16 now uses the uv package manager to install Bench.
$ uv tool install frappe-benchCheck if the bench is correctly installed by running bench –version
When Frappe Bench is initialized, it creates a folder. We can consider this folder a container for all the sites and apps we will install later. Let’s initialize now.
$ cd /home/frappe
$ bench init --frappe-branch version-16 frappe-bench
Then, we can allow execution permission to the Frappe user’s home directory.
$ sudo chmod -R o+rx /home/frappe/Step 10. Create a New Site
We still need to execute the commands as the ‘frappe’ user.
$ cd /home/frappe/frappe-bench/
$ bench new-site erpnext.yourdomain.com
The system will ask you for the MySQL root password. You will also need to create a password for your ‘Administrator’ user in this step.
Step 11. Set up Production Environment
We will enable the scheduler and turn off the maintenance mode.
$ bench --site erpnext.yourdomain.com enable-scheduler
$ bench --site erpnext.yourdomain.com set-maintenance-mode off
As informed earlier, Frappe 16 uses the uv package manager. So, in this step, we will install Ansible, then run the bench setup commands.
$ sudo apt install -y ansible
$ sudo env "PATH=$PATH" bench setup production frappe
The command above will take some time to complete, depending on your network speed.
Now, let’s execute the command below:
$ bench setup nginxThen, run these commands.
$ sudo ln -sf /home/frappe/frappe-bench/config/supervisor.conf /etc/supervisor/conf.d/frappe-bench.conf
$ sudo supervisorctl reread
$ sudo supervisorctl update
$ sudo supervisorctl restart all
$ sudo supervisorctl status
If everything is okay, you will see a message similar to this after executing the last command above:
frappe-bench-redis:frappe-bench-redis-cache               RUNNING   pid 71944, uptime 0:03:16
frappe-bench-redis:frappe-bench-redis-queue               RUNNING   pid 71945, uptime 0:03:16
frappe-bench-web:frappe-bench-frappe-web                  RUNNING   pid 71946, uptime 0:03:16
frappe-bench-web:frappe-bench-node-socketio               RUNNING   pid 71947, uptime 0:03:16
frappe-bench-workers:frappe-bench-frappe-long-worker-0    RUNNING   pid 71960, uptime 0:03:16
frappe-bench-workers:frappe-bench-frappe-schedule         RUNNING   pid 71948, uptime 0:03:16
frappe-bench-workers:frappe-bench-frappe-short-worker-0   RUNNING   pid 71954, uptime 0:03:16
Step 12. Install ERPNext
In this step, we will download the apps from GitHub and install them on our ERPNext website.
cd /home/frappe/frappe-bench
$ bench get-app --branch version-16 erpnext
$ bench get-app --branch version-16 hrms
Finally, we can install the apps now.
$ bench --site erpnext.yourdomain.com install-app erpnext
$ bench --site erpnext.yourdomain.com install-app hrms
To check if they are installed, we can run this command:
$ bench version --format tableThe command will show an output like this:
+---------+---------+------------+---------+
| App | Version | Branch | Commit |
+---------+---------+------------+---------+
| erpnext | 16.12.0 | version-16 | ddef35c |
| frappe | 16.13.0 | version-16 | 8d901c9 |
| hrms | 16.4.5 | version-16 | 2a9180f |
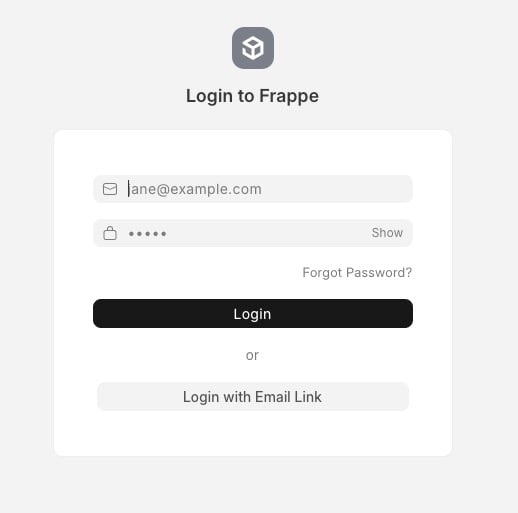
+---------+---------+------------+---------+Now you can visit erpnext.yourdomain.com in your favorite browser. You will be prompted for a username and its password to log in. This is the password you created when running the ‘bench new-site’ command in the earlier step above.
Once logged in, you need to complete the setup wizard steps.
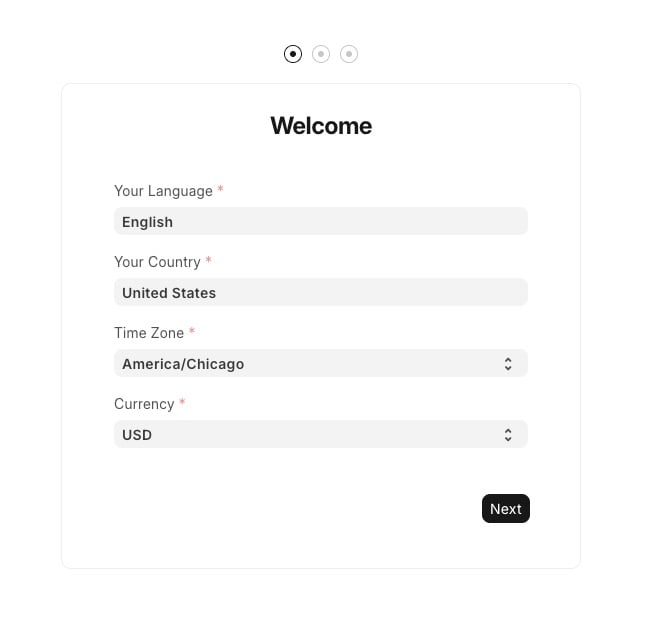
Fill in the required fields, then continue setting up your account.
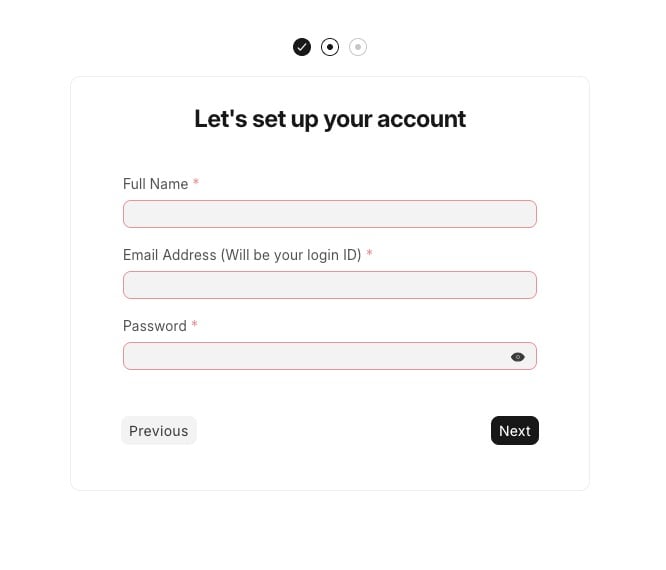
Click Next to continue
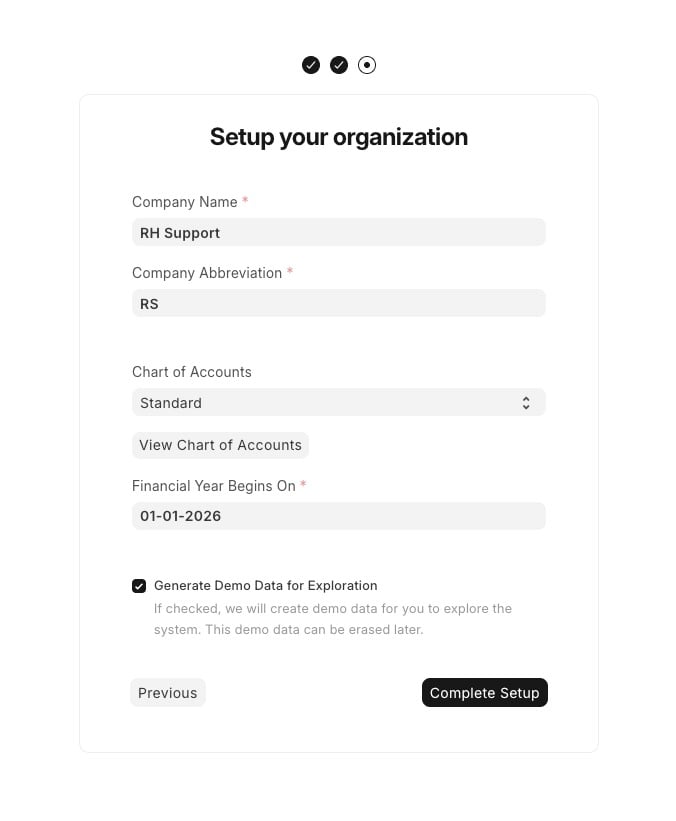
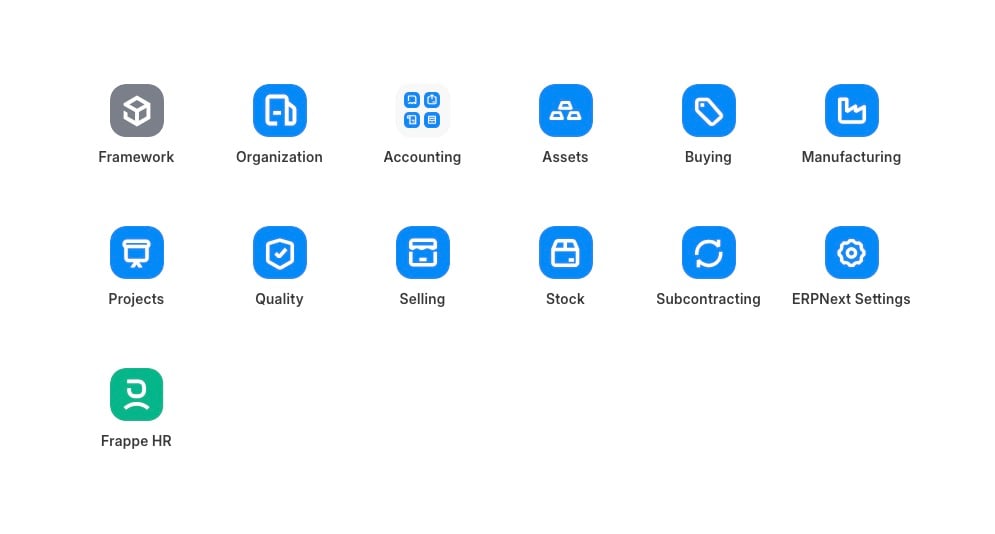
In this step, you can enter your organization’s details and finalize the setup. Once you are done, you will be shown the menus.
Wrapping Everything Up
That’s it all! You have learned how to install ERPNext on Ubuntu 26.04
Of course, you don’t have to install ERPNext on Ubuntu 26.04 if you have an active service with us, in which case you can simply ask our expert Linux admins to install ERPNext on Ubuntu 26.04 for you. They are available 24×7 and will take care of your request immediately. Managing a website is not just about installation; we can help you optimize it if you have an active service with us.
If you liked this post on how to install ERPNext on Ubuntu 26.04, please share it with your friends or leave a comment below.

I’m new to ERPnext, and am trying to setup a test environment following these instructions. Everything works ok until step 11: Setup Production Environment with the command:
$ sudo ln -sf /home/frappe/frappe-bench/config/supervisor.conf /etc/supervisor/conf.d/frappe-bench.conf
This returns the error: ln: No such file or directory. Do you have any suggestions on how to proceed forward from here?
Do you have supervisor installed on your server?
If not, install it using:
sudo apt install supervisor -yThen, proceed with the ERPnext installation.
Thank you for the detailed step by step procedure.
Was able to install successfully.
When I browsed to the site, got to the login page. However, don’t know what email address to use to login as we did not setup any email address but just the password.
Now unable to login to complete the next steps.
Appreciate if you could please assist
Please check the step 10, in this step you should be prompted to create a password for your Administrator user when creating a website. If you don’t remember it, you can try to log in with the user “administrator” by resetting its password using the following command: bench –site yoursite.com set-admin-password “new-password”
Thanks big time. This tutorial is one that works and is not too complicated. Excellent I have to say. Although this should be more normal in the net…
Well done!