
In this article, we will show you how to install PrestaShop on Ubuntu 18.04 LTS.
 PrestaShop is a free shopping cart platform written in the PHP programming language with support for the MySQL database management system. PrestaShop is used to build and run an online store and it is very easy to use. With PrestaShop, you can share your ideas and products and sell them on the internet. Let’s get started.
Step 1: Log in via SSH on the Ubuntu server:
Log in via SSH to your server as the root user (or as a user with sudo privileges)
ssh root@Server_IP_Address -p Port_number
Replace “Server_IP_Address” and “Port_number” with the respective values from your Ubuntu server.
Step 2: Update all Packages
The first thing to do when you are logged in is to make sure that all the installed packages are up to date:
sudo apt update
sudo apt upgrade
Step 3: Install LAMP (Apache, MySQL and PHP 7.2) Server Stack
In this step, we will install some of the requirements for the PrestaShop installation. To install the LAMP server and all of the required PHP extensions, run the following commands:
sudo apt install apache2 libapache2-mod-php mysql-server
sudo apt install php7.2-cli php7.2-common php7.2-curl php7.2-zip php7.2-gd php7.2-mysql php7.2-xml php7.2-mbstring php7.2-json php7.2-intl
In order to enable the Apache mod_rewrite module, type the next command:
sudo a2enmod rewrite
Run the command below to locate the PHP configuration file:
php -i | grep -i php.ini
Edit the PHP configuration file:
nano /etc/php/7.2/cli/php.ini
Then set the following values as shown:
memory_limit = 128M
upload_max_filesize = 32M
For changes to take effect, we need to restart the web server:
sudo systemctl restart apache2
Step 4: Create a Database
To create a database, you need to log in to the MySQL console:
mysql -u root -p
By using the following query, we will create our database:
CREATE DATABASE prestashop;
We will then add a separate user that will be able to interact with the PrestaShop database:
GRANT ALL PRIVILEGES ON prestashop.* to 'prestashop'@'localhost' IDENTIFIED BY '5tr0ng_Pa55w0rD';
Please do not forget to change ‘5tr0ng_Pa55w0rD‘ with an actual strong password.
To apply the privileges that we set, we will run this command:
FLUSH PRIVILEGES;
After we finish, we can exit from the MySQL session with the command:
quit
Step 5: Install PrestaShop
First, we will download the latest stable version of PrestaShop in the /opt directory on the server and extract it in the /var/www/html/ directory:
cd /opt
wget https://download.prestashop.com/download/releases/prestashop_1.7.5.0.zip
unzip prestashop_1.7.5.0.zip
unzip prestashop.zip -d /var/www/html/prestashop/
We will set appropriate file permissions and ownership to the files (in this tutorial it is the www-data user and group because we are using the Apache web server on Ubuntu):
chown -R www-data: /var/www/html/prestashop/
Step 6: Configure the Apache Web Server
In this step, we will set a new Virtual Host on the web server so it can serve the PrestaShop directory. To do that we need to create a new Apache configuration file by using your preferred text editor:
sudo nano /etc/apache2/sites-available/prestashop.conf
Now we can modify it and add the following lines:
<VirtualHost *:80>
    ServerAdmin admin@your_domain.com
    ServerName your_domain.com
    ServerAlias www.your_domain.com
    DocumentRoot /var/www/html/prestashop

    <Directory /var/www/html/prestashop>
        Options +FollowSymlinks
        AllowOverride All
        Require all granted
    </Directory>

    ErrorLog /var/log/apache2/prestashop-error_log
    CustomLog /var/log/apache2/prestashop-access_log common
</VirtualHost>
Do not forget to change ‘your_domain.com‘ with your actual registered and configured domain name. Save the file and exit.
We can enable the Apache PrestaShop configuration by running this command:
sudo a2ensite prestashop.conf
We will also remove the default Apache configuration file:
sudo rm /etc/apache2/sites-enabled/000-default.conf
Once we make all the changes above, we will restart the Apache web server for the changes to take effect:
sudo systemctl restart apache2
You can now open your favorite web browser and enter the domain you added as your_domain.com in the above configuration file.
http://your_domain.com/
You should be able to see the PrestaShop Installation Assistant page:
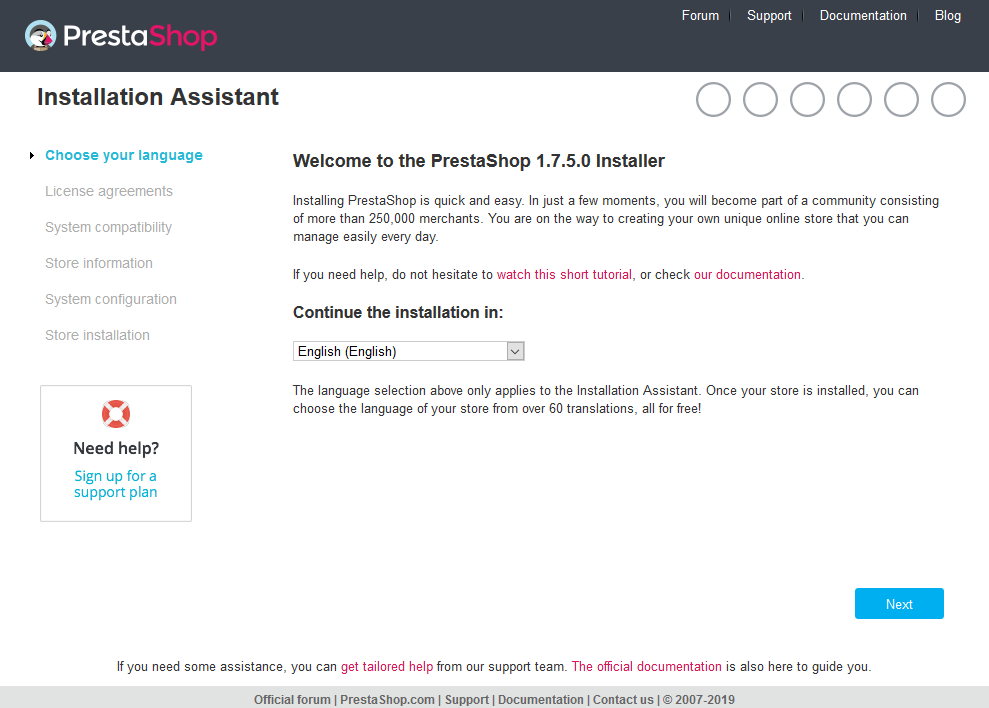
You can select the installation language and continue with the installation by clicking on the ‘Next’ button.
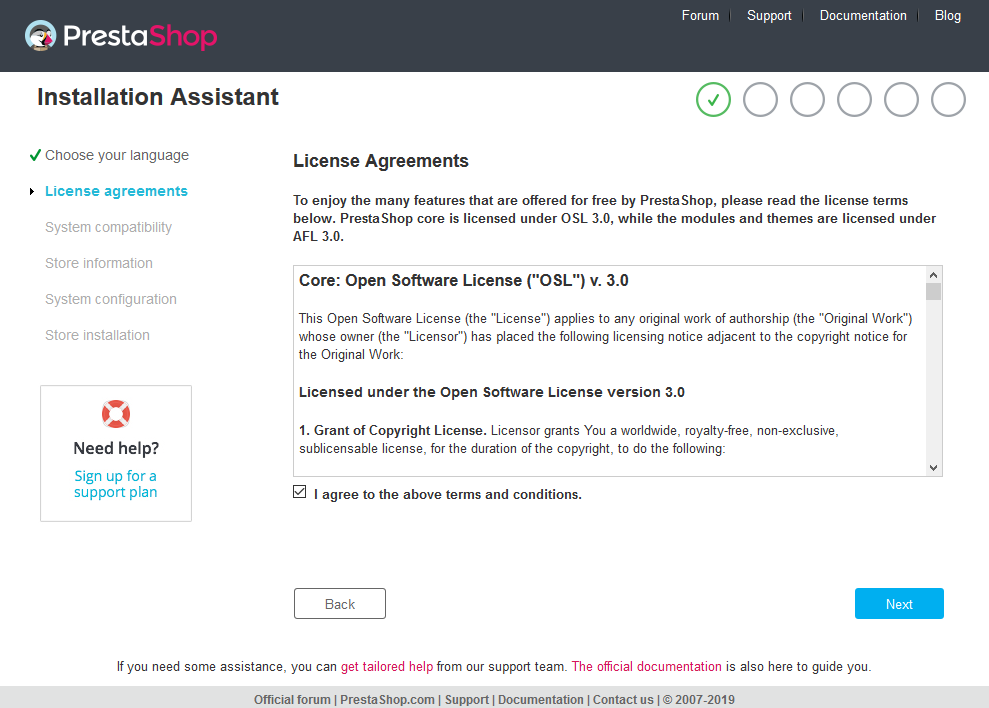
Make sure to read the License Agreements. You can continue with the installation upon agreeing to the License Agreements.
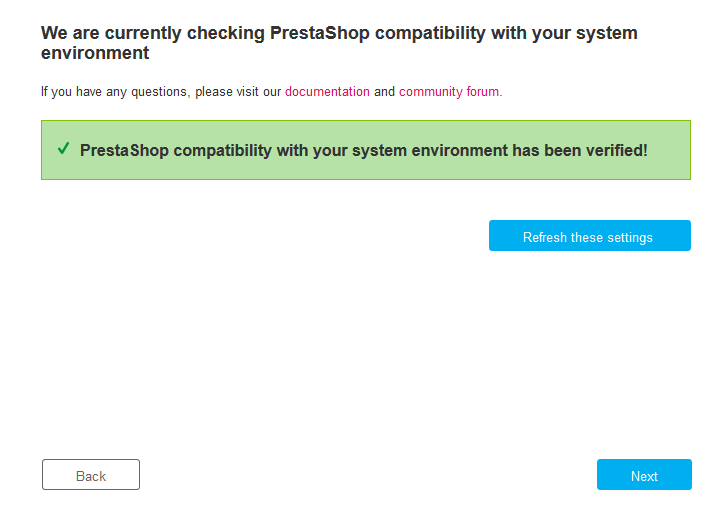
In this stage, you will check the PrestaShop compatibility with your system’s environment. Continue by clicking on the ‘Next’ button.
In the fourth stage of the web installation, enter all of the necessary information about your store and then proceed to the next step.
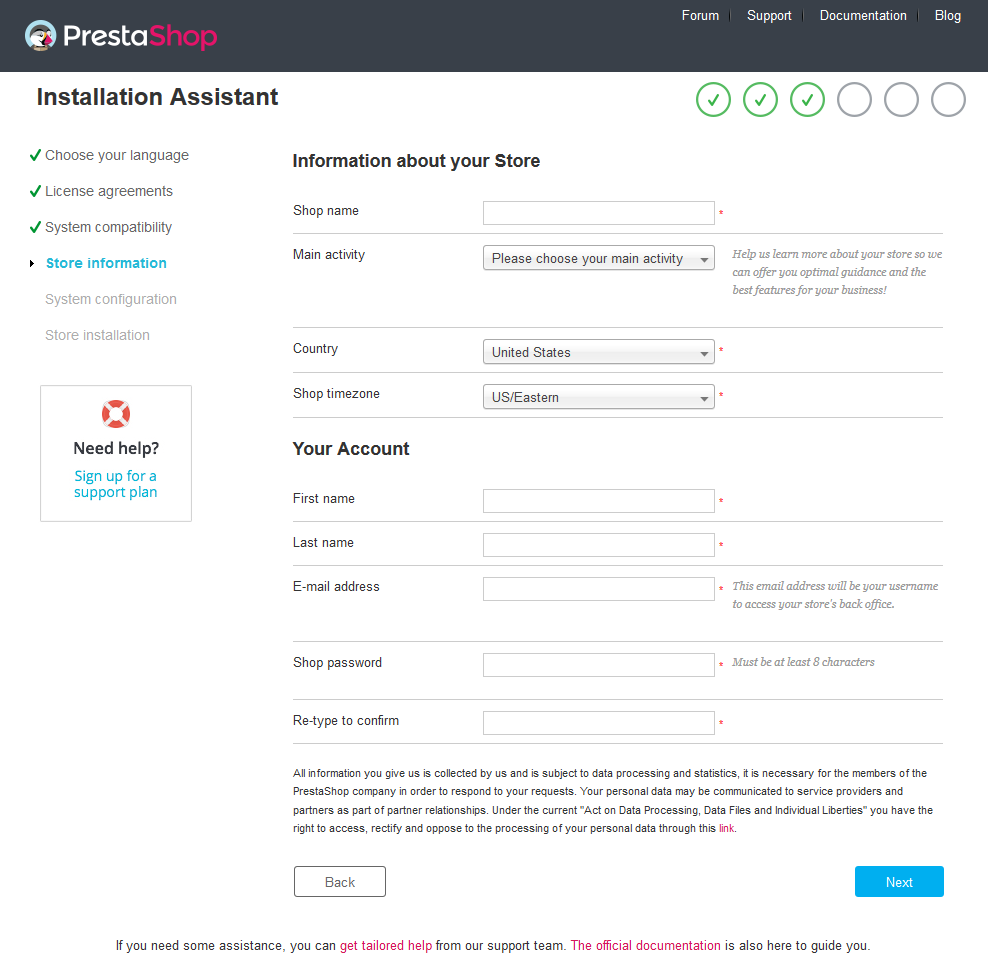
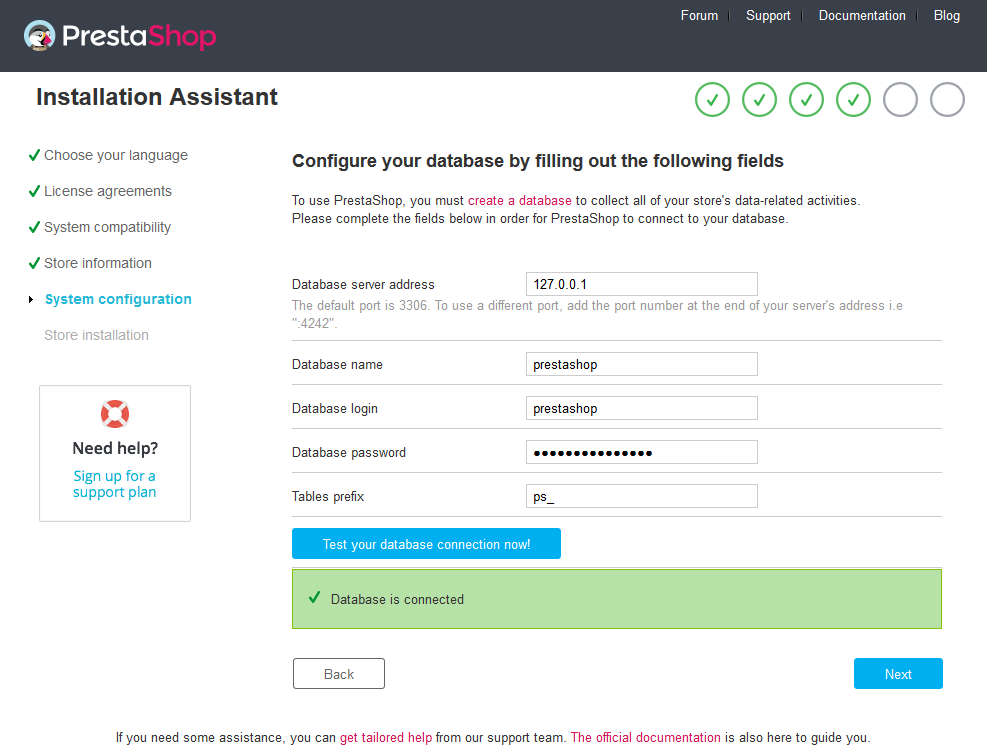
Enter the information about the database that we created in step 4 of this article.
Database server address: 127.0.0.1
Database name: prestashop
Database login: prestashop
Database password: <The password you set earlier in the database setup>
Congratulations! The installation is now complete.
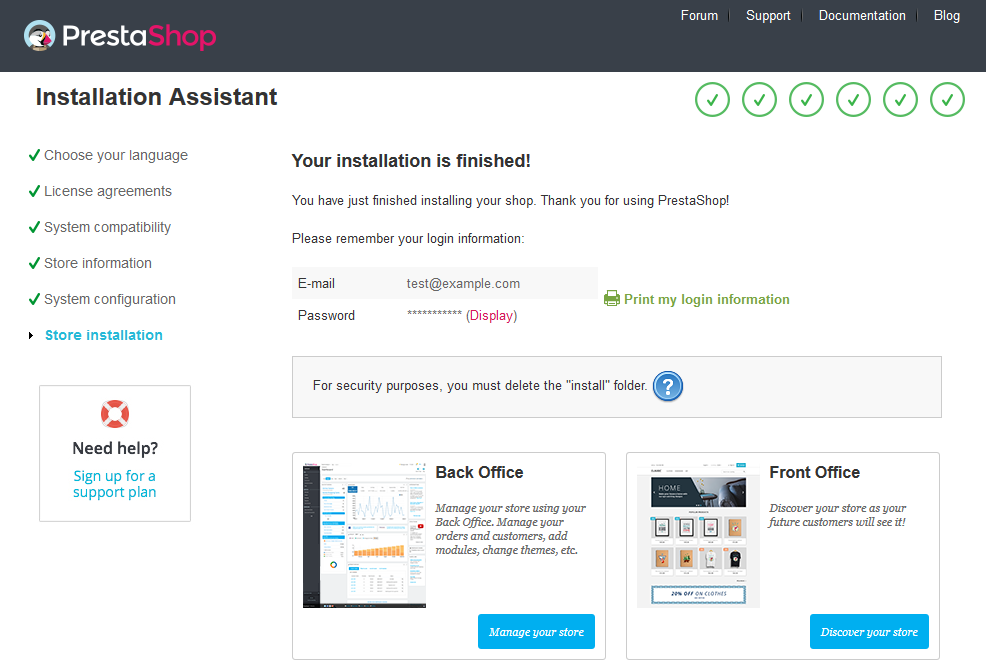
The last step we need to do is to remove the ‘install’ directory from the server. We can do this with the following command:
rm -rf /var/www/html/prestashop/install/
If you carefully followed the steps in this tutorial, you should have a working PrestaShop instance on your Ubuntu 18.04 VPS. For more details about PrestaShop configuration and usage, please check their official documentation.
 Of course, you don’t have to install PrestaShop on Ubuntu 18.04 if you use one of our Fully Managed Linux Server Support services, in which case you can simply ask our expert system administrators to install PrestaShop on Ubuntu 18.04 for you, using the LAMP stack or any other web hosting stack of your choice. They are available 24×7 and will take care of your request immediately.
PS. If you liked this post on how to install PrestaShop on Ubuntu 18.04, or if you found it helpful, please share it with your friends on the social networks using the share buttons, or simply leave a comment in the comments section. Thanks.

is there any alternative for domain name like instead of your_domain name can we do it locally
If you want to run Prestashop locally, please refer to Prestashop documentation
Perfectly explained! Thank you!