
Today we have a tutorial on how to install ownCloud 10 on CentOS 7. ownCloud is a popular open source web application used for data synchronization, file sharing, collaboration . It is a cross-platform and super easy to use application that that offers a great security and total control of your files.You can use our Server Support Services, and we will install ownCloud on your private server with easy, and we will do all the configuration and hardening required. We are always available via the Live Chat option in the bottom right corner of our website, where you can ask for more info, about time-frame, pricing, etc.. Let’s get started with installing ownCloud 10.

At the time of writing this tutorial, the latest stable version of ownCloud is 10.0.7, and it requires the following:
- PHP >= 5.6 (PHP 7.0 or above is recommended), with the following PHP extensions enabled: XML (Expat), curl, PDO, Phar, GD Graphics Library version 2.0.x+, DOM, ctype, JSON, iconv, intl, mcrypt, openssl, bz2, Zlib and Zip.
- Apache Web Server >= 2.0 compiled with mod_rewrite module
- MySQL >= 5.x (MySQL 5.5 or later is recommended), MariaDB 5.5+, PostgreSQL, or SQLite installed on your Linux virtual server.
Let’s start with the ownCloud installation procedure.
1. Update the OS packages
Make sure the CentOS 7 server packages are fully up-to-date:
yum clean all
yum -y update
2. Install PHP 7.1 and the required PHP extensions
The default PHP version on CentOS 7 is PHP 5.4. In this tutorial, we will install PHP version 7.
Install EPEL and Remi repository packages:
rpm -Uvh https://dl.fedoraproject.org/pub/epel/epel-release-latest-7.noarch.rpm
rpm -Uvh http://rpms.remirepo.net/enterprise/remi-release-7.rpm
Enable the Remi PHP 7.1 repository:
yum-config-manager --enable remi-php71
and install PHP 7.1 and several PHP extensions required by ownCloud by running the following command:
yum install php php-mysqlnd php-pecl-zip php-xml php-mbstring php-gd php-mcrypt php-pear php-pspell php-pdo php-xml php-intl php-zip php-zlib
Open the PHP configuration file and increase the upload file size. You can find the location of the PHP configuration file by executing the following command:
php -i | grep -i php.ini
Configuration File (php.ini) Path => /etc
Loaded Configuration File => /etc/php.ini
Increase the default post_max_size and upload_max_filesize values in the PHP configuration, e.g.:
sed -i "s/post_max_size = 8M/post_max_size = 256M/" /etc/php.ini
sed -i "s/upload_max_filesize = 2M/upload_max_filesize = 256M/" /etc/php.ini
You can set the post_max_size and upload_max_filesize values according to your needs.
Do not forget to restart the Apache service for the changes to take effect:
systemctl restart httpd.service
3. Download and extract ownCloud
Download ownCloud 10.0.7 available at http://download.owncloud.org/ in some directory on the server and extract the downloaded ownCloud archive using the following commands:
cd /opt
wget https://download.owncloud.org/community/owncloud-10.0.7.zip
yum -y install unzip
unzip -d /var/www/html/ owncloud-10.0.7.zip
Change the permissions on the owncloud directory:
chown apache:apache -R /var/www/html/owncloud/
4. Create a new MySQL database
Create a new MySQL database for ownCloud on your server:
mysql -u root -p
mysql> CREATE DATABASE ownclouddb;
mysql> GRANT ALL PRIVILEGES ON ownclouddb.* TO 'ownclouduser'@'localhost' IDENTIFIED BY 'Y0ur-pa55w0rD' WITH GRANT OPTION;
mysql> FLUSH PRIVILEGES;
mysql> quit
Create a new virtual host directive in Apache. For example, create a new Apache configuration file named ‘owncloud.conf’ on your virtual server:
touch /etc/httpd/conf.d/owncloud.conf
vi /etc/httpd/conf.d/owncloud.conf
Then, add the following lines:
<VirtualHost YOUR_SERVER_IP:80>
ServerAdmin [email protected]
DocumentRoot "/var/www/html/owncloud/"
ServerName yourdomain.com
ServerAlias www.yourdomain.com

ErrorLog "/var/log/httpd/yourdomain.com-error_log"
CustomLog "/var/log/httpd/yourdomain.com-access_log" combined

<Directory "/var/www/html/owncloud/">
DirectoryIndex index.html index.php
Options FollowSymLinks
AllowOverride All
Require all granted
</Directory>
</VirtualHost>
Create a new ownCloud data directory outside of the document root directory:
mkdir -p /opt/data
chown apache:apache -R /opt/data/
Restart the Apache web server for the changes to take effect:
systemctl restart httpd
5. Install a new SSL certificate
Install a new SSL certificate from Let’sEncrypt, or obtain a new SSL certificate from some Certificate Authority.
yum -y install mod_ssl python-certbot-apache
certbot --apache -d yourdomain.com
Replace ‘yourdomain.com’ with the actual domain name you want to use to access the ownCloud installation.
6. Continue the ownCloud installation using a web browser
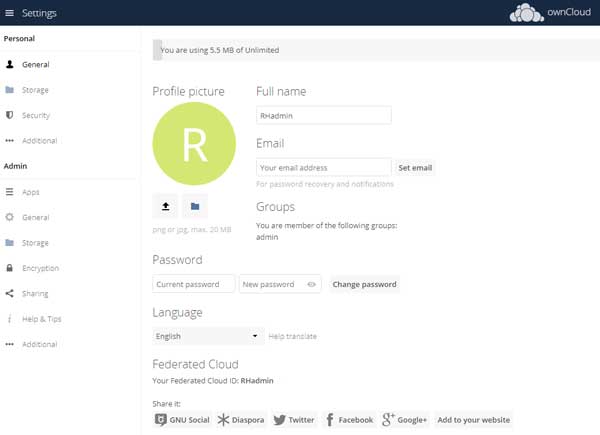
Open https://yourdomain.com in your favorite web browser, create a new administrator account (set an admin username and password), click on ‘Storage & database’, change the ‘data’ directory to ‘/opt/data’ (do not leave the default setting ‘/var/www/html/owncloud/data’). Click on ‘Configure the database’, select MySQL/MariaDB, enter the database information (MariaDB username, password, database name and localhost:3306 as MariaDB hostname/port) and finally click on the ‘Finish setup’ button.
That is it, the OwnCloud 10 installation on your CentOs 7 server is now complete.
Of course, you don’t have to install and configure OwnCloud 10 on a CentOS 7 VPS, if you use one of our Hosting Support Services, in which case our expert Linux admins will to install and configure OwnCloud 10 on CentOS 7 for you. They are available 24×7 and will take care of your request immediately.
PS. If you liked this post on how to install and configure OwnCloud 10 on a CentOS 7 VPS, please share it with your friends on the social networks using the buttons on the left or simply leave a reply below. Thanks.
