
In this guide, we will show you how to install Magento 2 with LEMP stack on an Ubuntu 20.04 VPS.
Magento is one of the most popular open-source e-commerce platforms available, thanks to its customizability and flexibility. It is created using the Zend Framework and uses MySQL as its database management system. Magento provides online merchants with a very flexible shopping cart and it comes with a rich set of features.
Installing Magento 2 on Ubuntu 20.04 should take less than 10 minutes to complete. Let’s get started with the tutorial.
Prerequisites
- An Ubuntu 20.04 VPS with root access enabled, or a user with or a user with Sudo privileges is also required
- 2GB of RAM or higher
- MySQL 5.6 or 5.7 version, (or MariaDB >= 10.0, or higher, Percona 5.7, or any other binary-compatible MySQL database server)
- nginx, or Apache webserver with mod_rewrite module enabled
- PHP 7.3 with bcmath, ctype, curl, dom, gd, hash, iconv, intl, libxml, mbstring, openssl, pdo_mysql, simplexml, soap, xsl and zip extensions enabled. Also, for performance reasons, it is a good idea to install and enable the opcache extension.
- A valid domain name for accessing the Magento 2 website. Also, a valid SSL certificate is required for accessing the website using HTTPS.
Step 1: Login and Update the OS Packages
First, we’re going to need to log into our server using SSH. You can do that by entering this command:
ssh root@IP_Address -p Port_number
Replace “root” with a user that has sudo privileges if necessary. Additionally, replace “IP_Address” and “Port_Number” with your server’s respective IP address and SSH port number.
Once you are logged in, you should update all of your Ubuntu OS packages to their latest available versions.
apt-get update
apt-get upgrade
Once all the OS packages are up-to-date, restart your server if required to apply the configuration changes.
Step 2: Install LEMP
LEMP is an acronym that describes a Linux OS with an installed Nginx web server, i.e. LEMP consists of Linux, Nginx, MySQL, and PHP.
Install Nginx
If there is an Apache web server installed on the server, stop the Apache service and disable it to start on server boot:
systemctl stop apache2
systemctl disable apache2
Install Nginx with the following command:
apt-get install nginx
Install MySQL
Install the MySQL database server which will be used for storing the data of your Magento website, such as products, categories, customers, and orders.
For the purposes of this tutorial, we will install and use MariaDB. You can also install and use the MySQL 5.7 version. Please note, MySQL 8 version is not supported yet. To install the MariaDB database server, enter the following command:
apt install mariadb-server
Enable the MariaDB service to start on server boot:
systemctl enable mariadb.service
Install PHP 7.3
By default, Ubuntu 20.04 ships with PHP version 7.4. But, Magento 2.3 does not support PHP 7.4. So, we will need to remove PHP 7.4 version, install PHP 7.3 version and all the respective PHP extensions.
Remove the PHP 7.4 version:
apt-get remove php7.4 php7.4-common
Add PPA for PHP 7.3:
add-apt-repository ppa:ondrej/php
Next, update the OS package list and install PHP 7.3 with the following command:
apt-get update
apt-get install php7.3
Install all the required PHP extensions with the following command:
apt-get install php7.3-bcmath php7.3-common php7.3-curl php7.3-fpm php7.3-gd php7.3-intl php7.3-mbstring php7.3-mysql php7.3-soap php7.3-xml php7.3-xsl php7.3-zip
Once the PHP extensions have been installed on the server, install few other OS packages required for the Magento 2 installation:
apt-get install git curl software-properties-common
Next, open the main PHP configuration file /etc/php/7.3/fpm/php.ini and change the following PHP settings:
nano /etc/php/7.3/fpm/php.ini
Change the following settings:
memory_limit = 256M
upload_max_filesize = 128M
zlib.output_compression = On
max_execution_time = 600
max_input_time = 900
date.timezone = America/Chicago
Save and close the PHP configuration file.
Step 3: Create a Database for Magento 2
Next, we will create our MySQL user and database for our Magento 2 website. Log in to your MySQL server with the following command and enter your MySQL root password when prompted:
mysql -u root -p
To create a new database for our Magento 2 instance, run the following commands:
mysql> set global log_bin_trust_function_creators=1;
mysql> CREATE USER 'magento'@'localhost' IDENTIFIED WITH mysql_native_password BY 'strongPassword';
mysql> create database magentodb;
mysql> GRANT ALL PRIVILEGES ON magentodb.* TO 'magento'@'localhost';
mysql> flush privileges;
mysql> quit
Step 4: Install Magento 2
We can now proceed with the Magento 2 installation. At the time of writing this article, the latest stable version of Magento is version 2.3.5.
First, go to the GitHub repository and download the latest version of Magento with the following command:
mkdir -p /var/www/magento2/
cd /var/www/magento2/
git clone https://github.com/magento/magento2.git /var/www/magento2/
Next, check the latest version of Magento 2 with the following command:
git checkout $(git describe --tags $(git rev-list --tags --max-count=1))
Next, we will need to install Composer to install all necessary Magento components. You can install Composer by just running the following command:
curl -sS https://getcomposer.org/installer | php -- --install-dir=/usr/bin --filename=composer
cd /var/www/magento2
composer install
bin/magento setup:install --base-url=http://yourdomain.com/ --db-host=localhost --db-name=magentodb --db-user=magento --db-password=strongPassword --admin-firstname=FirstName --admin-lastname=LastName [email protected] --admin-user=magentoadmin --admin-password=strong-password --language=en_US --currency=USD --timezone=America/Chicago --use-rewrites=1
Do not forget to replace the domain name, database password, admin username, password, and admin email address accordingly.
Once the installation is complete, you should receive the following output:
[Progress: 699 / 701]
Post-installation file permissions check…
For security, remove write permissions from these directories: ‘/var/www/magento2/app/etc’
[Progress: 700 / 701]
Write installation date…
[Progress: 701 / 701]
[SUCCESS]: Magento installation complete.
[SUCCESS]: Magento Admin URI: /admin_1k4pc0
Nothing to import.
Remember the ‘Magento Admin URI’. You will need this info later when you need to log in to the Magento backend.
Change the ownership of the magento2 directory to www-data with the following command:
chown -R www-data:www-data /var/www/magento2/
Step 5: Create nginx Configuration File
upstream fastcgi_backend {
server unix:/run/php/php7.3-fpm.sock;
}
server {
server_name yourdomain.com;
listen 80;
set $MAGE_ROOT /var/www/magento2;
set $MAGE_MODE developer; # or production
access_log /var/log/nginx/magento2-access.log;
error_log /var/log/nginx/magento2-error.log;
include /var/www/magento2/nginx.conf.sample;
}
Remove the default nginx configuration file, if is not being used:
rm -f /etc/nginx/sites-enabled/default
Enable the newly created nginx configuration file, then test the nginx configuration and make sure that there are no errors:
ln -s /etc/nginx/sites-available/magento2 /etc/nginx/sites-enabled/magento2
nginx -t
nginx: the configuration file /etc/nginx/nginx.conf syntax is ok
nginx: configuration file /etc/nginx/nginx.conf test is successful
Step 6: Install SSL Certificate
Add PPA for certbot
add-apt-repository ppa:certbot/certbot
apt-get update
apt-get install certbot python3-certbot-nginx
Install a new SSL certificate on your domain name:
certbot --nginx -dyourdomain.com-dwww.yourdomain.com
Please select ‘2’ and choose to redirect HTTP traffic to HTTPS:
– – – – – – – – – – – – – – – – – – – – – – – – – – – – – – – – – – – – – – – –
1: No redirect – Make no further changes to the webserver configuration.
2: Redirect – Make all requests redirect to secure HTTPS access. Choose this for
new sites, or if you’re confident your site works on HTTPS. You can undo this
change by editing your web server’s configuration.
– – – – – – – – – – – – – – – – – – – – – – – – – – – – – – – – – – – – – – – –
Select the appropriate number [1-2] then [enter] (press ‘c’ to cancel): 2
Use the following Magento 2 CLI commands to update the Magento base-url and the base-url-secure values:
cd /var/www/magento2/
php bin/magento setup:store-config:set --base-url="https://yourdomain.com/"
php bin/magento setup:store-config:set --base-url-secure="https://yourdomain.com/"
Edit the nginx configuration file and enable HTTP/2:
nano /etc/nginx/sites-enabled/magento2
Replace:
listen 443 ssl;
With:
listen 443 ssl http2;
Restart the Nginx service for the changes to take effect:
systemctl restart cron.service
Step 7: Install Cron Job
Magento requires a cron job configuration for many important system functions, so create the following cron job:
crontab -u www-data -e
* * * * * /usr/bin/php /var/www/magento2/bin/magento cron:run | grep -v "Ran jobs by schedule" >> /var/www/magento2/var/log/magento.cron.log
Restart the cron service:
systemctl restart cron.service
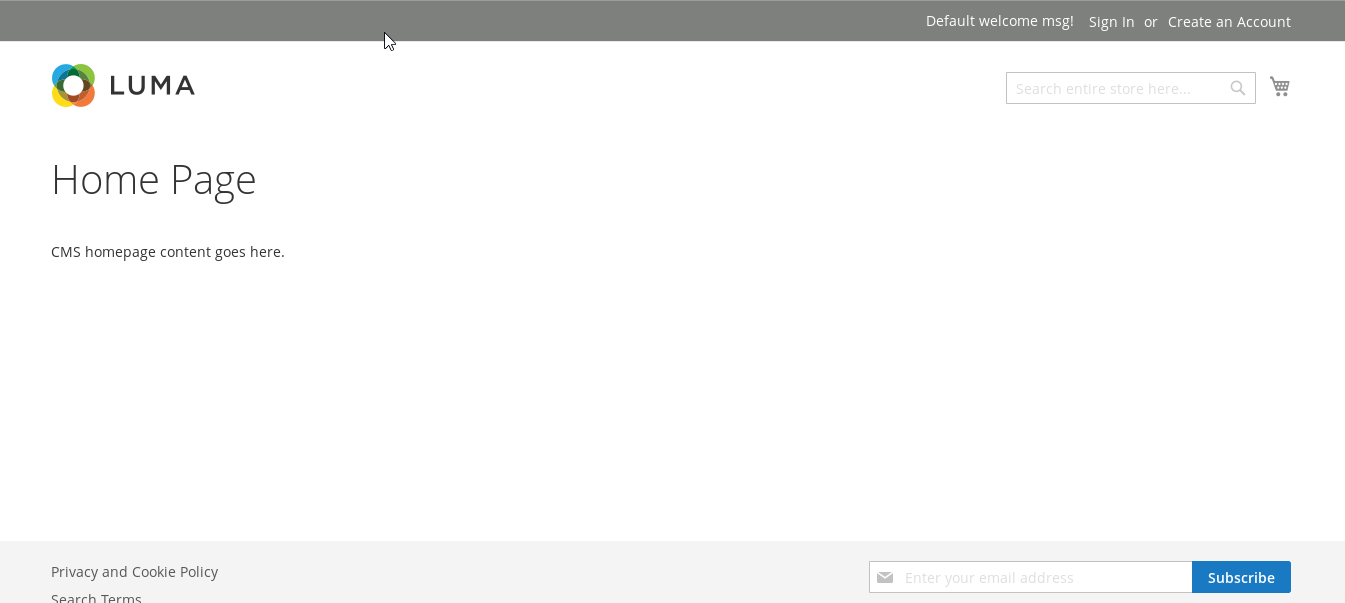
That is it. Magento 2 has been successfully installed on your server.
You can access the Magento front-end at http://yourdomain.com :
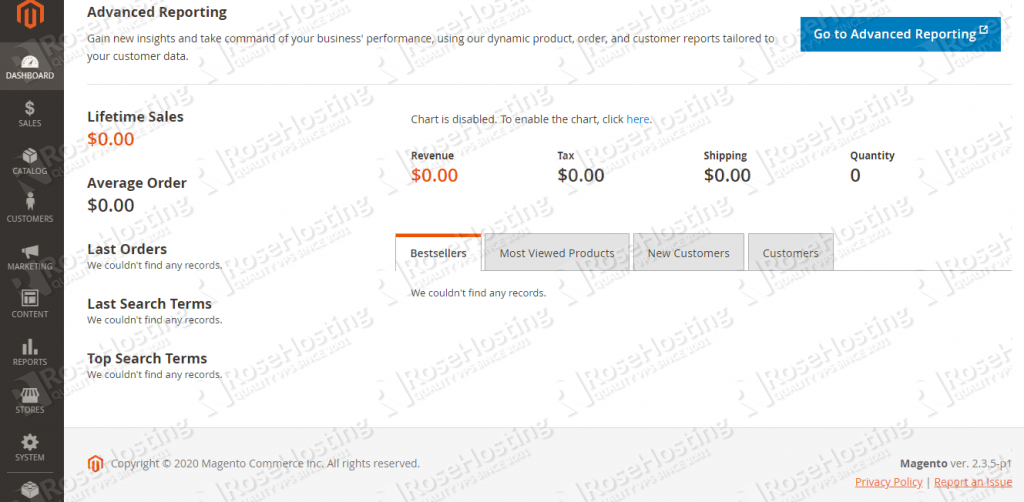
Log in to the Magento 2 back-end at http://yourdomain.com/Magento Admin URI, and configure Magento according to your needs, install extensions, add products, categories etc.
Of course, you don’t have to install Magento 2 with LEMP stack on Ubuntu 20.04, if you use one of our Monthly Server Maintenance services, in which case you can simply ask our expert system administrators to install Magento 2 on Ubuntu 20.04 for you, using the LEMP stack or any other web hosting stack of your choice. They are available 24×7 and will take care of your request immediately.
PS. If you liked this post, on how to install Magento 2 with LEMP stack on Ubuntu 20.04, please share it with your friends on the social networks using the buttons below or simply leave a comment in the comments section. Thanks.
