
In this article, we will show you how to install Jenkins on Ubuntu 18.04.
 Jenkins is an open-source automation server written in Java. In a nutshell, this software helps to automate the repetitive technical tasks during the software development process. Jenkins can provide you with many plugins to support building, deploying and automating any project.
Jenkins can be installed on Windows, macOS and on most of the Unix-like operating systems, such as Ubuntu. Let’s get started with installing this useful piece of software.
Prerequisites:
In order to follow this tutorial, you will need:
- For the purposes of this tutorial, we will be using an Ubuntu 18.04 VPS.
- Full SSH root access (or a user with sudo privileges) is also required.
- Web server (in this tutorial we will use Apache2 as the web server)
Step 1. Connect to Your Server
Before we begin, you need to connect to your server via SSH as the root user. To do this, use the following command:
ssh root@IP_ADDRESS -p PORT_NUMBER
of course, you will need to replace IP_ADDRESS and PORT_NUMBER with your actual server IP address and SSH port number (if necessary).
Once logged in, make sure that your server is up-to-date by running the following commands:
sudo apt update
sudo apt upgrade
Step 2. Install Java
Since Jenkins is based on Java, we need to have installed Java in order to run the application. In this step, we will install Java 8 OpenJDKby using the following command:
sudo apt install openjdk-8-jdk
The current Jenkins version might not be fully compatible with the higher versions of Java JDK (for example Java JDK 9,10 or 11). That’s why we are using Java 8 in this tutorial.
Step 3. Add Jenkins Repository
By using the wget command, we will import the GPG keys of the Jenkins repository:
wget -q -O - https://pkg.jenkins.io/debian/jenkins.io.key | sudo apt-key add -
When we execute the command above, we should receive the output “OK”, which means that the key has been imported successfully – all of the packages from this repository are considered as trusted from now on.
And now with the following command, we will add the Jenkins repository to the system:
sudo sh -c 'echo deb http://pkg.jenkins.io/debian-stable binary/ > /etc/apt/sources.list.d/jenkins.list'
Step 4. Install Jenkins
Once the previous step is finished and we have enabled the Jenkins repository in our system, we can proceed with the updating of the apt package list and install the latest version of Jenkins:
sudo apt update
sudo apt install jenkins
After the installation is completed, the application will automatically start. To verify that Jenkins is running on our system, we can run the status command:
sudo systemctl status jenkins
We should see a similar output to this:
● jenkins.service - LSB: Start Jenkins at boot time
Loaded: loaded (/etc/init.d/jenkins; generated)
Active: active (exited) since Sun 2019-02-10 16:55:11 CST; 59s ago
Docs: man:systemd-sysv-generator(8)
Process: 1389 ExecStop=/etc/init.d/jenkins stop (code=exited, status=0/SUCCESS)
Process: 1445 ExecStart=/etc/init.d/jenkins start (code=exited, status=0/SUCCESS)
Step 5. Setting up an Apache Proxy
In this tutorial, we will use Apache as a web server. Apache is an extremely popular and customizable web server, so setting it up will be very straightforward. We’re going to assume that you have already installed Apache on your server. If you’re not sure if you have Apache installed, you can check the Apache status with the command:
sudo systemctl status apache2
we can also disable the default virtual host with:
sudo a2dissite 000-default
Now we will create a new virtual host configuration file so that we can access the Jenkins application with a domain name.
sudo nano /etc/apache2/sites-available/domain_name.conf
add the following content to the file:
<VirtualHost *:80>
    ServerAdmin webmaster@localhost
    ServerName domain_name.com
    ServerAlias www.domain_name.com
    ProxyRequests Off
    <Proxy *>
        Order deny,allow
        Allow from all
    </Proxy>
    ProxyPreserveHost on
    ProxyPass / http://localhost:8080/ nocanon
    AllowEncodedSlashes NoDecode
</VirtualHost>
of course, you will need to replace domain_name.com with your actual registered domain name. When you finish with editing the configuration file, save the file and exit.
Please do not forget that the following Apache modules must be installed and enabled:
a2enmod proxy
a2enmod proxy_http
a2enmod headers
In order to enable the virtual host we have just created, run the a2ensite command:
sudo a2ensite domain_name
For the changes we made to take effect, we need to restart Apache:
sudo apache2ctl restart
Step 6. Adjusting the Firewall
If you are using a firewall, you will need to open ports 80,443 and 8080 so you will be able to access Jenkins. We will assume that you are using UFW to manage the firewall, so you can open the ports with the commands below:
sudo ufw allow 80
sudo ufw allow 443
sudo ufw allow 8080
We can verify the changes with the following command:
sudo ufw status
Output:
Status: active

To                         Action      From
--                         ------      ----
80                         ALLOW       Anywhere
443                        ALLOW       Anywhere
8080                       ALLOW       Anywhere
OpenSSH                    ALLOW       Anywhere
80 (v6)                    ALLOW       Anywhere (v6)
443 (v6)                   ALLOW       Anywhere (v6)
8080 (v6)                  ALLOW       Anywhere (v6)
OpenSSH (v6)               ALLOW       Anywhere (v6)
Step 7. Setting up Jenkins
To finish the installation of Jenkins, you need to open your favorite browser and type your domain name or your server IP address followed by port 8080.
For example, http://domain_name.com or http://server_IP_address:8080 and you should see a screen that is similar to the following:
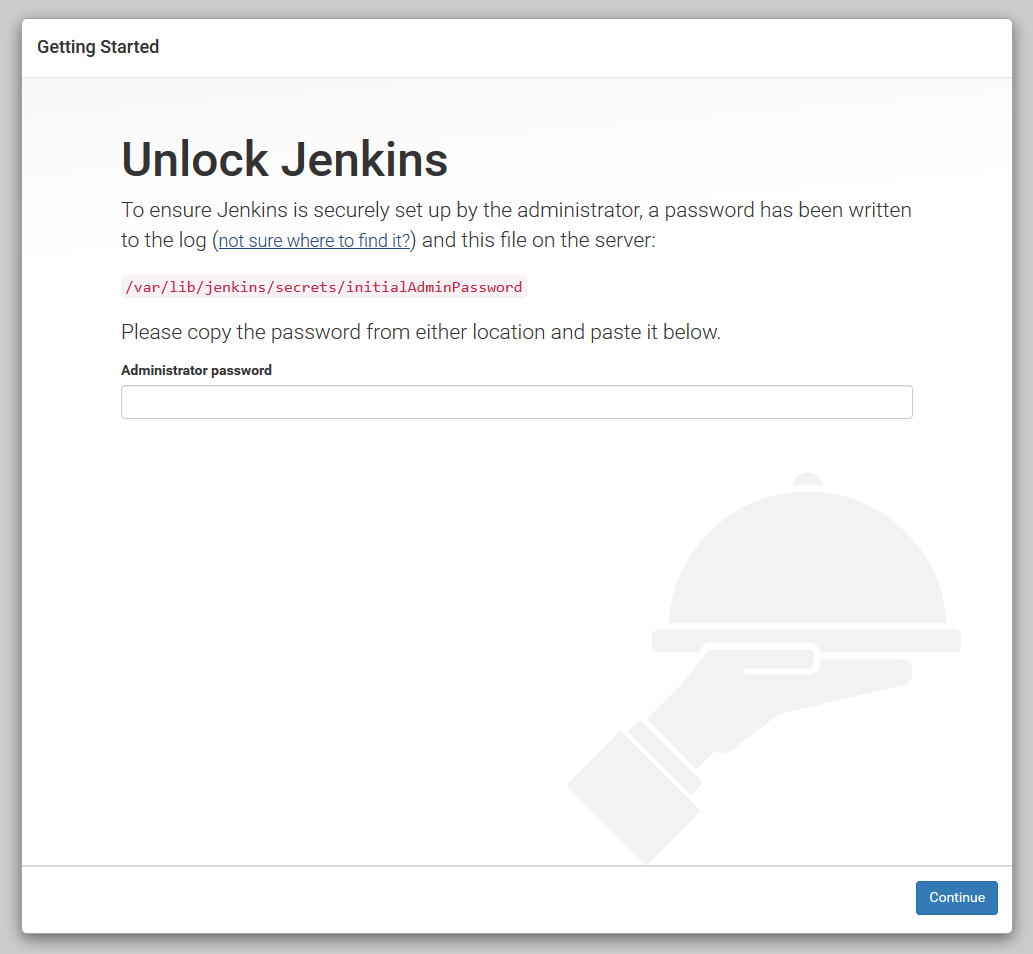
The Jenkins installer creates an initial long alphanumeric password with a length of 32 characters. To unlock Jenkins and continue with the web installation, you need to set up the required admin password. We will use the cat command so that we can display the password in our terminal:
sudo cat /var/lib/jenkins/secrets/initialAdminPassword
Copy the displayed password from your terminal and paste it into the Administrator password field in the web browser, then click Continue.
On the next screen, you can choose between the options of installing suggested plugins or selecting specific plugins:
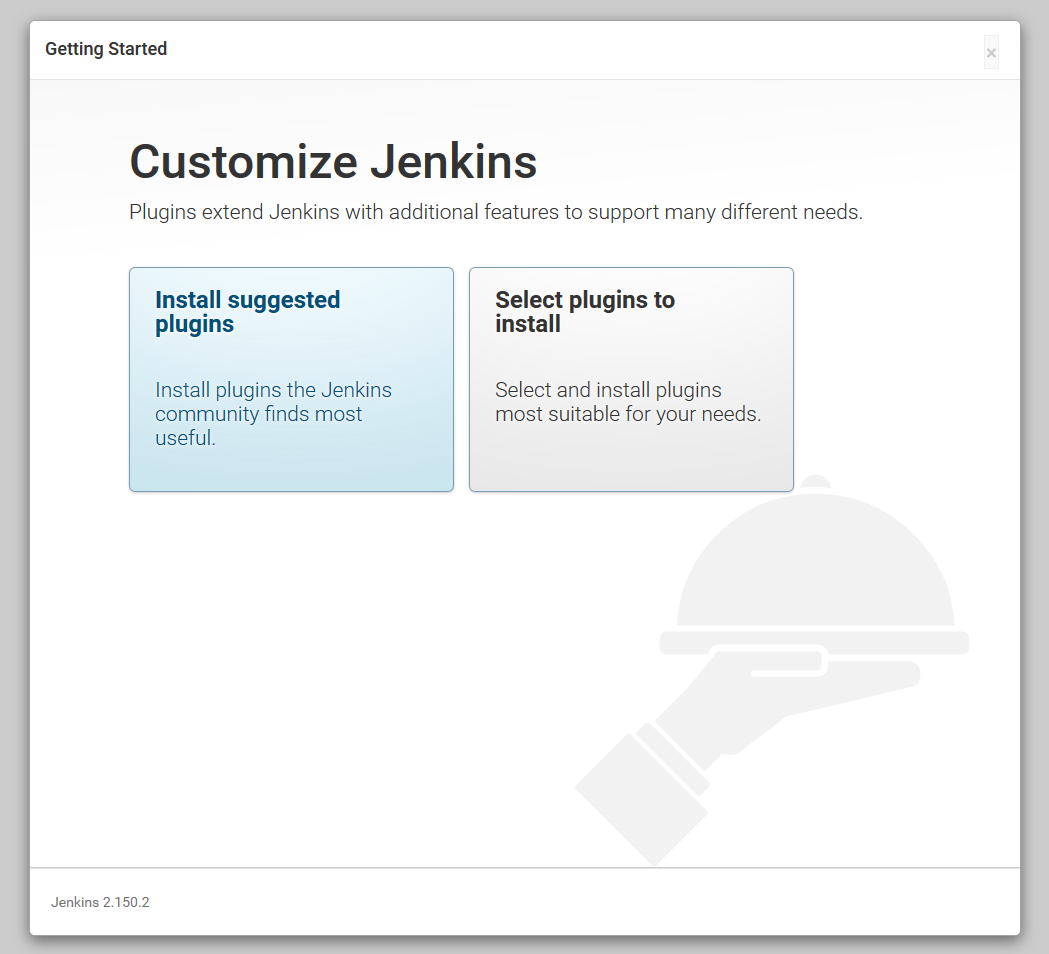
In this case, we will select the first option offered, but if you need specific plugins, you can freely choose the second option offered.
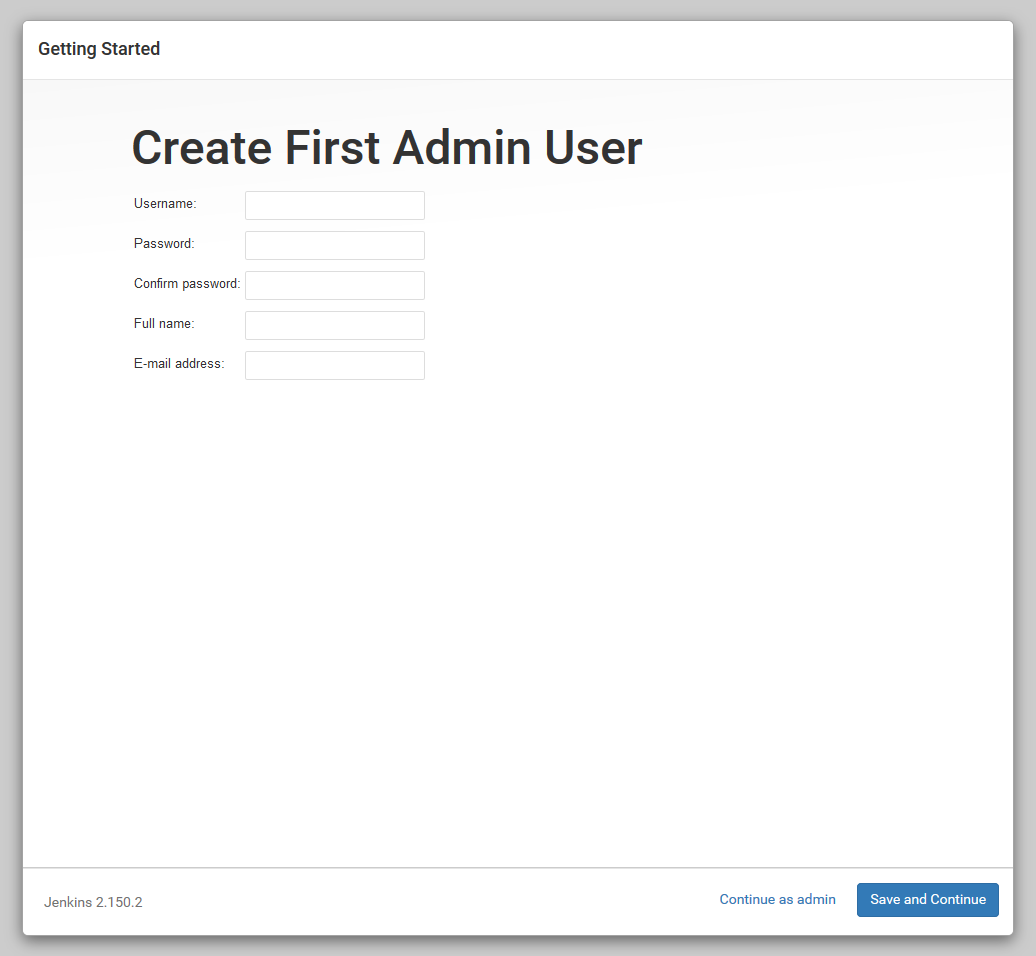
Once the installation is complete, you will be prompted to set up the first admin user. Fill out all the information required and click Save and Continue.
On the next screen, you will see an Instance Configuration page. You will need to verify with your domain_name.com or with the IP address of your server.
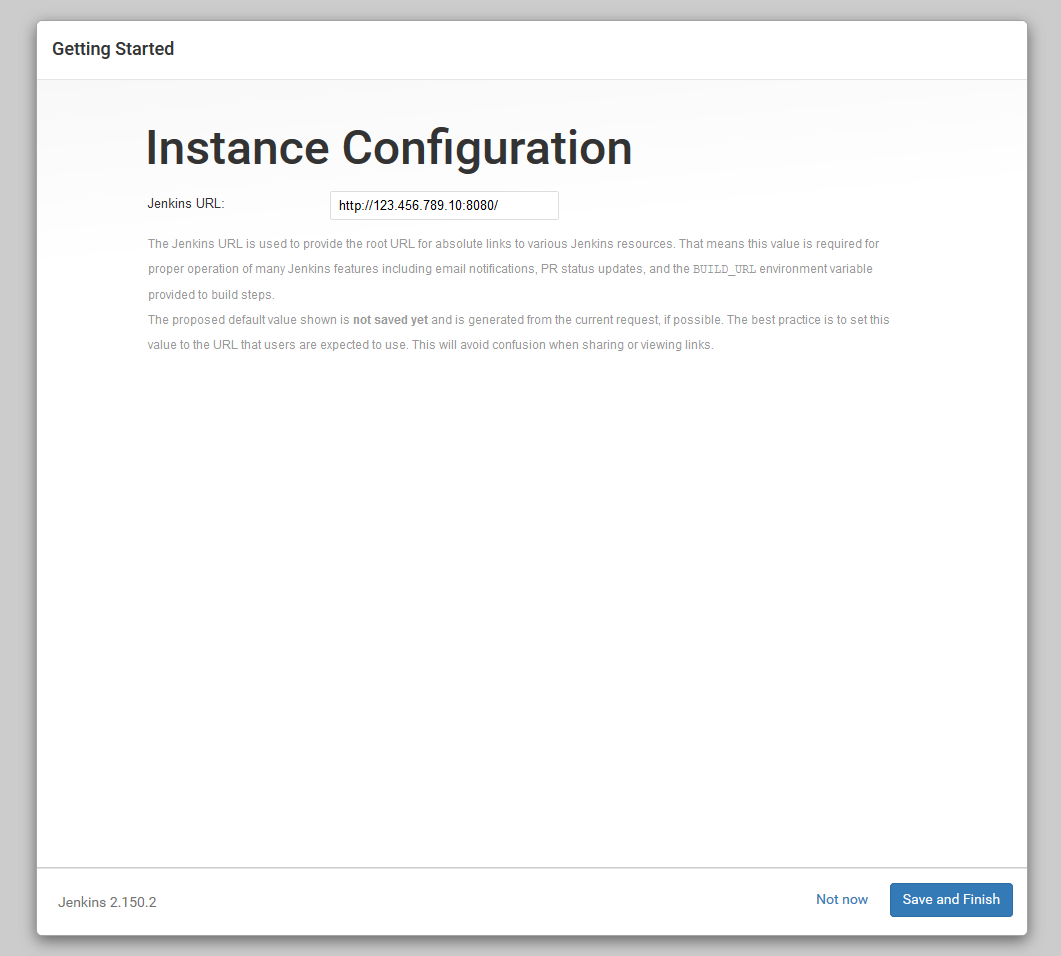
After your confirmation with appropriate information, you can continue by clicking the Save and Finish button. Finally, you should be able to see the confirmation page that is confirming that “Jenkins is ready!”.
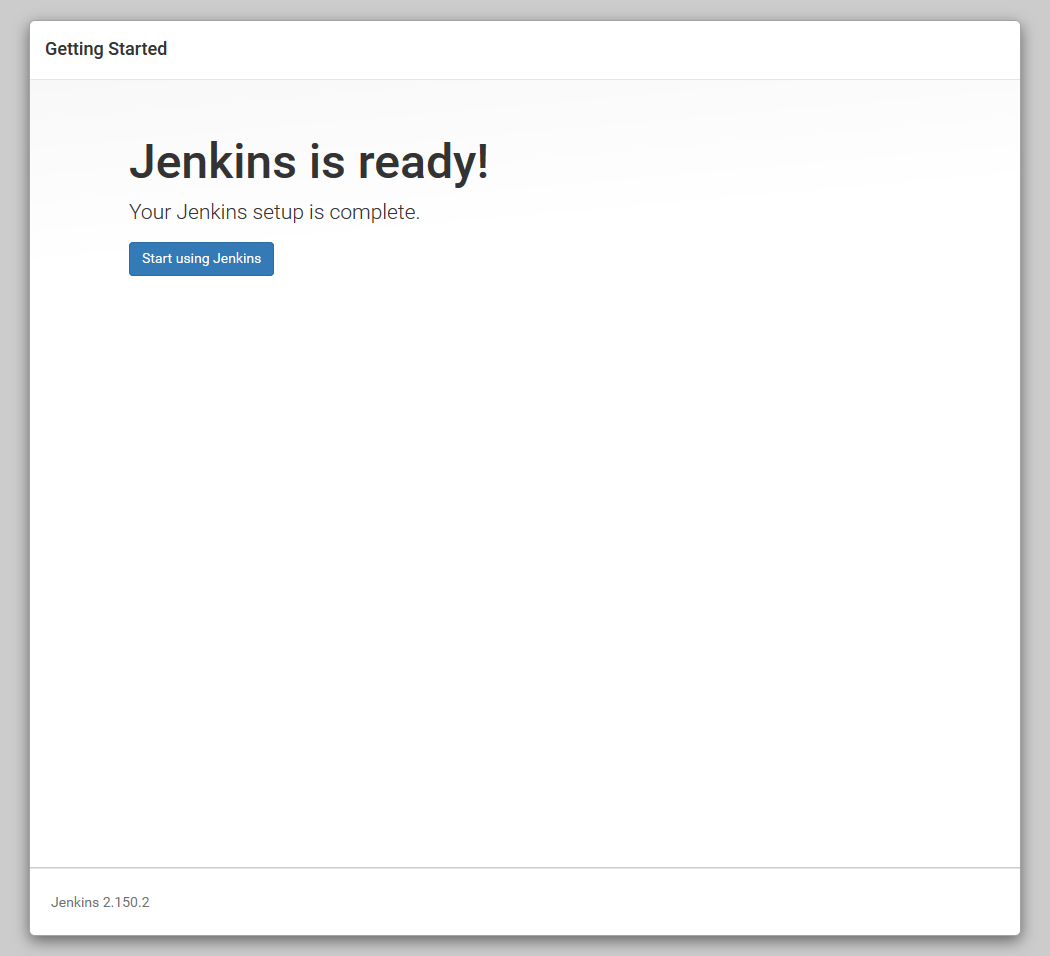
When you proceed with ‘Start using Jenkins’, you will be redirected to the Jenkins dashboard, and you will also be logged in as the administrator user you just created.
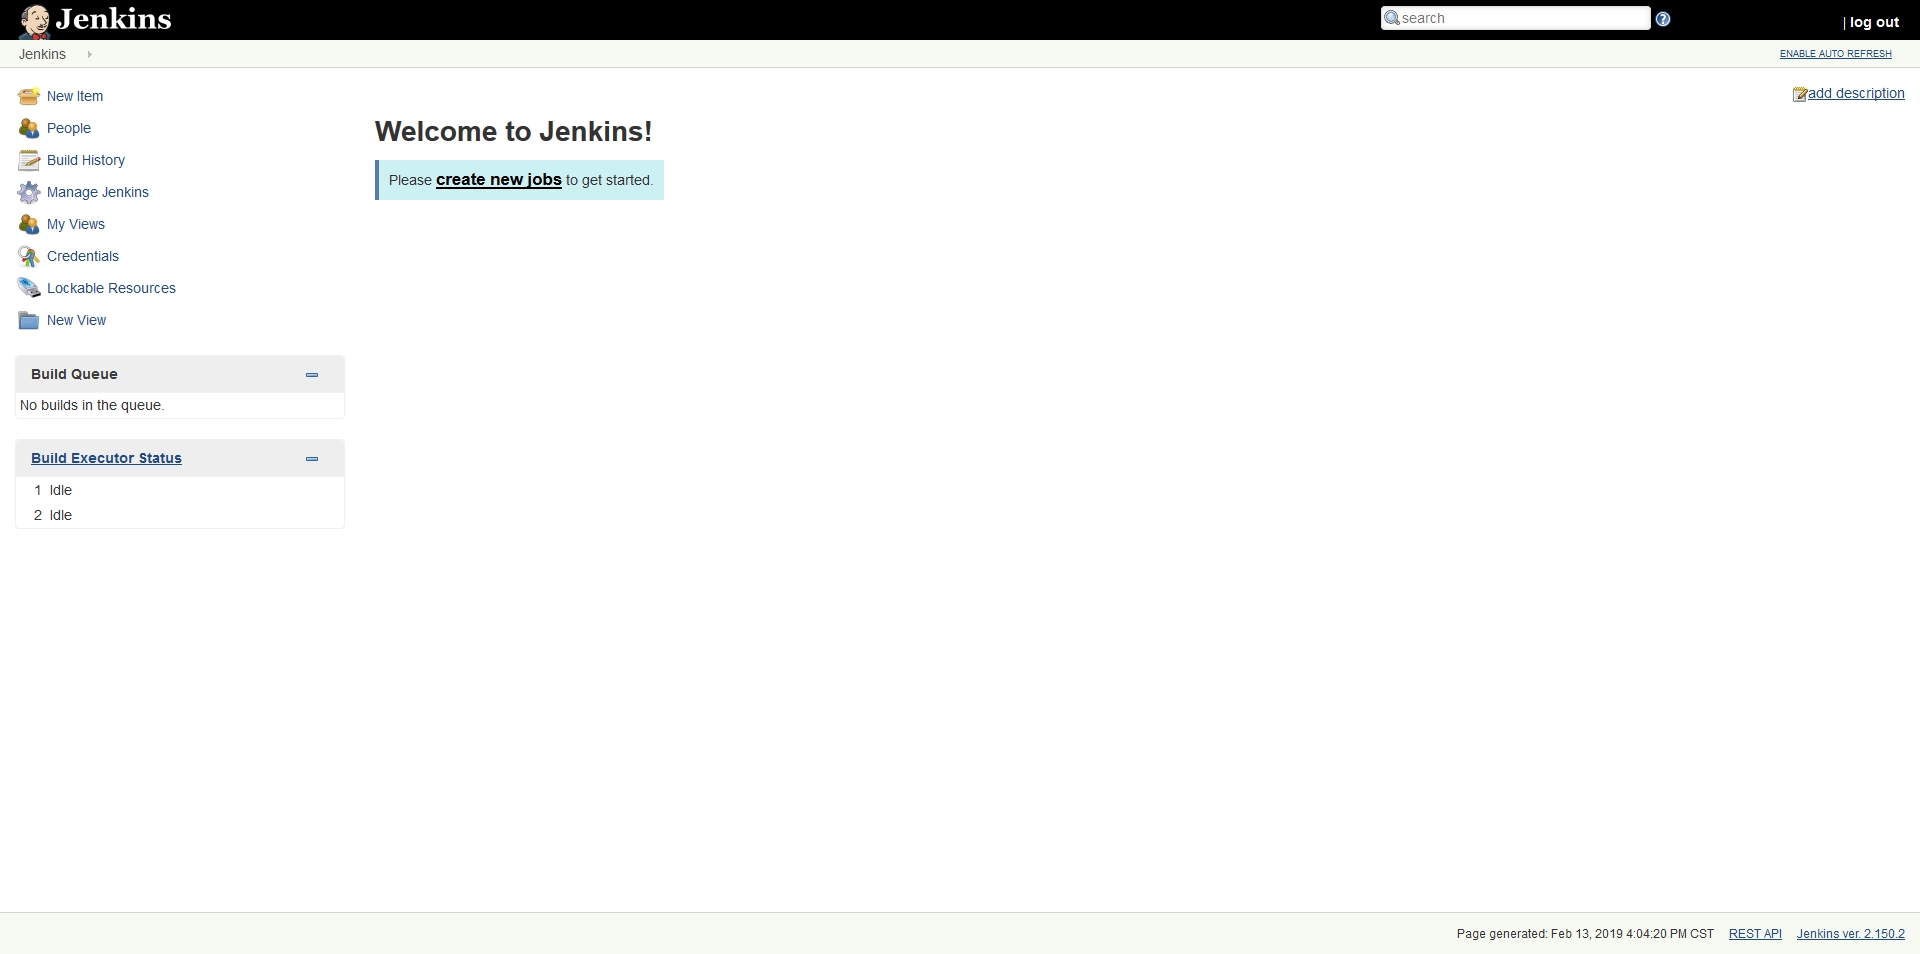
Congratulations! You have successfully installed Jenkins on your server.
In this article, we showed you how to install Java needed to run Jenkins, install Jenkins using the packages provided by the repository, set up an Apache Proxy, customize the firewall, and create an admin user. Now you can continue exploring this incredible application.
 Of course, if you are one of our Managed Linux Server Support customers, you don’t have to install Jenkins on your Ubuntu 18.04 VPS – simply ask our admins, sit back, and relax. Our admins will install Jenkins on Ubuntu 18.04 for you immediately.
PS. If you liked this post about how to install Jenkins on an Ubuntu 18.04 VPS, please share it with your friends on the social networks using the share shortcuts, or simply leave a comment in the comments section. Thank you.
