
Jellyfin is a free and open-source media server solution that allows you to control and manage your streaming media. In this tutorial, we will show you how to install Jellyfin on Debian 12.
Jellyfin is an alternative to the proprietary Emby and Plex, designed to provide media from a server to end-user devices through a number of client applications. Media content can be accessed through specialized Jellyfin applications, extensions designed for various streaming platforms, a web interface, or by means of DLNA uPnP streaming to a wide range of compatible devices. Let’s start with the installation.
Prerequisites
- A Debian 12 server or VPS
- SSH access with sudo privileges, or root access.
Step 1. Log in to your VPS and Update the System
First of all, we need to log in to our Debian 12 VPS through SSH:
ssh root@IP_Address -p Port_number
Replace “root” with a user that has sudo privileges or root if necessary. Additionally, replace “IP_Address” and “Port_Number” with your server’s respective IP address and SSH port number.
Next, let’s make sure that we’re on Debian 12. You can do that like this:
# lsb_release -a
The command should return an output similar to this:
No LSB modules are available.
Distributor ID: Debian
Description: Debian GNU/Linux 12 (bookworm)
Release: 12
Codename: bookworm
Step 2. Install Dependencies
Installing Jellyfin requires some packages. So, before starting, we will install the dependencies on our Debian 12 system. Let’s execute the command below to proceed.
# apt install gnupg curl apt-transport-https ca-certificates -y
Step 3. Add the Jellyfin Repository
There are two ways to install Jellyfin on Debian 12; we can install it using the repository or the deb package. In this tutorial, we are going to use the repository to install Jellyfin on Debian 12.
# curl -fsSL https://repo.Jellyfin.org/Jellyfin_team.gpg.key | gpg --dearmor -o /etc/apt/keyrings/Jellyfin.gpg
Then, we’ll create our Jellyfin source list.
# nano /etc/apt/sources.list.d/Jellyfin.sources
Insert the following into the file.
Types: deb
URIs: https://repo.Jellyfin.org/debian
Suites: bookworm
Components: main
Architectures: amd64
Signed-By: /etc/apt/keyrings/Jellyfin.gpg
Save the file then exit from the editor.
Next, we need to update the package index files on the system.
# apt update
Step 4. Install Jellyfin
After adding the Jellyfin repository and updating the package index files in the previous step, we should be able to install Jellyfin from its repository now. Simply execute this command below.
# apt install jellyfin -y
Once installed, Jellyfin should be up and running on a Debian 12, you can verify this by executing the command below.
# systemctl status Jellyfin
The command should return an output similar to this:
root@debian12:~# systemctl status jellyfin
● jellyfin.service - Jellyfin Media Server
     Loaded: loaded (/lib/systemd/system/jellyfin.service; enabled; preset: enabled)
    Drop-In: /etc/systemd/system/Jellyfin.service.d
             └─jellyfin.service.conf
     Active: active (running) since Mon 2023-10-16 04:59:06 CDT; 2min 19s ago
   Main PID: 590854 (Jellyfin)
      Tasks: 15 (limit: 2306)
     Memory: 183.4M
        CPU: 28.848s
     CGroup: /system.slice/jellyfin.service
             └─590854 /usr/bin/Jellyfin --webdir=/usr/share/jellyfin/web --restartpath=/usr/lib/jellyfin/restart.sh --ffmpeg=/usr/lib/jellyfin-ff>

Oct 16 04:59:33 debian12.linuxhostsupport.net jellyfin[590854]: [04:59:33] [INF] ServerId: c580665228f148dc8e24e556ee48d263
Oct 16 04:59:34 debian12.linuxhostsupport.net jellyfin[590854]: [04:59:34] [INF] Executed all pre-startup entry points in 0:00:00.430609
Oct 16 04:59:34 debian12.linuxhostsupport.net jellyfin[590854]: [04:59:34] [INF] Core startup complete
Oct 16 04:59:34 debian12.linuxhostsupport.net jellyfin[590854]: [04:59:34] [INF] StartupTrigger fired for task: Update Plugins
Oct 16 04:59:34 debian12.linuxhostsupport.net jellyfin[590854]: [04:59:34] [INF] Queuing task PluginUpdateTask
Oct 16 04:59:34 debian12.linuxhostsupport.net jellyfin[590854]: [04:59:34] [INF] Executing Update Plugins
Oct 16 04:59:34 debian12.linuxhostsupport.net jellyfin[590854]: [04:59:34] [INF] Executed all post-startup entry points in 0:00:00.7256918
Oct 16 04:59:34 debian12.linuxhostsupport.net jellyfin[590854]: [04:59:34] [INF] Startup complete 0:00:25.7226079
Oct 16 04:59:36 debian12.linuxhostsupport.net jellyfin[590854]: [04:59:36] [INF] Update Plugins Completed after 0 minute(s) and 2 seconds
Oct 16 04:59:36 debian12.linuxhostsupport.net jellyfin[590854]: [04:59:36] [INF] ExecuteQueuedTasks
You should be able to access Jellyfin at http://YOUR_SERVER_IP_ADDRESS:8096
Step 5. Install and Configure Nginx
To access Jellyfin using your domain or subdomain, we need to install and configure a reverse proxy. In this step, we will install Nginx and create an Nginx server block for our Jellyfin website.
# apt install nginx
Once installed, we can create a new configuration file.
# nano /etc/nginx/sites-enabled/Jellyfin.yourdomain.com.conf
Insert the following into the file.
upstream jellyfin {
 server 127.0.0.1:8096;
}

server {
      listen 80;
      server_name jellyfin.yourdomain.com;

      access_log /var/log/nginx/jellyfin.access.log;
      error_log /var/log/nginx/jellyfin.error.log;

    resolver 127.0.0.1 valid=30;


    add_header X-Frame-Options "SAMEORIGIN";
    add_header X-XSS-Protection "1; mode=block";
    add_header X-Content-Type-Options "nosniff";


    location / {

        proxy_pass http://jellyfin;
        proxy_set_header Host $host;
        proxy_set_header X-Real-IP $remote_addr;
        proxy_set_header X-Forwarded-For $proxy_add_x_forwarded_for;
        proxy_set_header X-Forwarded-Proto $scheme;
        proxy_set_header X-Forwarded-Protocol $scheme;
        proxy_set_header X-Forwarded-Host $http_host;

        proxy_buffering off;
    }


    location = /web/ {

        proxy_pass http://jellyfin/web/index.html;
        proxy_set_header Host $host;
        proxy_set_header X-Real-IP $remote_addr;
        proxy_set_header X-Forwarded-For $proxy_add_x_forwarded_for;
        proxy_set_header X-Forwarded-Proto $scheme;
        proxy_set_header X-Forwarded-Protocol $scheme;
        proxy_set_header X-Forwarded-Host $http_host;
    }

    location /socket {

        proxy_pass http://jellyfin/socket;
        proxy_http_version 1.1;
        proxy_set_header Upgrade $http_upgrade;
        proxy_set_header Connection "upgrade";
        proxy_set_header Host $host;
        proxy_set_header X-Real-IP $remote_addr;
        proxy_set_header X-Forwarded-For $proxy_add_x_forwarded_for;
        proxy_set_header X-Forwarded-Proto $scheme;
        proxy_set_header X-Forwarded-Protocol $scheme;
        proxy_set_header X-Forwarded-Host $http_host;
    }
}
Do not forget to replace jellyfin.yourdomain.com with your actual domain or subdomain name which is already pointing to your server IP address. Then, save the file, exit, and restart Nginx.
# systemctl restart nginx
At this point, you should be able to access your Jellyfin website at http://jellyfin.yourdomain.com
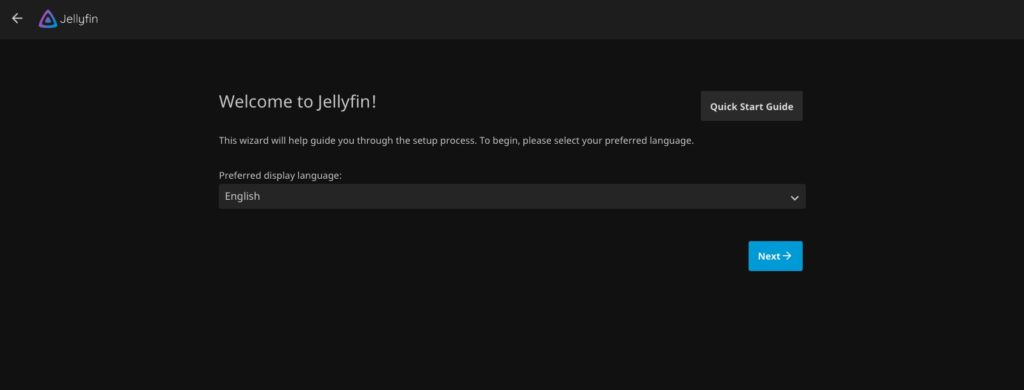
Choose your language then click on the Next button.
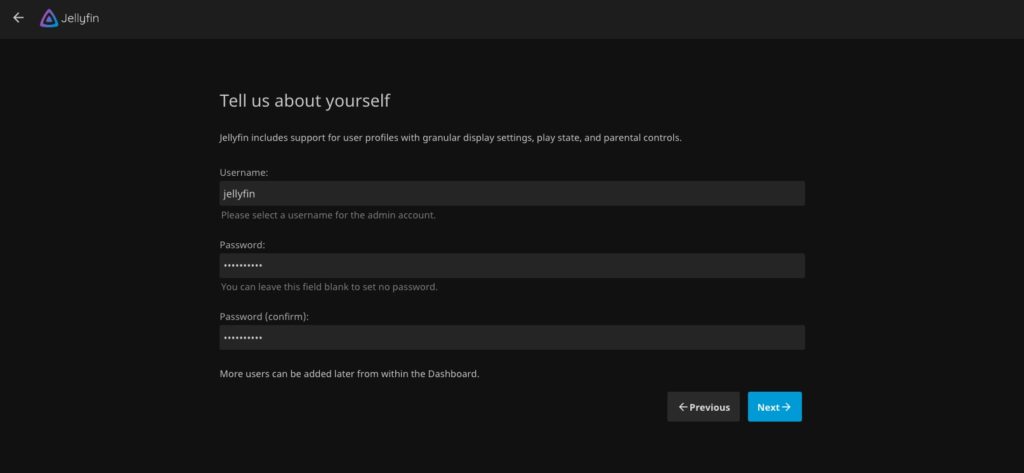
In this step, we can create a new account. Fill in the blanks with your preferred values, then click Next to proceed.
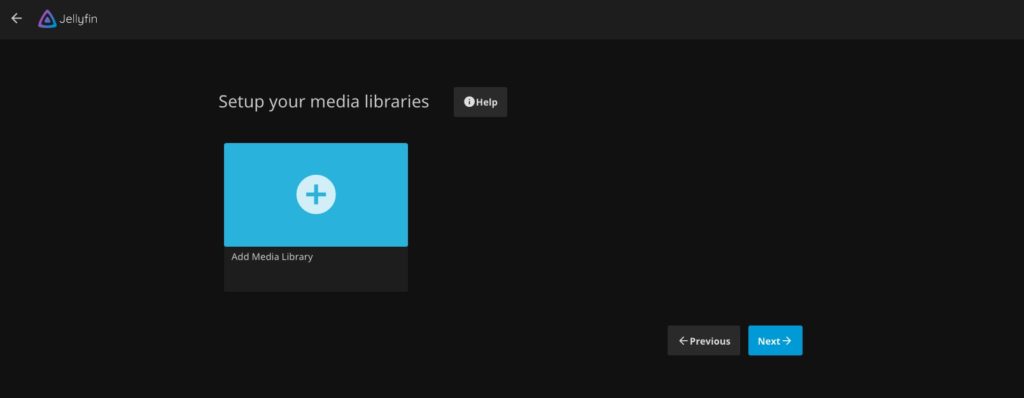
In this step, you can create a media library or simply hit the Next button to skip it.

Here, you can choose your language then country, and click Next to continue.
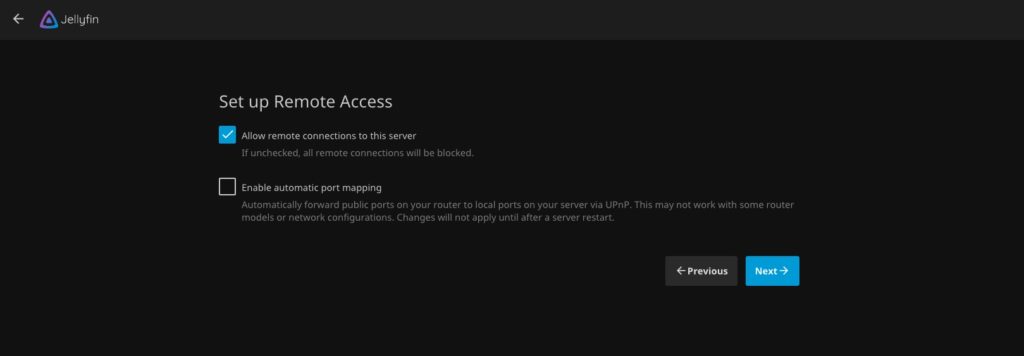
Check the “Allow remote connections to this server” then click Next.
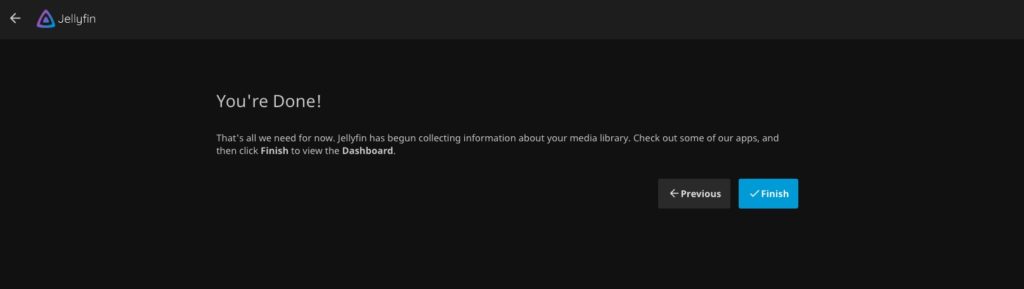
Click Finish, then you will be brought to the login page.
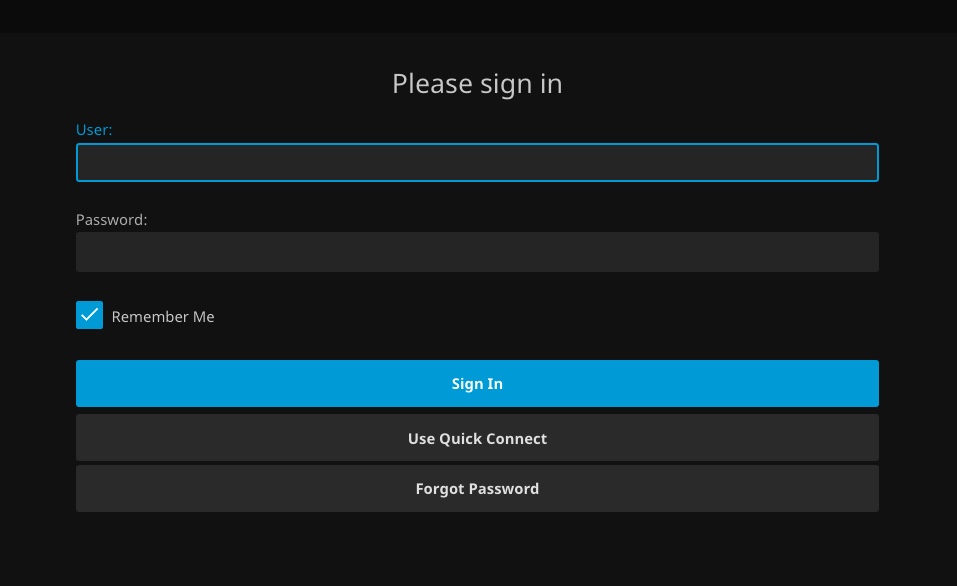
Log in using the credentials you created earlier to access the backend.
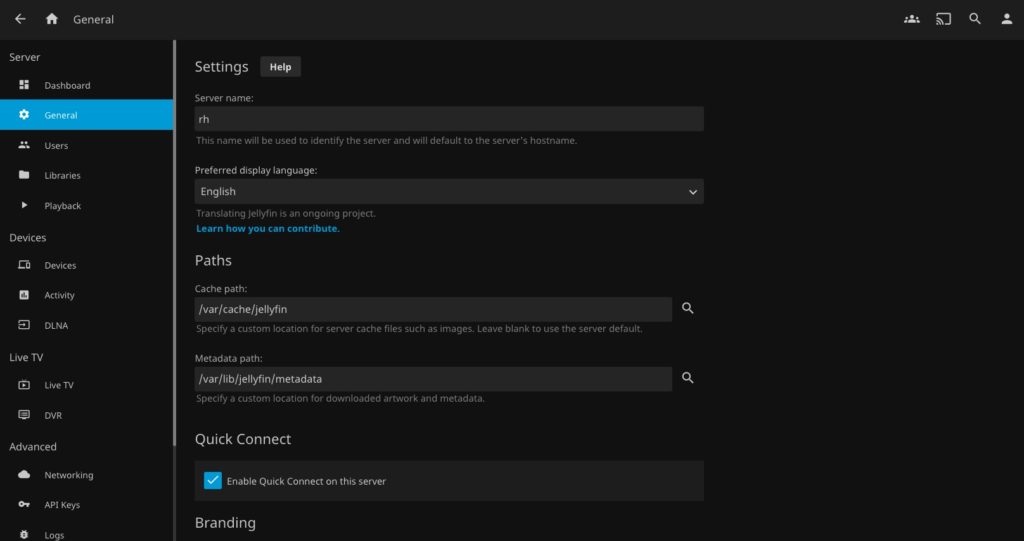
Once logged, in you can navigate to the dashboard and customize your Jellyfin installation.
Congratulations! You have successfully installed Jellyfin on Debian 12.
Of course, if you are one of our Managed Linux Support customers, you don’t have to install Jellyfin on Debian 12 yourself – simply ask our admins, sit back, and relax. Our support team will install Jellyfin on Debian 12 for you immediately without any additional fee, along with anything else you need.
If you liked this post about how to install Jellyfin on Debian 12, please share it with your friends on social networks using the share buttons, or simply leave a comment in the comments section. Thanks.
