
Anyone with websites hosted on a server is likely familiar with cPanel, Plesk, and DirectAdmin. These are very popular paid control panels among users. They offer premium features essential for managing servers and websites, making server management much easier. However, since they are paid control panels, you would need to pay a fairly expensive subscription fee to access their features. Alternatively, you can use a free control panel called aaPanel. In this article, we’ll teach you how to install aaPanel Control Panel on Debian 13.
aaPanel is a practical solution that will simplify your VPS server management. With its GUI (Graphical User Interface) and support features, the control panel can help you run your server easily. For those of you who are not familiar with using the command line in the terminal, aaPanel is the easiest and most efficient solution for server management. This is because, by simply accessing the aaPanel website, we can manage our server from anywhere, at any time. In this article, we will show you how to install aaPanel on Debian 13.
These are some features offered by aaPanel:
- Web Server Management: aaPanel supports several web servers, including Nginx, Apache, and OpenLiteSpeed.
- Database Management: aaPanel also supports a variety of databases, such as MySQL, MariaDB, PostgreSQL, and SQLite.
- File Manager: You can easily manage files through a web-based interface.
- SSL Management: aaPanel allows you to easily install SSL certificates.
- Task Scheduler: aaPanel’s cron feature can also be used to automate tasks.
- Security Management: Managing your Firewall, Fail2Ban, and brute-force protection is easier with aaPanel.
- Domain and DNS Management: Domain and DNS can be managed centrally through aaPanel.
- CPU, Memory, and Network Monitoring: You can also monitor CPU, memory, and network usage through aaPanel.
Prerequisites
- A Debian 13 VPS
- SSH root access or a regular system user with sudo privileges
Conventions
# – given commands should be executed with root privileges either directly as a root user or by use of sudo command
$ – given commands should be executed as a regular user
Step 1. Update the System
Let’s log in to your Debian 13 VPS through SSH as a root user or as a regular user with sudo privileges.
ssh root@IP_Address -p Port_numberIf you cannot log in as root, remember to substitute “root” with a user that has sudo privileges. Additionally, change “IP_Address” and “Port_Number”; make sure they match your server’s respective IP address and SSH port.
You can check whether you have the correct Debian version installed on your server with the following command:
# lsb_release -aYou should get this output:
No LSB modules are available.
Distributor ID: Debian
Description:  Debian GNU/Linux 13 (trixie)
Release:  13
Codename: trixie
That’s it; the system package information should be updated now.
Step 2. Install aaPanel
To install aaPanel, we can simply download the installation script, then execute it. Let’s download it first now.
# wget
# bash aapanel.sh
You will see:
+----------------------------------------------------------------------
| aaPanel FOR CentOS/Ubuntu/Debian
+----------------------------------------------------------------------
| Copyright © 2015-2099 BT-SOFT(https://www.aapanel.com) All rights reserved.
+----------------------------------------------------------------------
| The WebPanel URL will be https://SERVER_IP:18675 when installed.
+----------------------------------------------------------------------

Do you want to install aaPanel to the /www directory now?(y/n):
Hit Y then ENTER
This will take some time to complete. You can go ahead and grab a coffee. Once completed, you will see:
==================================================================
Congratulations! Installed successfully!
==================================================================
aaPanel Internet IPv4 Address: https://YOUR_SERVER_IP:18675/990be3e0
aaPanel Internal Address: https://YOUR_INTERNAL_IP:18675/990be3e0
username: ifmmtidy
password: e9ecfad0
Warning:
If you cannot access the panel,
release the following port (18675|888|80|443|20|21) in the security group
==================================================================
Time consumed: 4 Minute!
Make sure to save a copy of the username and password. Let’s open a web browser and log in to aaPanel now.
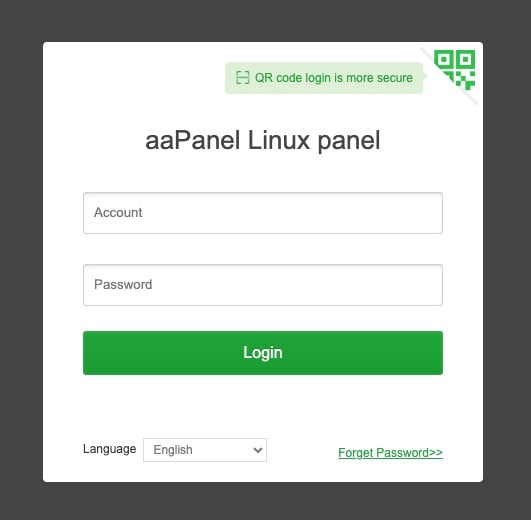
Once logged in, you will see:
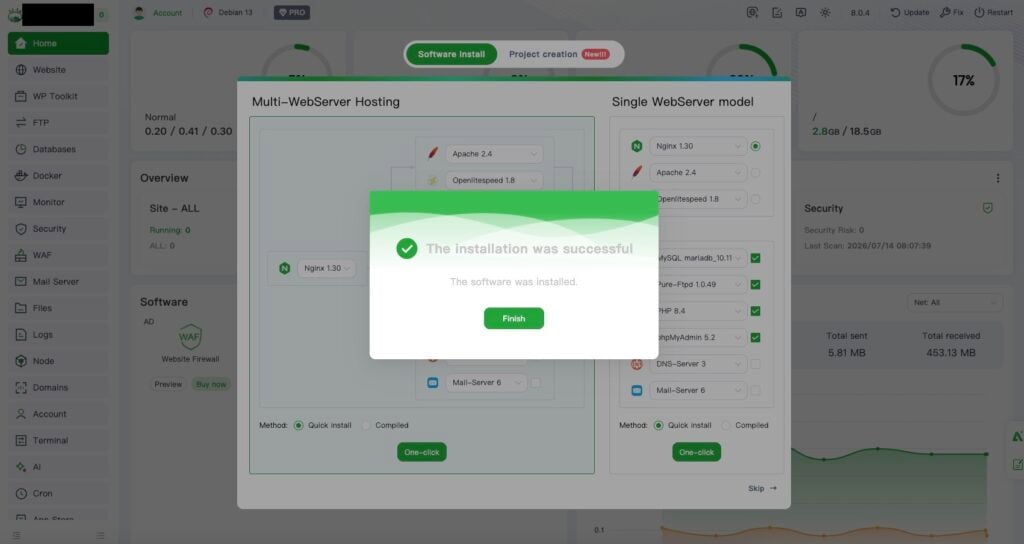
Click on the Finish button, you will be redirected to a successful installation page, you can close the tab.
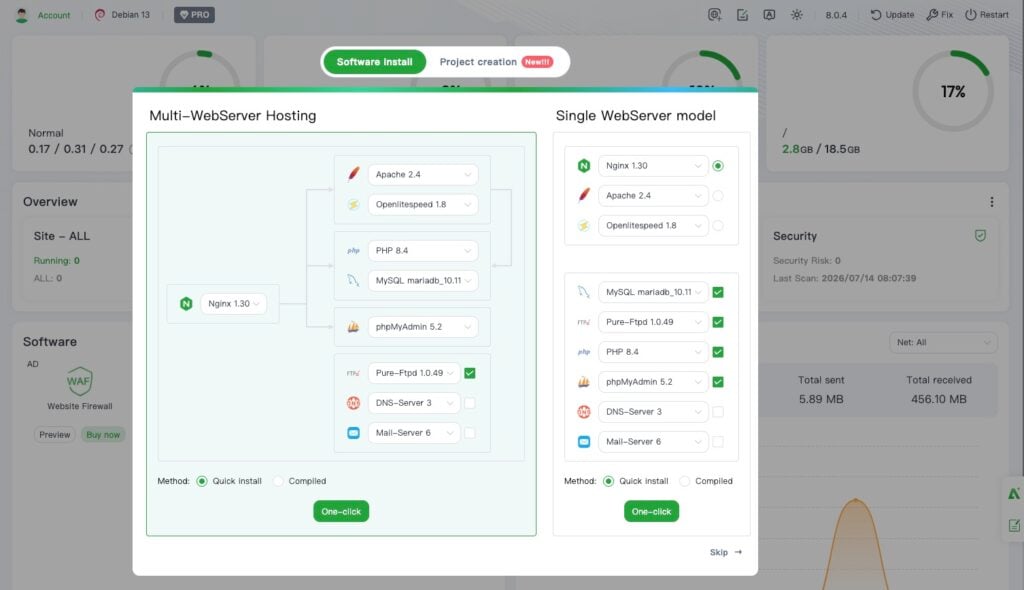
After closing the tab, you will see this. Here, you can choose the web server, database server, PHP version, etc.
aaPanel offers two options for installing the software: Quick install and Compiled. Quick install uses precompiled binaries, which are quicker to install because they’re already provided. Compiled uses a more stable version and is downloaded from source, making the installation process more time-consuming.
After that, you can choose which stack to use: LNMP (recommended) or LAMP. DNS Server and Mail Server can be checked as needed. Then click One-Click to start the installation under the Quick install option, and wait for the installation to complete.
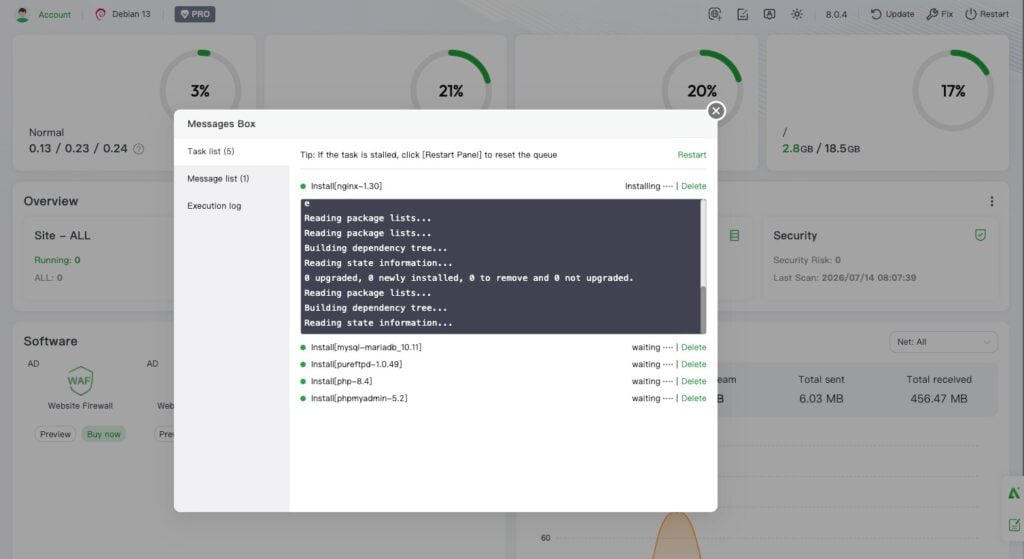
Just wait until everything is installed.
You’ve managed to install aaPanel Control Panel on Debian 13
That’s it! You followed this article, and you have successfully installed aaPanel on Debian 13. You can now start adding your website and doing other tasks in aaPanel.
Of course, you don’t have to install aaPanel on Debian 13 if you have an active monthly server management service with us; in that case, you can simply ask our expert Linux administrators to install aaPanel on Debian 13 for you, free of charge. If you don’t have our monthly service, we are available 24×7 for one-time per-incident server support. Managing aaPanel websites is not just about the installation; we can help you optimize your aaPanel installation if you have an active service with us.
If you liked this post about how to install aaPanel on Debian 13, please share it with your friends on the social networks using the share buttons below, or simply leave a comment in the comments section. Thanks.
