
ClickHouse is a fast and open source column-oriented analytics database system developed by Yandex. ClickHouse is built to process analytical queries while including high-availability features that work across clusters. If you are looking for a powerful column oriented database system with a high-availability system, you really should consider ClickHouse as your database system of choice.
 ClickHouse also provides multi-master synchronous replication, automatic fail-over, and self-organizing clusters. All in all, this makes ClickHouse a great choice for most users that need analytic features from their database system.
In this tutorial, we will show you how to install ClickHouse on an Ubuntu 18.04 server.
Prerequisites
- Ubuntu 18.04 server or VPS. Other Ubuntu versions may work, but this tutorial is focused on Ubuntu 18.04.
- SSH access with root privileges (a user account that has sudo access or the root account)
Step 1 – Getting Started – Login & Updates
Log in to your Ubuntu 18.04 VPS using SSH as the root user (or as a user that has sudo privileges)
ssh root@IP_Address -p Port_number
Don’t forget to replace IP_Address and Port_number with their respective values for your server. If you don’t know your server’s SSH port, it’s likely port 22.
You can check whether you have the proper Ubuntu version installed on your server with the following command:
# lsb_release -a
You should get this output:
Distributor ID: Ubuntu
Description: Ubuntu 18.04.2 LTS
Release: 18.04
Codename: bionic
Again, if you have Ubuntu 16.04 or Ubuntu 20.04, this may work, but it’s not guaranteed.
Then, run the following command to make sure that all installed packages on the server are updated to the latest available version.
# apt update && apt upgrade
This maximizes compatibility and ensures that nothing is out of date.
Step 2 – Install ClickHouse
There are several ways to install ClickHouse on Ubuntu 18.04 (such as building it from source), but in this tutorial, we will install it using the ClickHouse official repository. This simplifies the install and gets you up and running in just a few minutes. You can add the key for the repository and then install the repository with these commands:
# apt-key adv --keyserver keyserver.ubuntu.com --recv E0C56BD4
# echo "deb http://repo.yandex.ru/clickhouse/deb/stable/ main/" | tee /etc/apt/sources.list.d/clickhouse.list
The command above will create a clickhouse.list file. We need to run the following commands to install ClickHouse now.
# apt update
# apt install clickhouse-server clickhouse-client
In the installation process, you will be asked to create a password for user ‘default’. Please create and save a copy of the password – you will need it to access your ClickHouse server.
Once the installation is completed, we can enable ClickHouse to run automatically on boot.
# systemctl enable clickhouse-server
Let’s start the ClickHouse service now.
# systemctl start clickhouse-server
Your ClickHouse server is now running, you can verify it by running this command:
# systemctl status clickhouse-server
root@ubuntu1804:~# systemctl status clickhouse-server
● clickhouse-server.service - ClickHouse Server (analytic DBMS for big data)
Loaded: loaded (/etc/systemd/system/clickhouse-server.service; enabled; vendor preset: enabled)
Active: active (running) since Mon 2019-07-01 03:37:57 CEST; 3s ago
Main PID: 19308 (clickhouse-serv)
Tasks: 36 (limit: 2299)
CGroup: /system.slice/clickhouse-server.service
└─19308 /usr/bin/clickhouse-server --config=/etc/clickhouse-server/config.xml --pid-file=/run/clickhouse-server/clickhouse-server.pid

Jul 01 03:37:57 ubuntu1804 systemd[1]: Started ClickHouse Server (analytic DBMS for big data).
Jul 01 03:37:57 ubuntu1804 clickhouse-server[19308]: Include not found: clickhouse_remote_servers
Jul 01 03:37:57 ubuntu1804 clickhouse-server[19308]: Include not found: clickhouse_compression
Jul 01 03:37:57 ubuntu1804 clickhouse-server[19308]: Logging trace to /var/log/clickhouse-server/clickhouse-server.log
Jul 01 03:37:57 ubuntu1804 clickhouse-server[19308]: Logging errors to /var/log/clickhouse-server/clickhouse-server.err.log
Jul 01 03:37:57 ubuntu1804 clickhouse-server[19308]: Include not found: networks
Jul 01 03:37:59 ubuntu1804 clickhouse-server[19308]: Include not found: clickhouse_remote_servers
Jul 01 03:37:59 ubuntu1804 clickhouse-server[19308]: Include not found: clickhouse_compression
Now that the server is running, you can access your ClickHouse server through the command line interface:
# clickhouse-client --password
You will be asked for the password that you created earlier.
root@ubuntu1804:~# clickhouse-client --password
ClickHouse client version 19.9.2.4 (official build).
Password for user (default):
Connecting to localhost:9000 as user default.
Connected to ClickHouse server version 19.9.2 revision 54421.
Here’s how you can show your databases in ClickHouse:
ubuntu1804.yourdomain.com :) show databases

SHOW DATABASES

┌─name────┐
│ default │
│ system │
└─────────┘

2 rows in set. Elapsed: 0.002 sec.
And here’s how you can select using ClickHouse.
ubuntu1804.yourdomain.com :) select 1

SELECT 1

┌─1─┐
│ 1 │
└───┘

1 rows in set. Elapsed: 0.002 sec.
As seen above, we can invoke the “show database” and “select” queries with no problems.
Step 3 – Configure ClickHouse
3.1 – Change listening IP address
Once the ClickHouse server is installed, you can only access it from the same server, as it only listens on localhost by default. To change the listening IP address, we need to edit the /etc/clickhouse-server/config.xml file.
# nano /etc/clickhouse-server/config.xml
Find the string listen_host, and uncomment the tag line. If you have several IP addresses and want to set ClickHouse server to listen only on a specific IP address, you can edit the line as follows – make sure that you replace 111.222.333.444 with your actual IP address:
<listen_host>111.222.333.444</listen_host>
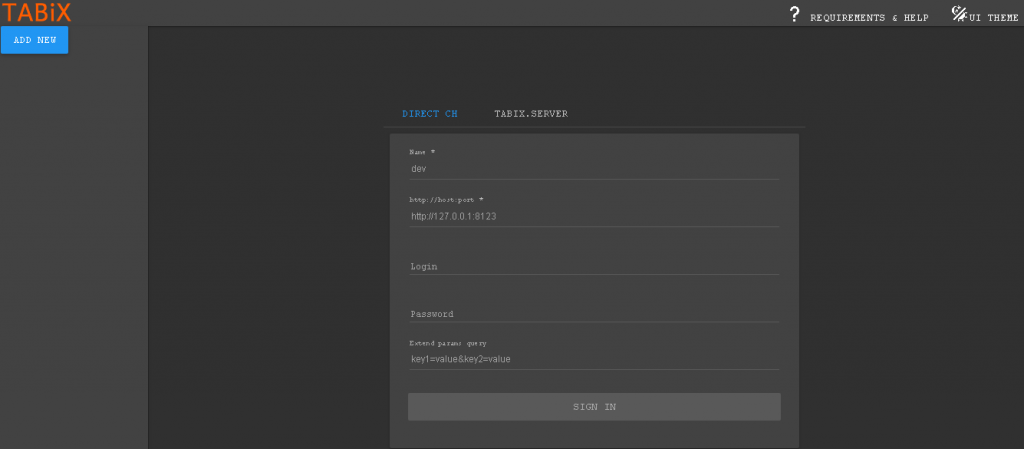
3.2 – Enable Tabix
If you want to access the ClickHouse server through http or by using a web browser, you can enable Tabix by editing the same config.xml file as before. If you choose not to do this, you won’t be able to access and manage your databases through a web browser.
# nano /etc/clickhouse-server/config.xml
Find the string http_server_default_response, then uncomment the tag line.
After making changes to the config.xml file, we need to restart our clickhouse-server service.
# systemctl restart clickhouse-server
Now, you should be able to access http://Your_IP_Address:8123 and log in using the default user and password you specified earlier in the installation process.
Congratulations! At this point, you should be able to access ClickHouse using port 9000 and Tabix at http://111.222.333.444:8123. For more information about ClickHouse, its features, and configuration, please check their official documentation.
 Setting up ClickHouse is easy, but maintaining it is a different story. This is where our Managed Ubuntu Support services can help you save a lot of time and money when running your business. We specialize in fully-managed support for almost any enterprise Linux server. Whether you need help optimizing your ClickHouse instance, or general maintenance and management of any other service, we’re here to help you 24 hours a day, 7 days a week.
If you found this tutorial helpful in setting up ClickHouse on your Ubuntu server, please consider sharing this post on social media with our share shortcuts, or leave a comment telling us how the install went in our comments section. Thanks.
