
In this tutorial we are going to explain in step-by-step detail how to install and secure PhpMyAdmin on AlmaLinux.
PhpMyAdmin is a free and open-source tool written in PHP used for managing MySQL databases via browser. It provides a very easy and user-friendly interface, that allows users to easily create databases, create users, tables columns and etc in no time. In this blog post, we are going to install PhpMyAdmin with the LAMP stack.
Installing and securing PhpMyAdmin on AlmaLinux is a straightforward process and may take up to 15 minutes. Let’s get started!
Prerequisites
- A server with AlmaLinux 20.04 as OS
- Valid domain pointed to the servers IP address
- User privileges: root or non-root user with sudo privileges
Step 1. Update the System
Before we install the LAMP stack we need to update the system packages to the latest version available.
sudo dnf update -y && sudo dnf upgrade -y
Step 2. Install Apache2 Web Server
To install the Apache2 execute the following command:
sudo dnf install httpd -y
To start and enable the apache service, execute the commands below:
sudo systemctl start httpd && sudo systemctl enable httpd
Check the status of the Apache service:
sudo systemctl status httpd
You should receive the following output:
[root@host ~]# sudo systemctl status httpd
● httpd.service - The Apache HTTP Server
   Loaded: loaded (/usr/lib/systemd/system/httpd.service; enabled; vendor preset: disabled)
  Drop-In: /usr/lib/systemd/system/httpd.service.d
           └─php-fpm.conf
   Active: active (running) since Sun 2022-07-03 11:11:13 CDT; 8min ago
     Docs: man:httpd.service(8)
 Main PID: 4665 (httpd)
   Status: "Total requests: 2; Idle/Busy workers 100/0;Requests/sec: 0.00409; Bytes served/sec:  20 B/sec"
    Tasks: 213 (limit: 23674)
   Memory: 38.0M
   CGroup: /system.slice/httpd.service
           ├─4665 /usr/sbin/httpd -DFOREGROUND
           ├─4670 /usr/sbin/httpd -DFOREGROUND
           ├─4671 /usr/sbin/httpd -DFOREGROUND
           ├─4672 /usr/sbin/httpd -DFOREGROUND
           └─4673 /usr/sbin/httpd -DFOREGROUND

Jul 03 11:11:12 host.test.vps systemd[1]: Starting The Apache HTTP Server...
Step 3. Install PHP8.0 with extensions
First we need to add the repository for PHP8.0 with the command below:
sudo dnf install -y https://rpms.remirepo.net/enterprise/remi-release-8.rpm
Update the system and list the available php modules
sudo dnf update

sudo dnf module list php
You should receive the following output:
Last metadata expiration check: 0:00:33 ago on Sun 03 Jul 2022 07:22:57 AM CDT.
AlmaLinux 8 - AppStream
Name                           Stream                               Profiles                                             Summary
php                            7.2 [d][e]                           common [d], devel, minimal                           PHP scripting language
php                            7.3                                  common [d], devel, minimal                           PHP scripting language
php                            7.4                                  common [d], devel, minimal                           PHP scripting language
php                            8.0                                  common [d], devel, minimal                           PHP scripting language

Remi's Modular repository for Enterprise Linux 8 - x86_64
Name                           Stream                               Profiles                                             Summary
php                            remi-7.2                             common [d], devel, minimal                           PHP scripting language
php                            remi-7.3                             common [d], devel, minimal                           PHP scripting language
php                            remi-7.4                             common [d], devel, minimal                           PHP scripting language
php                            remi-8.0                             common [d], devel, minimal                           PHP scripting language
php                            remi-8.1                             common [d], devel, minimal                           PHP scripting language

Hint: [d]efault, [e]nabled, [x]disabled, [i]nstalled
Select the PHP8.0 with the comands below:
sudo dnf module reset php

sudo dnf module enable php:remi-8.0

sudo dnf install php -y
After sucessfull installation you can check the version with php -v command and receive output similar like this:
[root@host ~]# php -v
PHP 8.0.20 (cli) (built: Jun  8 2022 00:33:06) ( NTS gcc x86_64 )
Copyright (c) The PHP Group
Zend Engine v4.0.20, Copyright (c) Zend Technologies
    with Zend OPcache v8.0.20, Copyright (c), by Zend Technologies
Step 4. Install MySQL database server
To install MySQL database server execute the following commands:
sudo dnf install mysql-server mysql
Start and enable the mysqld.service with the following commands:
sudo systemctl start mysqld && sudo systemctl enable mysqld
Check the status of the mysqld.service
sudo systemctl status mysqld
You should receive the following output:
[root@host ~]# sudo systemctl status mysqld
● mysqld.service - MySQL 8.0 database server
   Loaded: loaded (/usr/lib/systemd/system/mysqld.service; enabled; vendor preset: disabled)
   Active: active (running) since Sun 2022-07-03 07:53:36 CDT; 2s ago
 Main PID: 39835 (mysqld)
   Status: "Server is operational"
    Tasks: 38 (limit: 23674)
   Memory: 467.1M
   CGroup: /system.slice/mysqld.service
           └─39835 /usr/libexec/mysqld --basedir=/usr

Jul 03 07:53:23 host.test.vps systemd[1]: Starting MySQL 8.0 database server...
Step 5. Download and Install PhpMyAdmin
Go into the default Apache document root directory and download the PHPMyAdmin:
 cd /var/www/html

wget https://files.phpmyadmin.net/phpMyAdmin/5.2.0/phpMyAdmin-5.2.0-all-languages.zip
Once downloaded extract the zip file and rename it to phpmyadmin.
unzip phpMyAdmin-5.2.0-all-languages.zip

mv phpMyAdmin-5.2.0-all-languages/ phpmyadmin/
Set the right permissions:
chown -R apache:apache /var/www/html/
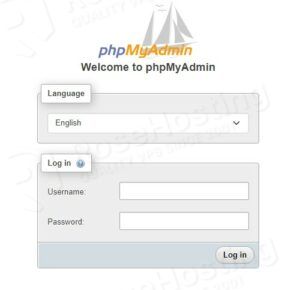
Now, you can access the phpMyAdmin at http://YOURSERVERIPADDRESS/phpmyadmin/ This way we are not able to secure the URL since it is an IP address and the SSL certificate can not be installed on the IP address. In the next steps, we will explain a bit more about this.
Step 6. Create Apache Virtual Host File
First we need to create Apache virtual host file so we can access the phpMyAdmin via a domain name.
touch /etc/httpd/sites-available/phpmyadmin.conf
Open the file with your favorite editor and paste the following lines of code.
<VirtualHost *:80>
    ServerName yourdomain.com
    DocumentRoot /var/www/html/phpmyadmin
    ErrorLog /var/log/httpd/phpmyadmin_error.log
</VirtualHost>
Save the file, close it and enable the Apache configuration.
ln -s /etc/httpd/sites-available/phpmyadmin.conf /etc/httpd/sites-enabled/
Check the Apache syntax with the command below:
httpd -t
If everything is OK, you should receive the following output:
[root@host html]# httpd -t
Syntax OK
Now, you can restart the Apache service and access your application in browser at http://yourdomain.com
Step 7. Secure the Website with Free Let’s Encrypt SSL certificate
First we need to install the mod_ssl module and the python certbot in order can generate the SSL certificate.
sudo dnf install epel-release mod_ssl -y

sudo dnf install python3-certbot-apache -y
Next we can install the Free Let’s Encrypt SSL certificate with the following command:
sudo certbot --apache --agree-tos --redirect --hsts --staple-ocsp --email [email protected] -d yourdomain.com
After successful installation you should see the following output:
Successfully received certificate.
Certificate is saved at: /etc/letsencrypt/live/yourdomain.com/fullchain.pem
Key is saved at:         /etc/letsencrypt/live/yourdomain.com/privkey.pem
This certificate expires on 2022-10-01.
These files will be updated when the certificate renews.
Certbot has set up a scheduled task to automatically renew this certificate in the background.

Deploying certificate
Successfully deployed certificate for yourdomain.com to /etc/httpd/sites-available/phpmyadmin-le-ssl.conf
Congratulations! You have successfully enabled HTTPS on https://yourdomain.com

- - - - - - - - - - - - - - - - - - - - - - - - - - - - - - - - - - - - - - - -
If you like Certbot, please consider supporting our work by:
 * Donating to ISRG / Let's Encrypt:   https://letsencrypt.org/donate
 * Donating to EFF:                    https://eff.org/donate-le
- - - - - - - - - - - - - - - - - - - - - - - - - - - - - - - - - - - - - - - -
Now, you can access your website securely at https://yourdomain.com
Congratulations! You successfully installed PhpMyAdmin on AlmaLinux with the Let’s Encrypt SSL certificate. If you find it difficult to complete these steps feel free to contact us anytime you want. We are available 24/7.
If you liked this post on how to install and secure PhpMyAdmin on AlmaLinux, please share it with your friends on the social networks using the buttons on the left or simply leave a reply below. Thanks.
