
A need for “a simple, visual way to keep track of what needs to get done” is the main reason why the open-source TaskBoard has been developed. With a minimalistic design approach by the developer and contributors, TaskBoard aims to replicate the basics of commonly used Kanban apps like Trello and LeanKit all within a very small and light footprint.
 Some of TaskBoard’s main key features are the following:
- Email notifications
- Unlimited and customizable boards with items
- Full history logging
- Robust privilege system
- Supports file attachments
TaskBoard is licensed under the MIT License and can be self-hosted on a Linux-based server. For this tutorial, we recommend using a public-facing server with a freshly installed CentOS 7 Linux distribution, along with a registered domain name.
If you follow this guide on how to install and configure TaskBoard on CentOS 7 correctly, the install process won’t take more than 10-15 minutes. Let’s get started!
Requirements
The following are the packages and dependencies required by TaskBoard:
- Apache Web Server
- PHP 7.2 and extensions
- SQLite
- OpenJDK (optional)
Step 1: Installing Updates and Dependencies
Connect to your publicly available server via SSH using the following commands in your preferred terminal program:
ssh [username]@[server_ip_address]
Replace [username] with the account name of a root-enabled user (or the root user itself), and replace [server_ip_address] with your server’s public IP address.
Before proceeding with the installation, it is best to update the packages to their recent stable versions, if there are any:
yum update -y
We also recommend installing EPEL and the basic dependencies of CentOS 7 to avoid missing out on important packages required during installation (these are useful for other projects, too!):
yum install epel-release -y
yum groupinstall -y "Development Tools"
Step 2: Installing the Apache Web Server
Apache is the official web server supported by TaskBoard as it is reliable, robust, and a battle-tested web server. To proceed with the installation, supply the following command:
yum install httpd -y
Once it shows that the installation is complete, enable the Apache service (httpd) to start at boot, and then start the service.
systemctl enable httpd
systemctl start httpd
Verify the status of the Apache service by:
systemctl status httpd
You should see that the service is “active (running)”:
● httpd.service - The Apache HTTP Server

Loaded: loaded (/usr/lib/systemd/system/httpd.service; enabled; vendor preset: disabled)

Active: active (running) since Mon 2019-07-22 19:59:59 CDT; 3s ago
Step 3: Installing PHP
The TaskBoard back-end is developed using the PHP programming language. According to its developers and contributors, TaskBoard still has support for the lower-end PHP versions (5.5+), although it is recommended to use the latest stable version for bug fixes and performance improvements. Because of this, we’ll be installing PHP 7.2, a modern and reliable version of PHP.
To proceed with the installation, use the following commands:
yum install http://rpms.remirepo.net/enterprise/remi-release-7.rpm
yum-config-manager --enable remi-php72
yum update -y
yum install php php-json php-cli php-gd php-sqlite3 libapache2-mod-php -y
These commands will enable the Remi-Release repo first to activate PHP 7.2 repositories then initiate an update. Once updated, we can now install the PHP core package, some extensions, and libapache2-mod, the PHP module for the Apache 2 web server.
Verify if PHP has been successfully installed:
php -v
You should see that the output contains PHP 7.2.x:
PHP 7.2.20 (cli) (built: Jul 2 2019 13:37:16) ( NTS )

Copyright (c) 1997-2018 The PHP Group

Zend Engine v3.2.0, Copyright (c) 1998-2018 Zend Technologies
Step 4: Installing a SQLite Database Server
To achieve the goal of a small footprint application, TaskBoard makes use of SQLite as the platform for its database, which allows all records to be stored in just a single file on the server.
To install, simply enter the command:
yum -y install sqlite
Step 5: Installing TaskBoard
After setting up the software prerequisites, we can now proceed with the download of the TaskBoard files.
First, download and unzip the latest archive file from official TaskBoard Github repository. At the time of this article being written, the latest version of TaskBoard is v.0.3.1. Run these commands to change the directory to the Apache web directory, download the master .zip file, and unzip its contents.
cd /var/www/
wget https://github.com/kiswa/TaskBoard/archive/master.zip
unzip /var/www/master.zip
After unzipping the archive file, it will produce a directory named ‘TaskBoard-master’, which we can rename to something simpler:
mv TaskBoard-master/ taskboard/
Next, it is best to update the PHP Composer which is included in the directory:
cd taskboard/
./build/composer.phar self-update
Once updated, we can now proceed with the initial installation by running this command inside the directory:
./build/composer.phar install
Installation should not take that long. If no issues are encountered, we can now apply the correct permissions to our TaskBoard files.
chown -R apache:apache /var/www/taskboard
Step 6: Setting Up a Virtual Host for TaskBoard
In order for our TaskBoard application to be accessible with a publicly available domain name, we must set up an Apache virtual host. Make sure that the domain points to your server IP address and has propagated already.
To proceed, create the following virtual host file using:
nano /etc/httpd/conf.d/taskboard.conf
Next is to copy and paste the following syntax. Do not forget to modify taskboard.domain.com with your own domain or subdomain:
<VirtualHost *:80>
ServerName taskboard.domain.com
DocumentRoot /var/www/taskboard

<Directory "/var/www/taskboard">
Options -Indexes +FollowSymLinks +MultiViews
AllowOverride All
Require all granted
</Directory>

ErrorLog /var/log/httpd/taskboard.domain.com-error.log
CustomLog /var/log/httpd/taskboard.domain.com-access.log combined
</VirtualHost>
Save and exit the file. Finally, restart the Apache service for the changes to take effect:
systemctl restart httpd
Step 7: Accessing TaskBoard
Once the virtual host has been set up and the Apache service has been restarted, you can now access your website at http://taskboard.domain.com
At first, you will see a log in screen which looks like this:
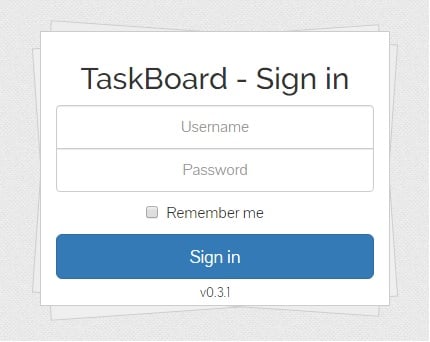
By default, the username and password are both admin.
Once logged in, you should see the pretty basic and straightforward dashboard of TaskBoard:

Also, do not forget to change your Admin account password after logging in.
That’s it! – you now have a working TaskBoard application on your CentOS 7 powered server.
 Of course, you don’t have to Install and Configure TaskBoard on CentOS 7 if you are a Managed VPS Support subscriber. In that case, you can simply ask our support team to install and configure TaskBoard on CentOS 7 for you. They are available 24/7, and they will be able to help you with the installation, along with almost anything else that you would ever need for your VPS.
PS. If you enjoyed reading this blog post on how to install and configure TaskBoard on CentOS 7, feel free to share it on social networks by using the shortcuts below, or simply leave a comment in the comments section. Thanks.
