

OpenVPN is a well-known VPN protocol that secures your connection when accessing the internet. It is a tool that lets you browse the internet world with some level of anonymity.
OpenVPN is an open-source network protocol to facilitate a secure connection between two points in a network. In this tutorial, we will show you how to install OpenVPN on the Debian 11 server.
Prerequisites
- A Debian 11 VPS
- SSH root access or a user with sudo privileges
Step 1. Log in to your server via SSH
First, you will need to log in to your Debian 11 server via SSH as the root user:
ssh root@IP_Address -p Port_number
You will need to replace ‘IP_Address’ and ‘Port_number’ with your server’s respective IP address and SSH port number. Additionally, replace ‘root’ with the username of the system user with sudo privileges.
You can check whether you have the proper Debian 11 installed on your server with the following command:
# lsb_release -a
The command will show you an output like this.
No LSB modules are available.
Distributor ID: Debian
Description: Debian GNU/Linux 11 (bullseye)
Release: 11
Codename: bullseye
Then, run the following command to make sure that all installed packages on the server are updated to their latest available versions:
# apt update
Step 2. Install OpenVPN Server
OpenVPN server packages are available in the default Debian 11 repository. But, in this article, we will use a shell script we can download from github.com to install the OpenVPN server. The installation is fairly easy and straightforward. Let’s download the script and proceed with the OpenVPN Server installation.
# wget https://git.io/vpn -O openvpn-install.sh
The installation script has been downloaded and saved as openvpn-install.sh; let’s execute the file and proceed with the installation.
# bash openvpn-install.sh
After the executable is executed, you will be prompted for a few options. Select UDP as the protocol, port 1194, and choose your favorite DNS resolver and the VPN client name.
Welcome to this OpenVPN road warrior installer!

Which protocol should OpenVPN use?
1) UDP (recommended)
2) TCP
Protocol [1]: 1

What port should OpenVPN listen to?
Port [1194]:

Select a DNS server for the clients:
1) Current system resolvers
2) Google
3) 1.1.1.1
4) OpenDNS
5) Quad9
6) AdGuard
DNS server [1]: 3

Enter a name for the first client:
Name [client]: vpnclient

OpenVPN installation is ready to begin.
Press any key to continue…
At this point, we can press any keyboard key to start the installation. It will finish in a few seconds, depending on your network speed.
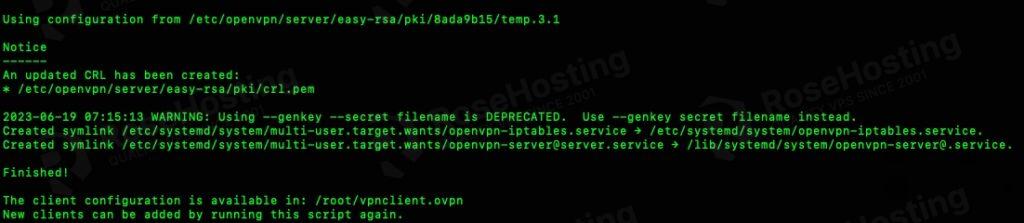
Once installed, the OpenVPN service will be automatically up and running. You will see a message about where the .ovpn file you can download.
Step 3. Connecto to OpenVPN Server
A VPN client is required to connect to our OpenVPN server. If you are using a Windows machine, you can use OpenVPN Client or Tunnelblick if you are using a MacOS device. For Linux desktops users, you can use the openvpn client file to import the network configuration file and then connect to your VPN server.
In this tutorial, we created ‘vpnclient’ as a VPN user, and the installation script generated the configuration file at /root/vpnclient.ovpn. We can download this file to connect to our OpenVPN server.
The client configuration is available in: /root/vpnclient.ovpn
New clients can be added by running this script again.
Download the file or print the file using the cat command, then create a .ovpn using the file’s content. Then, simply double-click on it to start using the VPN client.
Step 4. Create Additional OpenVPN Users
To create new VPN users, simply execute the installation script, and the script will ask you one of the options.
OpenVPN is already installed.

Select an option:
1) Add a new client
2) Revoke an existing client
3) Remove OpenVPN
4) Exit
Option:
Choose number 1, then ENTER. You will be asked for a client name. And it will show you an output like this.
* Using Easy-RSA configuration:
  /etc/openvpn/server/easy-rsa/pki/vars

* Using SSL: openssl OpenSSL 1.1.1n  15 Mar 2022

Generating a RSA private key
............................+++++
............+++++
writing new private key to '/etc/openvpn/server/easy-rsa/pki/5e4b9ee0/temp.1.1'
-----

Notice
------
Keypair and certificate request completed. Your files are:
* req: /etc/openvpn/server/easy-rsa/pki/reqs/rosehosting.req
* key: /etc/openvpn/server/easy-rsa/pki/private/rosehosting.key

Using configuration from /etc/openvpn/server/easy-rsa/pki/5e4b9ee0/temp.4.1
Check that the request matches the signature
Signature ok
The Subject's Distinguished Name is as follows
commonName            :ASN.1 12:'rosehosting'
Certificate is to be certified until Jun 16 07:27:20 2033 GMT (3650 days)

Write out database with 1 new entries
Data Base Updated

Notice
------
Certificate created at:
* /etc/openvpn/server/easy-rsa/pki/issued/rosehosting.crt

Notice
------
Inline file created:
* /etc/openvpn/server/easy-rsa/pki/inline/rosehosting.inline


rosehosting added. Configuration available in: /root/rosehosting.ovpn
That’s it! You have successfully installed the OpenVPN server the easy way. You can now add more users and use the VPN network for your activity.
Check out a more complicated installation without a script.
Of course, you don’t have to install OpenVPN server on Debian 11 if you use one of our Debian Hosting services, in which case you can simply ask our admins, sit back, and relax. Our admins will install and set up OpenVPN on Debian 11 immediately without any additional fee, along with many useful optimizations we can do for you. Managing an OpenVPN server is not just about the installation; we can help you optimize your OpenVPN installation if you have a VPS with us.
PS. If you liked this post on how to set up an OpenVPN Server on Debian 11, please share it with your friends on social networks or simply leave a reply below. Thanks.
