
Your site speed and the page load time is one of the most important components when the Google ranking algorithm is in place, and this can affect your search engine ranking. If you do a test with Google PageSpeed (or any other speed testing tool) and if you get a result that you need to use browser caching, we’ll show you how to do that in WordPress.
What is browser caching?
When you, as a user, visit a webpage for the first time then your browser will store a copy of the static files like images, CSS, java scripts and favicon locally on your computer. This basically means that your computer will not download those files again when you visit that website. The webpage at the end will load faster and this is called browser caching.
How to leverage browser caching?
First, you’ll need to disable the ETag header because this tutorial will teach you how to use Expires. The ETag technology is slow and full of problems.
Add the lines below to your .htaccess file:
Header unset Pragma
FileETag None
Header unset ETag
Additionally, add the lines below and you’ll start to enable Leverage Browser Caching
## EXPIRES CACHING ##
<IfModule mod_expires.c>
ExpiresActive On
ExpiresByType image/jpg "access 1 year"
ExpiresByType image/jpeg "access 1 year"
ExpiresByType image/gif "access 1 year"
ExpiresByType image/png "access 1 year"
ExpiresByType text/css "access 1 month"
ExpiresByType application/pdf "access 1 month"
ExpiresByType text/x-javascript "access 1 month"
ExpiresByType application/x-shockwave-flash "access 1 month"
ExpiresByType image/x-icon "access 1 year"
ExpiresDefault "access 2 days"
</IfModule>
## EXPIRES CACHING ##
This code, your main static files (images, PDFs, CSS, JS, etc.) will be cached on your visitor’s computer in order to produce faster loading of your webpage in the future.
Compress Components
If you compress things then you will always end up making them smaller and hence load faster, so implementing some form of compression on your components is a must have. This optimization step might not work if your server does not have either mod_deflate or mod_gzip installed as part of Apache.
<FilesMatch "\\.(js|css|html|htm|php|xml)$">
SetOutputFilter DEFLATE
</FilesMatch>

<IfModule mod_gzip.c>
mod_gzip_on Yes
mod_gzip_dechunk Yes
mod_gzip_item_include file \.(html?|txt|css|js|php|pl)$
mod_gzip_item_include handler ^cgi-script$
mod_gzip_item_include mime ^text/.*
mod_gzip_item_include mime ^application/x-javascript.*
mod_gzip_item_exclude mime ^image/.*
mod_gzip_item_exclude rspheader ^Content-Encoding:.*gzip.*
</IfModule>
Bonus tip that we want to share with you:
You can leverage browser caching with the W3 Total Cache Plugin. If you don’t already have it installed, you can do so for free on your WordPress site.
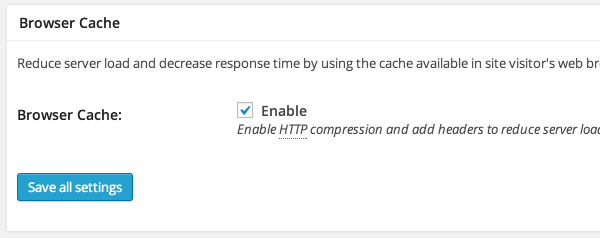
After you install the W3 Total Cache Plugin, simply head over to your WordPress Dashboard » Performance » General Settings and Enable “Browser cache“
After that, go to Performance >> Browser Cache. Apply the following settings.
Browser Cache – General Settings
- Enable “Set Last-Modified header”
- Enable “Set expires header”
- Enable “Set cache control header”
- Disable “Set entity tag (eTag)”
- Enable “Set W3 Total Cache header”
- Enable “HTTP (gzip) compression”
- Disable “Prevent caching of objects after settings change”
- Disable “Do not process 404 errors for static objects“
Browser Cache – CSS & JS
- Enable “Set Last-Modified header”
- Enable “Set expires header”
- Expires header lifetime – 31536000 seconds (1 year)
- Enable “Set cache control header”
- Cache Control Policy: cache with max-age
- Disable “Set entity tag (eTag)”
- Enable “Set W3 Total Cache header”
- Enable “HTTP (gzip) compression”
- Disable “Prevent caching of objects after settings change “
- Disable “Disable cookies for static files “
Browser Cache – HTML and XML
- Enable “Set Last-Modified header”
- Enable “Set expires header”
- Expires header lifetime – 3600 seconds (1 hour)
- Enable “Set cache control header”
- Cache Control Policy: cache with max-age
- Disable “Set entity tag (eTag)”
- Enable “Set W3 Total Cache header”
- Enable “HTTP (gzip) compression”
Browser Cache – Media and other files
- Enable “Set Last-Modified header”
- Enable “Set expires header”
- Expires header lifetime – 31536000 seconds (1 year)
- Enable “Set cache control header”
- Cache Control Policy – cache with max-age
- Disable “Set the entity tag (eTag)”
- Enable “Set W3 Total Cache header”
- Enable “HTTP (gzip) compression”
- Disable “Prevent caching of objects after settings change”
- Disable “Disable cookies for static files”
That’s it all you need to do. Run the page speed test again and see the results. You will see your PageSpeed Score will be improved and your website will load much faster than before.
Of course, you don’t have to do any of this if you use one of our Service Configuration & Optimization services, in which case you can simply ask our expert Linux admins to speed up WordPress and leverage browser caching for you. They are available 24×7 and will take care of your request immediately.
PS. If you liked this post, please share it with your friends on the social networks using the buttons on the left or simply leave a reply below. Thanks.
