
In this tutorial, we will be installing Moodle on an Ubuntu 18.04 server.
![]() Moodle is a well-known open-source learning management system written in PHP. With its customizable features, people all over the world are using Moodle to create websites to run and manage their online courses. Moodle enables us to conduct face-to-face online learning and training, as well as grading and testing. We can create assignments, quizzes, homework, and so on.
Moodle is a well-known open-source learning management system written in PHP. With its customizable features, people all over the world are using Moodle to create websites to run and manage their online courses. Moodle enables us to conduct face-to-face online learning and training, as well as grading and testing. We can create assignments, quizzes, homework, and so on.
Moodle was originally released in 2002 and has been translated to over 100 languages ever since, making it accessible to as many students and teachers as possible. The installation process shouldn’t take much time, so let’s get started.
Moodle comes with a lot of useful features, such as:
- A modern and easy-to-use interface
- Personalized Dashboard
- Collaborative tools and activities
- All-in-one calendar
- Simple text editor
- Track progress
- Notifications
- and lots more…
Prerequisites:
- Ubuntu 18.04
- Apache/Nginx for the web server
- PHP 7.0 or newer for Moodle itself
- MySQL/MariaDB for the database server
Step 1. Log in via SSH and Update the System
Log in to your Ubuntu 18.04 VPS with SSH as the root user (or as an account with sudo privileges)
ssh root@IP_Address -p Port_number
You can check whether you have the proper Ubuntu version installed on your server with the following command:
# lsb_release -a
You should get this output:
Distributor ID: Ubuntu
Description: Ubuntu 18.04.1 LTS
Release: 18.04
Codename: bionic
Then, run the following command to make sure that all installed packages on the server are updated to the latest available version:
# apt update && apt upgrade
Step 2. Install a Web Server
In this tutorial, we will go over installing both of the most popular web server platforms available. Apache is more user-friendly, while Nginx is more customizable.
Both will do the job just fine, so you are free to pick either one. Make sure to not install both web servers.
Installing Apache
Run the following command to install Apache and other dependencies needed to proceed with the Moodle installation:
# apt install apache2 libapache2-mod-php mysql-server php-mysql php-gd php-intl php-xmlrpc php-soap php-cli php-zip php-mbstring php-curl php-xml php-pear php-bcmath php-fpm
Then, we need to enable the rewrite module in Apache.
# a2enmod rewrite
# systemctl restart apache2
Create an Apache virtual host
Make sure to replace “yourdomain.com” with your registered domain name. Create a new file using a text editor of your choice:
# nano /etc/apache2/sites-available/yourdomain.com.conf
Then enter the following content:
<VirtualHost *:80>
DocumentRoot /var/www/html/moodle/
ServerName yourdomain.com
ServerAlias www.yourdomain.com
ServerAdmin admin@yourdomain.com

<Directory /var/www/html/moodle/>
Options +FollowSymlinks
AllowOverride All
Require all granted
</Directory>

ErrorLog /var/log/apache2/yourdomain.com-error.log
CustomLog /var/log/apache2/yourdomain.com-access.log combined
</VirtualHost>
Save and close the file, then run the following to enable the configuration that we just created.
# a2ensite yourdomain.com
Then restart Apache:
# systemctl restart apache2
Nginx
If you prefer Nginx to Apache, you can skip the section above and invoke the following instead:
apt install nginx mysql-server php-mysql php-gd php-intl php-xmlrpc php-soap php-cli php-zip php-mbstring php-curl php-xml php-pear php-bcmath php-fpm
Then, let’s create an Nginx server block.
# nano /etc/nginx/sites-available/yourdomain.com.conf
server {
    listen 80;
    root /var/www/html/moodle;
    index index.php index.html index.htm;
    server_name yourdomain.com www.yourdomain.com;

    location / {
        try_files $uri $uri/ =404;
    }

    location /dataroot/ {
        internal;
        alias /var/www/html/moodledata/;
    }

    location ~ [^/]\.php(/|$) {
        include snippets/fastcgi-php.conf;
        fastcgi_pass unix:/var/run/php/php7.2-fpm.sock;
        fastcgi_param SCRIPT_FILENAME $document_root$fastcgi_script_name;
        include fastcgi_params;
    }
}
Save the file then exit.
The server block is not enabled yet, we can enable it by running this command:
# ln -s /etc/nginx/sites-available/yourdomain.com.conf /etc/nginx/sites-enabled/
Then, restart nginx
# systemctl restart nginx
Step 3. Create database
We are going to use MySQL, and we installed MySQL server in the very first step of this tutorial
Now, you can skip the following step if you prefer not to have a MySQL root password.
# mysql_secure_installation
When prompted, answer the questions below by following the guide.
Enter current password for root (enter for none): Just press the [Enter] key, as no password is set by default
Set root password? [Y/n]: Y
New password: Enter password
Re-enter new password: Repeat password
Remove anonymous users? [Y/n]: Y
Disallow root login remotely? [Y/n]: Y
Remove test database and access to it? [Y/n]: Y
Reload privilege tables now? [Y/n]: Y
If you followed the above step, then you would have a password for MySQL root user, so you can run this command to access the MySQL shell.
# mysql -u root -p
Let’s proceed with creating a database for Moodle
mysql> create database moodle;
Query OK, 1 row affected (0.00 sec)

mysql> grant all on moodle.* to moodle@localhost identified by 'm0d1fyth15';
Query OK, 0 rows affected, 1 warning (0.00 sec)

mysql> flush privileges;
Query OK, 0 rows affected (0.00 sec)

mysql> quit
Please change the password ‘m0d1fyth15‘ above to your desired one.
Step 4. Install Moodle
Before installing Moodle, we will download the latest stable version (at the time of writing this article) from Moodle’s official download page. You can check for the latest version at https://download.moodle.org/releases/latest/ .
# wget https://download.moodle.org/download.php/direct/stable36/moodle-3.6.2.tgz
Once downloaded, run the following command to extract the downloaded file.
# tar -xvf moodle-3.6.2.tgz
Modify the directory permission and restart apache.
# chown -R www-data: /var/www/html/moodle/

systemctl restart apache2
Finally, go to the domain http://yourdomain.com to complete the Moodle installation.
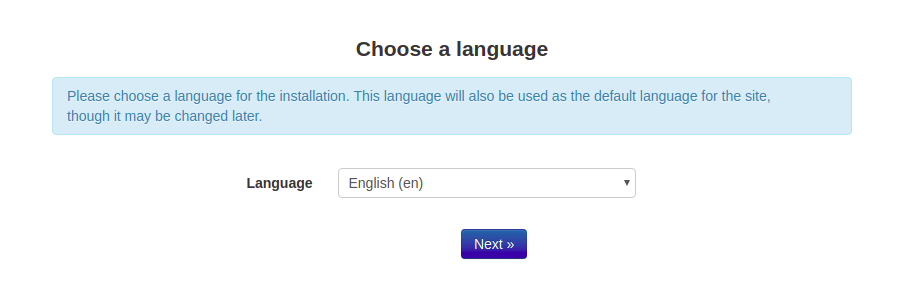
Click on the ‘Next’ button to continue.
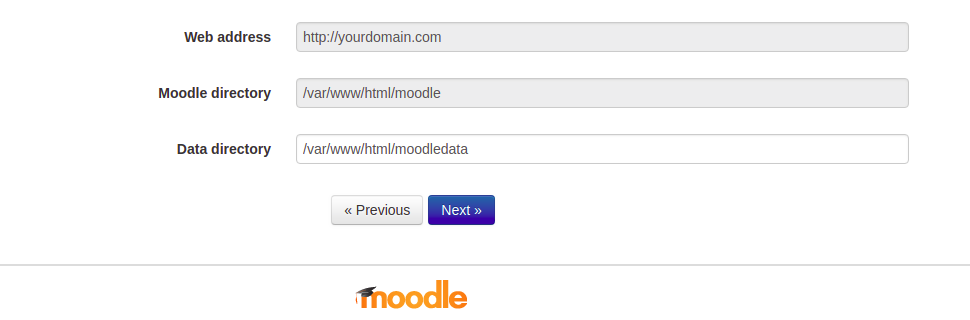
Modify the data directory, make sure the webserver has proper permission to access it, then click ‘Next’
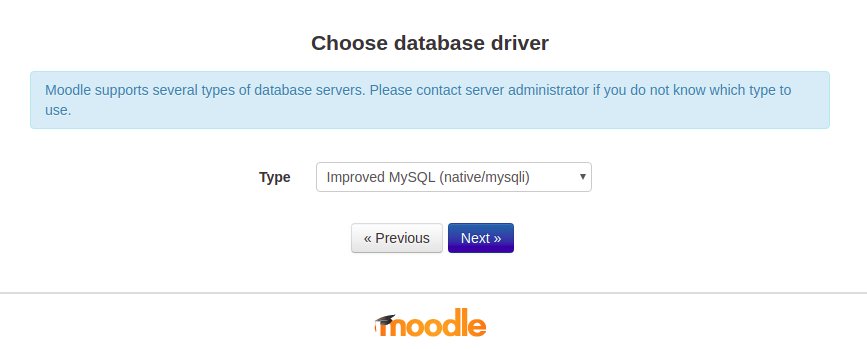
There are several options, but this time we are going to choose MySQL, click on ‘Next’ button to continue.
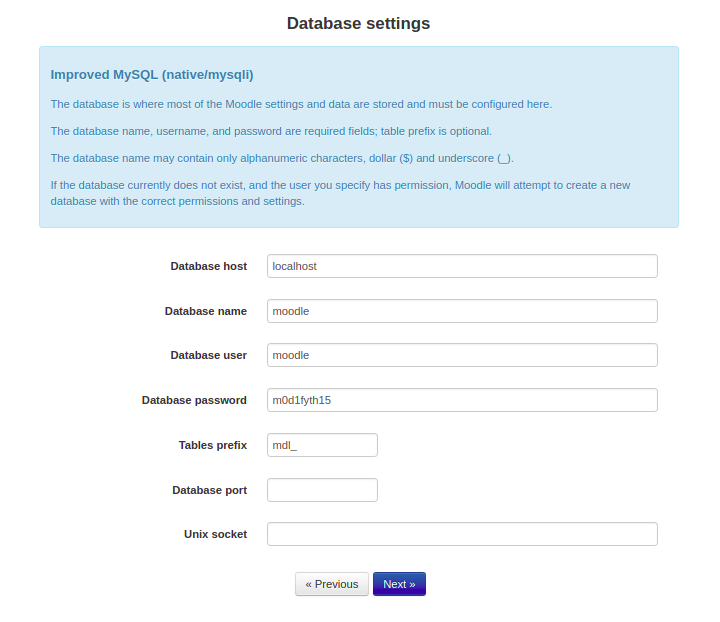
In this step, make sure you are filling the database information that you created earlier, you can leave the database port and Unix socket blank, click on ‘Next’ button to continue.

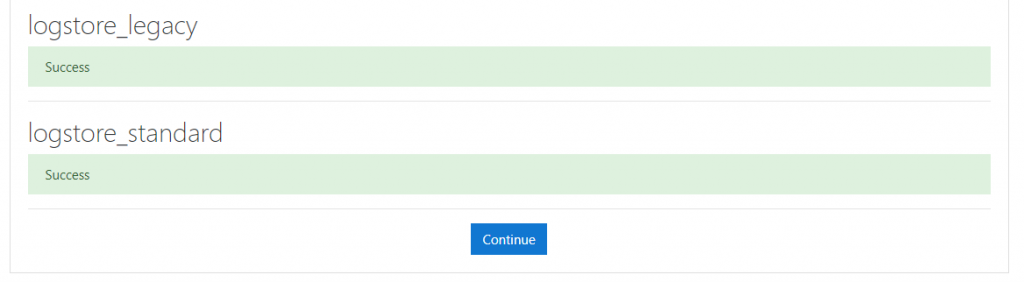
You will see success messages – click on the ‘Continue’ button to proceed.
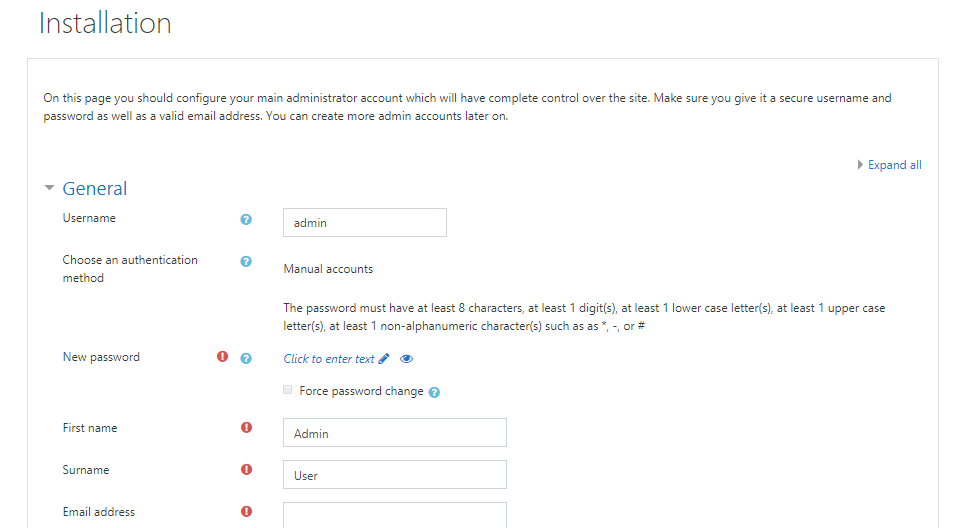
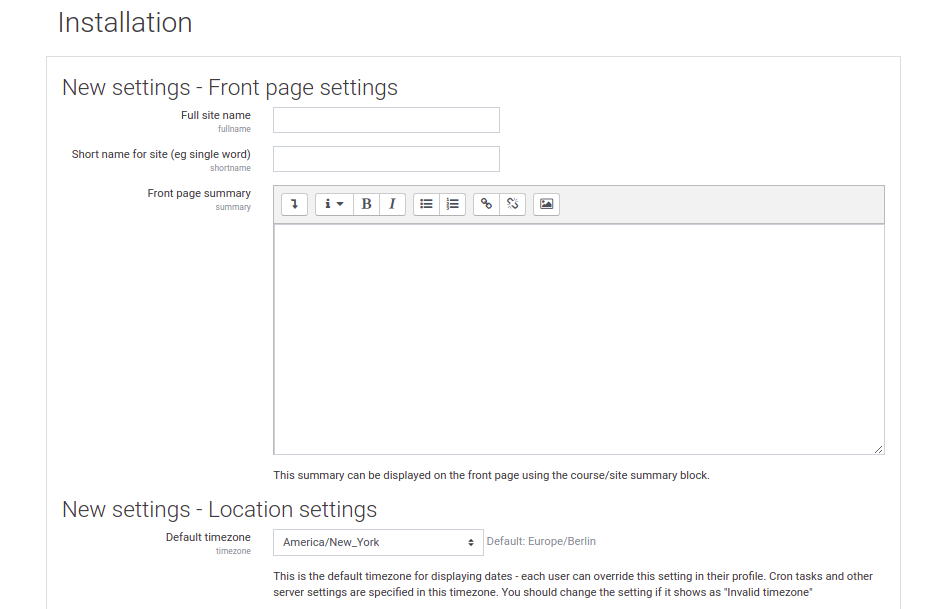
Complete all the required fields above then finish the installation.
Once installation is finished, click on continue to create the main administrator account. Then , click on update profile button.
Now, we need to configure the front page option.
Congratulations! At this point Moodle has been successfully installed, and you can access it at http://yourdomain.com. For more information about Moodle, its features and configuration, please check their official documentation.
![]() Of course, you don’t have to know how to install Moodle on Ubuntu 18.04 if you use one of our Managed VPS Support and Management services with us. You can simply ask our support team to install Moodle on an Ubuntu 18.04 server for you. They are available 24/7, and will be able to help you with the installation of Moodle on Ubuntu 18.04 at any time.
Of course, you don’t have to know how to install Moodle on Ubuntu 18.04 if you use one of our Managed VPS Support and Management services with us. You can simply ask our support team to install Moodle on an Ubuntu 18.04 server for you. They are available 24/7, and will be able to help you with the installation of Moodle on Ubuntu 18.04 at any time.
PS. If you enjoy reading this blog post on how to install Moodle on Ubuntu 18.04, feel free to share it on social networks using the share shortcuts, or simply leave a comment. Thank you.

I would like to ask a question .. Can one get free domain for learning purpose.
Your tutorial is very nice and clear thanks
yes you can, there are providers that offer free domains
Hi team,
I need to install Moodle 3.11 on Linux server. could you please help me how can I go this ?
appreciate your help
Thanks
Krishnan A
Yes, we can definitely help you with the Moodle installation on your server.
For more information, please sign up at our website (https://my.linuxhostsupport.com/index.php?/signup/) and submit a new support ticket about this. Our admins will contact you back immediately.