
Joomla is one of the most popular open-source content management systems (CMS). It is used to publish applications and websites online. It is written in PHP and is commonly configured to use MySQL/MariaDB databases.

In this tutorial, we will show you how to install Joomla 4.0 on Ubuntu 20.04 server. It should work everywhere but we will do this on one of our Joomla hosting servers.
Prerequisites:
– A VPS running Ubuntu 20.04
– Administrative sudo user with root privileges
Step 1: Connect to your Server
To connect to your server via SSH as user root, use the following command:
ssh root@IP_ADDRESS -p PORT_NUMBER
and replace “IP_ADDRESS” and “PORT_NUMBER” with your actual server IP address and SSH port number.
Once logged in, make sure that your server is up-to-date by running the following commands:
sudo apt-get update
sudo apt-get upgrade
Step 2: Install Apache web server and PHP
Joomla requires a webserver to function. Apache is a fast and secure web server and one of the most popular and widely used web servers in the world. You can install it from the official Ubuntu repositories running the following command:
sudo apt install apache2
After installing Apache, the commands below can be used to stop, start and enable Apache services to always start up every time your server starts up.
sudo systemctl stop apache2.service
sudo systemctl start apache2.service
sudo systemctl enable apache2.service
To verify that Apache is running, execute the following command:
sudo systemctl status apache2

Since Joomla is built on PHP, you will need to install PHP as well. You will install PHP and other supporting packages by running the following command:
sudo apt install php php-common libapache2-mod-php php-cli php-fpm php-mysql php-json php-opcache php-gmp php-curl php-intl php-mbstring php-xmlrpc php-gd php-xml php-zip
To verify that PHP is successfully installed, run the following command:
php -v
You should get the following output on your screen:
PHP 7.4.3 (cli) (built: Aug 13 2021 05:39:12) ( NTS )
Copyright (c) The PHP Group
Zend Engine v3.4.0, Copyright (c) Zend Technologies
with Zend OPcache v7.4.3, Copyright (c), by Zend Technologies
Once all the packages are installed, we will need to edit the php.ini file and modify some settings:
memory_limit = 512M
upload_max_filesize = 256M
post_max_size = 256M
max_execution_time = 300
output_buffering = off
date.timezone = America/Chicago
Step 3: Install MariaDB
Joomla uses MariaDB/MySQL as a database. To install the MariaDB database server, enter the following command:
sudo apt install -y mariadb-server mariadb-client
Secure your installation
When the installation is complete, run the following command to secure your installation:
mysql_secure_installation
This script will set the MariaDB root password, disable remote root login and remove anonymous users as shown below:
Enter current password for root (enter for none):
Set root password? [Y/n] Y
New password:
Re-enter new password:
Remove anonymous users? [Y/n] Y
Disallow root login remotely? [Y/n] Y
Remove test database and access to it? [Y/n] Y
Reload privilege tables now? [Y/n] Y
Step 4: Create a Joomla Database
Next, you will need to create a database and user for the Joomla installation. First, connect to the MariaDB shell with the following command:
mysql -u root -p
Once connected, create a database and user using the following command:
MariaDB [(none)]> CREATE DATABASE joomla;
MariaDB [(none)]> GRANT ALL PRIVILEGES ON joomla.* TO 'joomla'@'localhost' IDENTIFIED BY  'StrongPassword';
MariaDB [(none)]> FLUSH PRIVILEGES;
MariaDB [(none)]> EXIT;
At this point, MariaDB is installed and configured for Joomla. You can now proceed to install Joomla.
Step 5: Install Joomla
Now that you have your environment completely set up, you can proceed with the Joomla installation. At the time of writing this article, the latest version of Joomla is 4.0.3. You can download it from the Joomla! 4.0 downloads page using the following command:
wget https://downloads.joomla.org/cms/joomla4/4-0-3/Joomla_4-0-3-Stable-Full_Package.zip
Once the download is completed, unzip the archive and move the extracted files to the /var/www/html/joomla directory, which will be the root directory of your new Joomla site:
sudo unzip Joomla_4-0-3-Stable-Full_Package.zip -d /var/www/html/joomla
Finally, change the ownership of the /var/www/html/joomla directory to the www-data user:
sudo chown -R www-data: /var/www/html/joomla
Step 6: Configure Apache for Joomla
Next, you will need to create an Apache virtual host configuration file for the Joomla installation. You can create it with the following command:
nano /etc/apache2/sites-available/joomla.conf
Add the following lines:
<VirtualHost *:80>
     ServerAdmin admin@your_domain.com
     DocumentRoot /var/www/html/joomla/
     ServerName your_domain.com
     ServerAlias www.your_domain.com

     <Directory /var/www/html/joomla/>
          Options FollowSymlinks
          AllowOverride All
          Require all granted
     </Directory>

     ErrorLog ${APACHE_LOG_DIR}/error.log
     CustomLog ${APACHE_LOG_DIR}/access.log combined
</VirtualHost>
Save and close the file then activate the Joomla virtual host with the following command:
a2ensite joomla.conf
Next, restart the Apache service to apply the changes:
systemctl restart apache2
Open http://your_domain.com in your favorite web browser and follow the on-screen instructions to complete the Joomla installation.
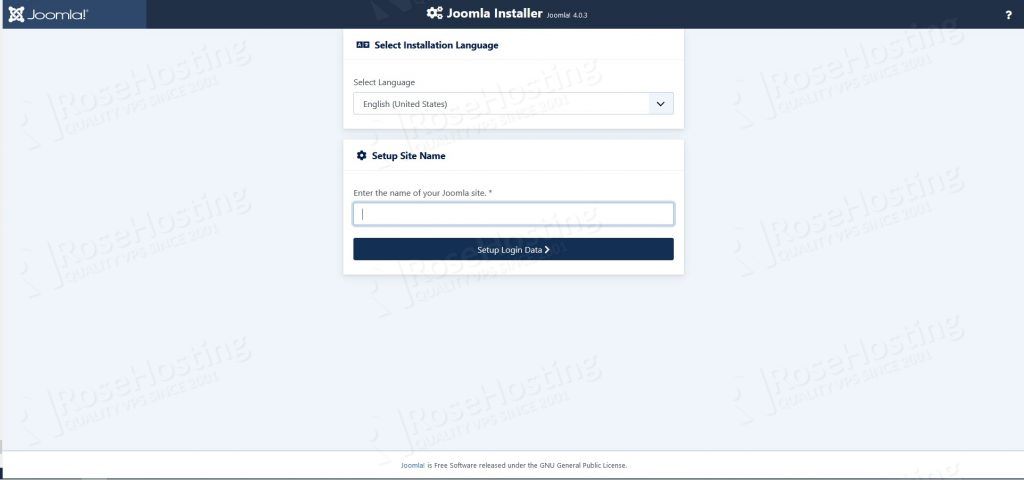
Select your language and enter your site name.
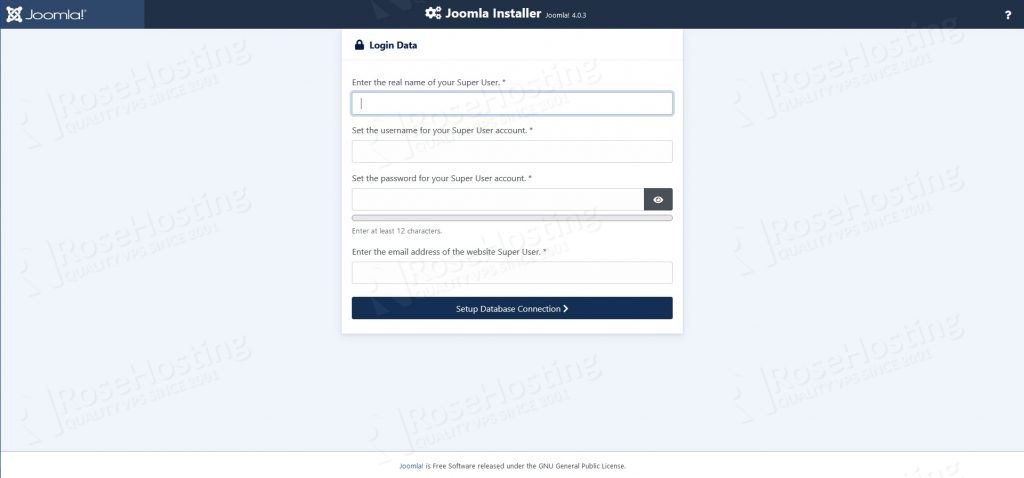
Insert username and password for your Joomla 4.0 administration account.
Note: Passwords must have at least 12 characters.
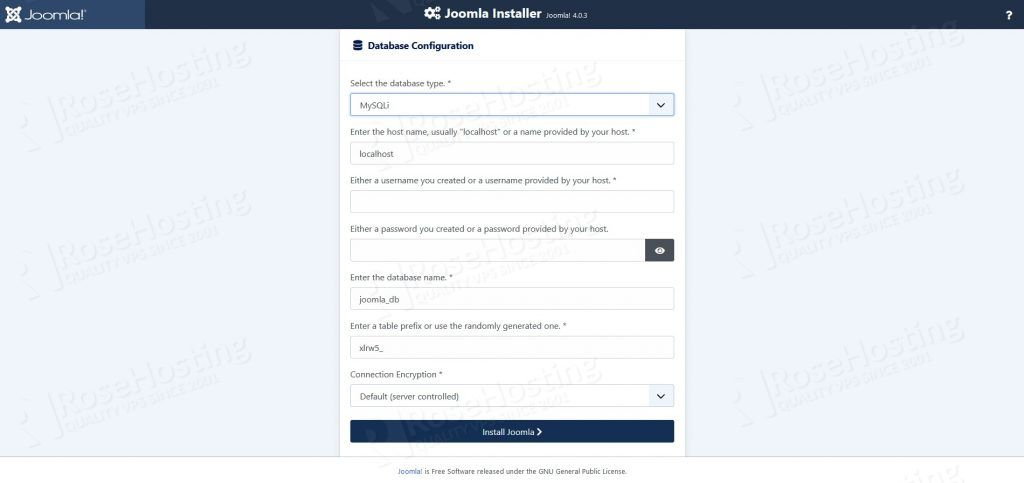
Set the databases configuration credentials as created previously.
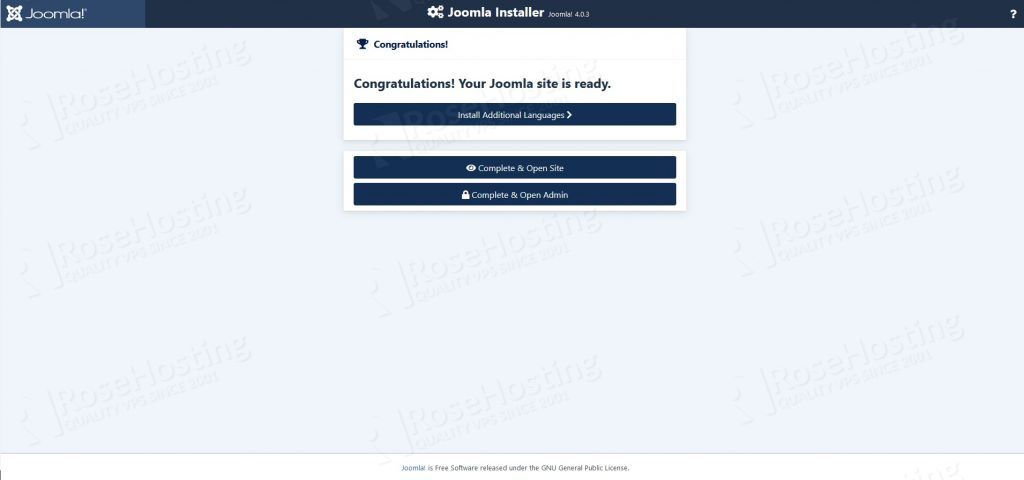
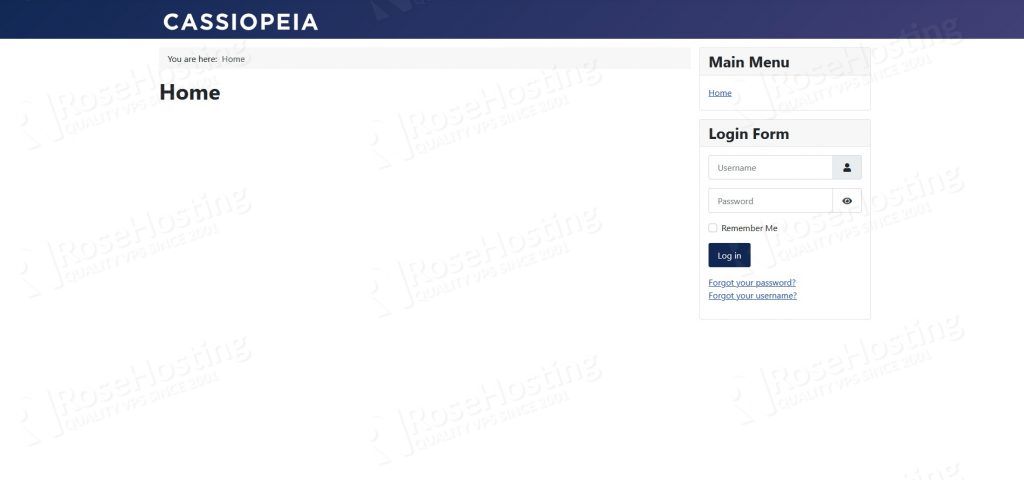
Click on Complete & Open Site to visit the Joomla 4.0 front page
or hit Complete & Open Admin to visit the Joomla 4.0 administration back-end.
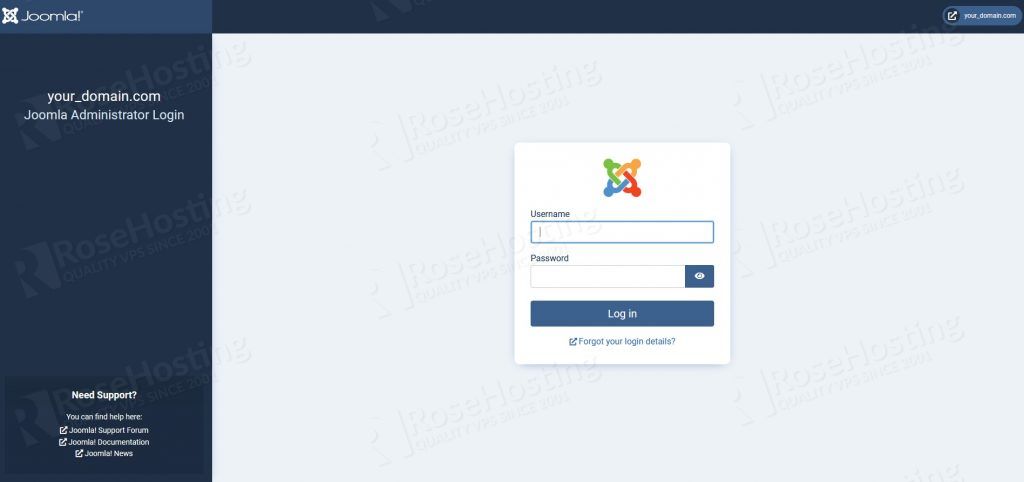
Use your administrator credentials created during the Joomla 4.0 installation.
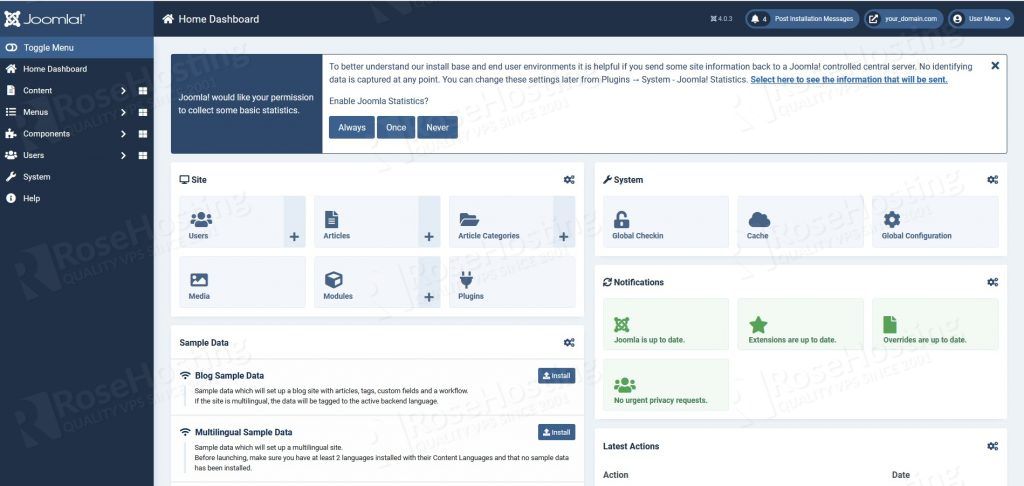
That’s it. You have successfully installed Joomla 4.0 on Ubuntu 20.04. For more information about how to manage your Joomla installation, please refer to the official Joomla documentation.
Of course, you don’t have to install Joomla 4.0 on Ubuntu 20.04, if you use one of our managed VPS hosting services, in which case you can simply ask our expert Linux admins to set up this for you. They are available 24×7 and will take care of your request immediately.
PS. If you liked this post on how to install Joomla 4.0 on Ubuntu 20.04, please share it with your friends on the social networks using the buttons on the left or simply leave a reply below. Thanks.
