

In this tutorial, we are going to explain in step-by-step detail how to install ERPNext on AlmaLinux OS.
ERPNext or Enterprise Resource Planning is an open-source integrated software solution that collects and organizes business information. ERPNext is built on the Frappe Framework in Python and Javascript that stores the data in the MySQL database server. The framework also uses Nginx as a web server and Redis cache. It is important to know that ERPNext requires only a clean server and has a configuration that needs to be installed from scratch. In this tutorial, we are going to use AlmaLinux 8.5 OS.
Installing ERPNext on AlmaLinux OS can take up to 1 hour. Let’s get things done!
Prerequisites
- A VPS with at least 4GB of RAM (Our NVMe 4 VPS plan)
- Fresh install of AlmaLinux 8 as OS
- Valid domain pointed to the servers IP address
- User privileges: root or non-root user with sudo privileges
Step 1. Update the System
We need to update the system packages to their latest version available before installation of ERPNext
sudo dnf update -y && sudo dnf upgrade -y
Step 2. Install Dependencies
To install the required dependencies, execute the following command:
yum groupinstall "Development Tools" -y
yum install epel-release gcc make git openssl-devel zlib-devel bzip2-devel libffi-devel xz-devel redis -y
After installation of the required dependencies, start and enable the Redis service.
sudo systemctl start redis && sudo systemctl enable redis
Step 3. Install Python
The latest version of ERPNext requires python version 3.10. To install the Python 3.10 version, execute the following commands:
cd /opt

wget https://www.python.org/ftp/python/3.10.0/Python-3.10.0.tar.xz

tar -xvf Python-3.10.0.tar.xz

rm Python-3.10.0.tar.xz

cd Python-3.10.0

./configure --enable-optimizations && make altinstall
After installation, make a symbolic link
ln -s /usr/local/bin/python3.10 /usr/bin/python3
Check the installed version with the following command: python3 -V
You should receive the following output:
[root@host Python-3.10.0]# python3 -V
Python 3.10.0
If there was already a symbolic link, just remove it with the following command:
rm -f /usr/bin/python3
Now, install pip3 and wheel dependencies with the newly installed Python3.10 version:
python3 -m pip install --upgrade pip setuptools wheel
Step 4. Install the MariaDB database server
Next, we need to install the MariaDB database server. To do that, execute the following command:
sudo yum install -y mariadb mariadb-server
Start and enable the mariadb.service with the following commands:
sudo systemctl start mariadb && sudo systemctl enable mariadb
Check the status of the mariadb.service
sudo systemctl status mariadb
You should receive the following output:
[root@host]# sudo systemctl status mariadb
● mariadb.service - MariaDB 10.3 database server
   Loaded: loaded (/usr/lib/systemd/system/mariadb.service; enabled; vendor preset: disabled)
   Active: active (running) since Fri 2023-02-10 03:59:54 CST; 20s ago
     Docs: man:mysqld(8)
           https://mariadb.com/kb/en/library/systemd/
 Main PID: 47326 (mysqld)
   Status: "Taking your SQL requests now..."
    Tasks: 30 (limit: 23666)
   Memory: 87.4M
   CGroup: /system.slice/mariadb.service
           └─47326 /usr/libexec/mysqld --basedir=/usr

Feb 10 03:59:50 host.test.vps systemd[1]: Starting MariaDB 10.3 database server...
Feb 10 03:59:50 host.test.vps mysql-prepare-db-dir[47223]: Initializing MariaDB database
Feb 10 03:59:54 host.test.vps mysqld[47326]: 2023-02-10  3:59:54 0 [Note] /usr/libexec/mysqld (mysqld 10.3.35-MariaDB) starting as process 47326 ...
Feb 10 03:59:54 host.test.vps systemd[1]: Started MariaDB 10.3 database server.
We must secure the database instance and set MySQL root password:
mysql_secure_installation
Follow the steps to secure the database:
Enter current password for root (enter for none): Hit Enter

Set root password? [Y/n] Y
New password:
Re-enter new password:
Password updated successfully!

Remove anonymous users? [Y/n] Y

Disallow root login remotely? [Y/n] Y

Remove test database and access to it? [Y/n] Y

Reload privilege tables now? [Y/n] Y

All done!  If you've completed all of the above steps, your MariaDB
installation should now be secure.

Thanks for using MariaDB!
Save the MySQL root password since you will need it while installing ERPNext.
Next, we need to add the lines of code below in /etc/my.cnf file:
[mysqld]
character-set-client-handshake = FALSE
character-set-server = utf8mb4
collation-server = utf8mb4_unicode_ci
[mysql]
default-character-set = utf8mb4
After adding these lines, restart the MariaDB service:
sudo systemctl restart mariadb
Step 5. Install NodeJS
ERPNext’s latest version, 14, requires a newer NodeJS version, such as NodeJS 16. To install nodejs execute the following command:
yum module list nodejs

yum module enable nodejs:16

yum install nodejs -y
After installation, check the Node and NPM versions with the following command:
node -v && npm -v
You should get the following output:
[root@host]# node -v && npm -v
v16.18.1
8.19.2
After nodejs installation, we will install Yarn:
npm install -g yarn
Check the installed Yarn version with the yarn -v command:
[root@host]# yarn -v
1.22.19
Step 6. Install ERPNext
Finally, we are at the last step of the tutorial, and that step is the installation of ERPNext.
First, create an ERPNext user, add to the wheel group, and set a password.
sudo useradd -m erpnext -G wheel

sudo passwd erpnext

Changing password for user erpnext.
New password:
Retype new password:
passwd: all authentication tokens updated successfully.
Switch to the erpnext user.
su - erpnext
Go into the /home directory of the erpnext user:
cd /home/erpnext/
Install the Frappe bench version 14 with the following command:
pip3 install --user frappe-bench

bench init frappe-bench --frappe-branch version-14
After the successful installation of the bench, you will receive the following output:
frappe/dist/js/
├─ bootstrap-4-web.bundle.22U72DEL.js                       1.73 Kb
├─ controls.bundle.RQCO7PK6.js                              1228.26 Kb
├─ data_import_tools.bundle.ZHGGYJ52.js                     106.10 Kb
├─ desk.bundle.VYQDF5SY.js                                  1414.14 Kb
├─ dialog.bundle.X36Y7A7S.js                                53.07 Kb
├─ form.bundle.6OYSHLE3.js                                  153.69 Kb
├─ frappe-web.bundle.W6O5MTCM.js                            949.60 Kb
├─ libs.bundle.YZMCKPNH.js                                  574.13 Kb
├─ list.bundle.RERWMHEV.js                                  185.53 Kb
├─ logtypes.bundle.7STJ7YLS.js                              0.73 Kb
├─ recorder.bundle.5AOEUOFD.js                              179.54 Kb
├─ report.bundle.IQ4SSISM.js                                170.93 Kb
├─ user_profile_controller.bundle.YR6XHZRM.js               11.35 Kb
├─ video_player.bundle.UO3KNN5D.js                          120.59 Kb
├─ web_form.bundle.75LN4HKD.js                              1562.54 Kb
├─ print_format_builder.bundle.KP4FAW42.js                  170.39 Kb
├─ build_events.bundle.L2HAVD4K.js                          11.62 Kb
└─ kanban_board.bundle.VCVKXCPT.js                          27.42 Kb

frappe/dist/css/
├─ desk.bundle.MBTR4LD7.css                                 547.98 Kb
├─ email.bundle.D7YLNAJF.css                                4.02 Kb
├─ login.bundle.6T5NJHU5.css                                24.88 Kb
├─ print.bundle.N3SFSER3.css                                196.28 Kb
├─ print_format.bundle.JH7UBL6H.css                         178.93 Kb
├─ report.bundle.HWLJLFER.css                               5.36 Kb
├─ web_form.bundle.YDYF7I73.css                             14.73 Kb
└─ website.bundle.IPR4YLHZ.css                              422.09 Kb

frappe/dist/css-rtl/
├─ desk.bundle.PZAWYDHE.css                                 548.23 Kb
├─ email.bundle.HU2YKLCX.css                                4.02 Kb
├─ login.bundle.FLH267FT.css                                24.88 Kb
├─ print.bundle.ALDGUYEF.css                                196.43 Kb
├─ print_format.bundle.3QFLLY7D.css                         179.05 Kb
├─ report.bundle.LY72JI7U.css                               5.35 Kb
├─ web_form.bundle.L26SZB7K.css                             14.72 Kb
└─ website.bundle.355E5L7G.css                              422.24 Kb

DONE  Total Build Time: 41.861s
Done in 45.98s.
SUCCESS: Bench frappe-bench initialized
Next is to create the website:
cd frappe-bench

bench new-site YourDomainName
The installation will ask for the MySQL root password, and you will need to set up a password for the administrator</b login user.
[erpnext@host frappe-bench]$ bench new-site YourWebsiteName
MySQL root password:
Updating DocTypes for frappe        : [========================================] 100%
Updating country info               : [========================================] 100%
Set Administrator password:
Re-enter Administrator password:
*** Scheduler is disabled ***
Enable the scheduler:
bench --site YourDomainName enable-scheduler
Once the scheduler is enabled, we need to get the ERPNext app and install it with the following commands:
bench get-app erpnext --branch version-14

bench --site YourDomainName  install-app erpnext
Step 7. Setup ERPNext in Production Mode
Now, we can install the bench in production mode with the following substeps:
pip3 install frappe-bench
Next, we will install Nginx and Supervisor:
sudo yum install nginx supervisor -y
After installation, open the /etc/nginx/nginx.conf file and change the Nginx user from root to erpnext.
user erpnext;
Save the file, close it, and start both services:
sudo systemctl start nginx && sudo systemctl enable nginx

sudo systemctl start supervisord && sudo systemctl enable supervisord
Once the services are enabled, create the symbolic links for Nginx, Supervisor, and Python3.10 again:
sudo ln -s `pwd`/config/supervisor.conf /etc/supervisord.d/frappe-bench.ini

sudo ln -s `pwd`/config/nginx.conf /etc/nginx/conf.d/frappe-bench.conf

sudo rm /usr/bin/python3

sudo ln -s /usr/local/bin/python3.10 /usr/bin/python3
Once the symbolic links are set, setup nginx and supervisor with the following commands:
bench setup supervisor

bench setup nginx
You should get the following output:
Site YourWebsiteDomain assigned port: 80
The last thing is to restart the services:
sudo systemctl restart supervisord

sudo systemctl restart nginx

sudo supervisorctl start all
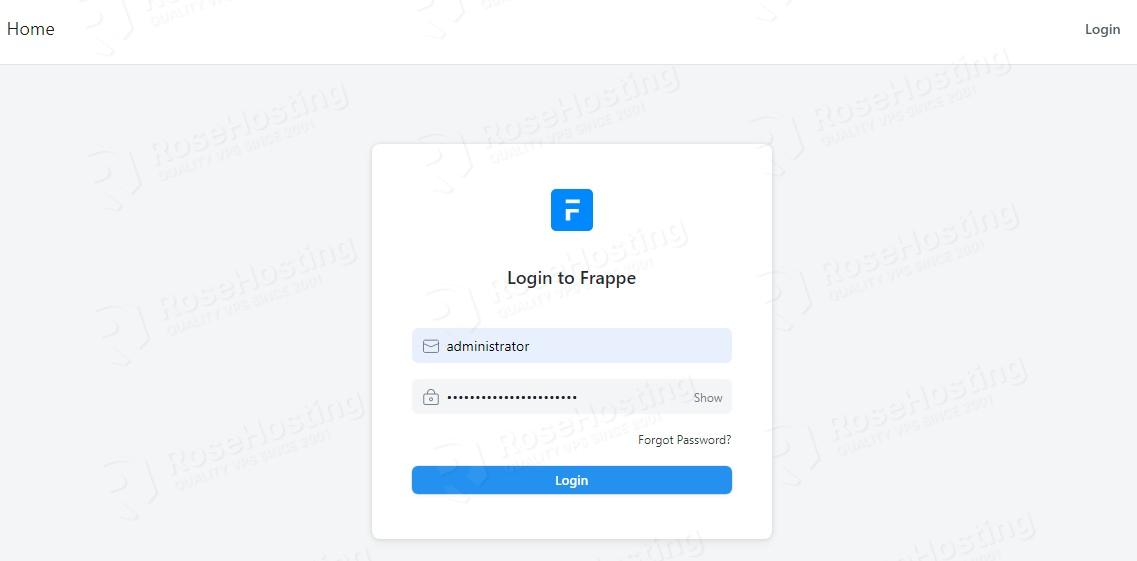
Now, you can access your website at http://YourWebsiteDomain using administrator as username and the password you set above.
That’s it. You successfully installed and configured ERPNext 14 on AlmaLinux 8 OS in production mode. If you find this setup difficult, you can always contact our technical support and they will help you immediately. You just need to sign up for one of our NVMe VPS hosting plans with >= 4GB of RAM and submit a support ticket.
If you liked this about installing ERPNext on AlmaLinux, please share it with your friends on social networks or simply leave a reply below.
