Asterisk is an open-source framework used for building communications applications including VoIP gateways, and conference servers. It is used by small businesses, enterprises, call centers, and governments worldwide. Asterisk uses a VoIP protocol that allows you to make a call using the TCP/IP without any cost. It provides very useful features including, voicemail, call recording, automatic call, music on hold, messaging, and more.
Asterisk can run on multiple operating systems, although it was originally created for Linux. Today, NetBSD, macOS, and Solaris users, among others, can install and use the Asterisk software with ease.
In this guide, we will show you how to install and configure Asterisk on Ubuntu 20.04.
Prerequisites
- An Ubuntu 20.04 VPS (we’ll be using our SSD 2 VPS plan)
- Access to the root user account (or access to an admin account with root privileges)
Log in to the Server & Update the Server OS Packages
First, log in to your Ubuntu 20.04 server via SSH as the root user:
ssh root@IP_Address -p Port_number
You will need to replace ‘IP_Address’ and ‘Port_number’ with your server’s respective IP address and SSH port number. Additionally, replace ‘root’ with the username of the admin account if necessary.
Before starting, you have to make sure that all Ubuntu OS packages installed on the server are up to date. You can do this by running the following commands:
apt-get update -y
apt-get upgrade -y
Install Required Dependencies
Before starting, you will need to install some dependencies required to build the Asterisk server. You can install all of them using the following command:
apt-get install build-essential git autoconf wget subversion pkg-config libjansson-dev libxml2-dev uuid-dev libsqlite3-dev libtool -y
Once all the packages are installed, you will need to install DAHDI to communicate Asterisk with analog and digital telephones.
First, download the latest version of DAHDI to the /opt directory:
cd /opt
git clone -b next git://git.asterisk.org/dahdi/linux dahdi-linux
Next, change the directory to the downloaded directory and compile it using the following command:
cd dahdi-linux
make
make install
Next, download the DAHDI tools with the following command:
cd /opt
git clone -b next git://git.asterisk.org/dahdi/tools dahdi-tools
Once the download is completed, configure and install it with the following command:
cd dahdi-tools
autoreconf -i
./configure
make install
make install-config
dahdi_genconf modules
Next, download the LibPRI to communicate Asterisk with ISDN connections.
git clone https://gerrit.asterisk.org/libpri libpri
cd libpri
Next, install it using the following command:
make
make install
Once all the necessary tools are installed, you can proceed to install Asterisk.
Install Asterisk
By default, the Asterisk package is not included in the Ubuntu 20.04 default repository. So you will need to download and compile it from the source. You can download it from the Git Hub using the following command:
git clone -b 18 https://gerrit.asterisk.org/asterisk asterisk-18
Once the download is completed, change the directory to the downloaded directory and install required dependencies with the following command:
cd asterisk-18/
contrib/scripts/get_mp3_source.sh
contrib/scripts/install_prereq install
Next, configure the Asterisk with the following command:
./configure
You should get the following output:
configure: Menuselect build configuration successfully completed

               .$$$$$$$$$$$$$$$=..
            .$7$7..          .7$$7:.
          .$$:.                 ,$7.7
        .$7.     7$$$$           .$$77
     ..$$.       $$$$$            .$$$7
    ..7$   .?.   $$$$$   .?.       7$$$.
   $.$.   .$$$7. $$$$7 .7$$$.      .$$$.
 .777.   .$$$$$$77$$$77$$$$$7.      $$$,
 $$$~      .7$$$$$$$$$$$$$7.       .$$$.
.$$7          .7$$$$$$$7:          ?$$$.
$$$          ?7$$$$$$$$$$I        .$$$7
$$$       .7$$$$$$$$$$$$$$$$      :$$$.
$$$       $$$$$$7$$$$$$$$$$$$    .$$$.
$$$        $$$   7$$$7  .$$$    .$$$.
$$$$             $$$$7         .$$$.
7$$$7            7$$$$        7$$$
 $$$$$                        $$$
  $$$$7.                       $$  (TM)
   $$$$$$$.           .7$$$$$$  $$
     $$$$$$$$$$$$7$$$$$$$$$.$$$$$$
       $$$$$$$$$$$$$$$$.

configure: Package configured for:
configure: OS type  : linux-gnu
configure: Host CPU : x86_64
configure: build-cpu:vendor:os: x86_64 : pc : linux-gnu :
configure: host-cpu:vendor:os: x86_64 : pc : linux-gnu :
Next, you will need to select the modules that you want to install with Asterisk. You can select it using the following command:
make menuselect
You can use the Arrow key to navigate and Enter key to select the modules.
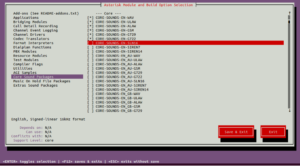
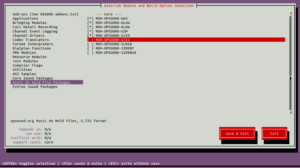
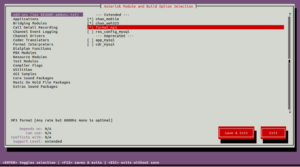
Select and enables the Addons as shown below:
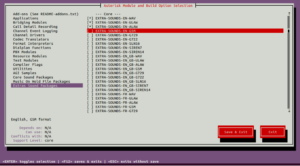
Next, enable the Core sound modules: 

Now, click on the Save and Exit button.
Next, build the Asterisk using the following command:
make -j2
Next, Asterisk and its modules using the following command:
make install
You should get the following output:
 +---- Asterisk Installation Complete -------+
 +                                           +
 +    YOU MUST READ THE SECURITY DOCUMENT    +
 +                                           +
 + Asterisk has successfully been installed. +
 + If you would like to install the sample   +
 + configuration files (overwriting any      +
 + existing config files), run:              +
 +                                           +
 + For generic reference documentation:      +
 +    make samples                           +
 +                                           +
 + For a sample basic PBX:                   +
 +    make basic-pbx                         +
 +                                           +
 +                                           +
 +-----------------  or ---------------------+
 +                                           +
 + You can go ahead and install the asterisk +
 + program documentation now or later run:   +
 +                                           +
 +               make progdocs               +
 +                                           +
 + **Note** This requires that you have      +
 + doxygen installed on your local system    +
 +-------------------------------------------+
You can also install the documentation and basic PBX config files with the following command:
make samples
make basic-pbx
Next, install the Asterisk init script with the following command:
make config
Next, update the shared libraries using the following command:
ldconfig
Create Asterisk User
It is always recommended to run Asterisk as a standalone user for security reasons.
First, create a new Asterisk user with the following command:
adduser --system --group --home /var/lib/asterisk --no-create-home --gecos "Asterisk PBX" asterisk
Next, edit the Asterisk default configuration file and configure it to run as a asterisk user:
nano /etc/default/asterisk
Uncomment the following lines:
AST_USER="asterisk"
AST_GROUP="asterisk"
Save and close the file then add the asterisk user to dialout and audio group:
usermod -a -G dialout,audio asterisk
Next, set proper ownership and permissions of all Asterisk files and directories with the following command:
chown -R asterisk: /var/{lib,log,run,spool}/asterisk /usr/lib/asterisk /etc/asterisk
chmod -R 750 /var/{lib,log,run,spool}/asterisk /usr/lib/asterisk /etc/asterisk
Start and Verify Asterisk
At this point, Asterisk is installed and configured. Now, you can start the Asterisk service using the following command:
systemctl start asterisk
You can also enable the Asterisk service to start at system reboot with the following command:
systemctl enable asterisk
To check the status of the Asterisk service, run the following command:
systemctl status asterisk
You should get the following output:
● asterisk.service - LSB: Asterisk PBX
     Loaded: loaded (/etc/init.d/asterisk; generated)
     Active: active (running) since Sun 2021-05-16 12:24:29 UTC; 13s ago
       Docs: man:systemd-sysv-generator(8)
    Process: 60668 ExecStart=/etc/init.d/asterisk start (code=exited, status=0/SUCCESS)
      Tasks: 46 (limit: 4691)
     Memory: 34.7M
     CGroup: /system.slice/asterisk.service
             └─60685 /usr/sbin/asterisk -U asterisk -G asterisk

May 16 12:24:29 ubuntu2004 systemd[1]: Starting LSB: Asterisk PBX...
May 16 12:24:29 ubuntu2004 asterisk[60668]:  * Starting Asterisk PBX: asterisk
May 16 12:24:29 ubuntu2004 asterisk[60668]:    ...done.
May 16 12:24:29 ubuntu2004 systemd[1]: Started LSB: Asterisk PBX.
Now, connect to the Asterisk command line utility with the following command:
asterisk -vvvr
Once connected, you should get the following output:
Asterisk GIT-18-78d7862463, Copyright (C) 1999 - 2021, Sangoma Technologies Corporation and others.
Created by Mark Spencer
Asterisk comes with ABSOLUTELY NO WARRANTY; type 'core show warranty' for details.
This is free software, with components licensed under the GNU General Public
License version 2 and other licenses; you are welcome to redistribute it under
certain conditions. Type 'core show license' for details.
=========================================================================
Connected to Asterisk GIT-18-78d7862463 currently running on ubuntu2004 (pid = 60685)
ubuntu2004*CLI>
Congratulations! You have successfully installed and configured Asterisk server on Ubuntu 20.04 VPS.
Of course, you don’t have to install and set up Asterisk if you use one of our Managed VPS Hosting services, in which case you can simply ask our expert Linux admins to install Asterisk on Ubuntu 20.04, for you. They are available 24×7 and will take care of your request immediately. If you’re looking to find something else, such as how to install Magento or Elasticsearch on Ubuntu 20.04, check out our blog.
If you liked this post on how to install Asterisk on Ubuntu 20.04, please share it with your friends on the social networks using the buttons on the left or simply leave a reply below. Thanks.


I see no cd commands to leave each directory …
… I ssume you want us to install asterisk under:
/opt/dahdi-tools/libpri/ ?
That is what I ended up with by following the directions.
You can do “cd /opt” then download the git repository of “libpri” and install it there.
Hello
I try to install chan-sep_master for using 3 Cisco IP-Phones 7942 an 2 Cisco 8831.
i’m got a error on make
make: *** No rule to make target ‘install’. Stop.
checking whether byte ordering is bigendian… no
Checking Configure Options:
checking pkg-config asterisk… not found
checking Search Path: /usr /usr/local /opt… not-found
not-found
not-found
configure: Either install asterisk and asterisk-devel packages using your package manager.
configure: If you compiled asterisk manually, make sure you also run `make install-headers` so chan-sccp can find them.
configure: Or run ./configure –with-asterisk=PATH with PATH pointing to the directory where you installed asterisk
configure: error: Could not find pbx headers or libraries – these are required.
Thanks for your time mate
I followed the instruction till “libpri” before getting error msg.
The last line read ; make: *** [Makefile:190: q921.o] Error 1
Should I ignore it and proceed to installing Asterisk
Looking forward to reading from you
Stanley
You shouldn’t ignore this error, make sure you installed DAHDI successfully before you continue with the LibPRI installation.
Hello, thank for this tuto is very nice. Help please i followed this tuto a to z but i can not use the sip show peer in the cli after using asterisk -vvvr.
help me!!
Hello, thank for this tuto is very nice. Please me i followed this tuto a to z but i can not use the sip show peer command in the cli after using asterisk -vvvr.
help me!!
très bon tutoriel
Hello, I am running virtualman as a control pannel on my box right now, am I going to have issues and conflicts with it installed if I follow this tutorial? thanks.