

Sometimes, working with YUM – the default CentOS package manager – can feel unintuitive and cumbersome. Sure, it’s better than using the even more barebones RPM package manager, but it still leaves a lot to be desired. Take YUM’s “history” command, for instance. The idea of that command is to give you a general idea of what package operations you’ve carried out recently. So if you’ve been installing stuff, upgrading older packages, or updating CentOS itself, YUM will keep a record of it all.
Getting a List of Manually Installed Packages
We can often install stuff that only ends up getting used a handful of times, which then ends up getting forgotten about being installed in the first place. This results in packages accumulating over a period of time, using up space, and cluttering our system files. It’s a good practice to clean them out every now and then. But how do we know which packages we installed manually?
If we use the history feature built into YUM by typing the following:
yum history
We get an output similar to this:
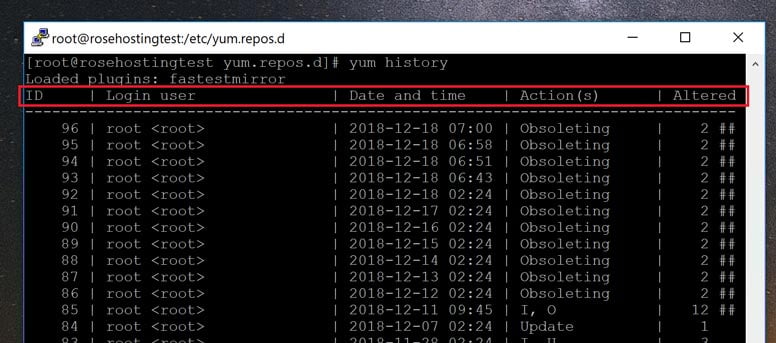
This tells us the following:
- The transaction ID
- The Username
- The Date
- The Actions that were carried out
- The Number of files and/or packages altered
Unfortunately, this doesn’t tell us which specific packages were installed, nor does it give us the commands used or options used in conjunction with the commands. Without these two crucial pieces of information, we can’t know what was installed.
Luckily, YUM allows us to specify the “setopt” parameter, which will give us the command name. We use it like this:
sudo yum --setopt=history_list_view=commands history
We can now get the history together with the commands as well:

This is definitely an improvement over the previous output – we now at least know which packages we were working with.
However, it isn’t close enough to what we’re looking for. For one, the package names are often cut off (because they can get really long in Linux and not fit in the output), and second, there’s no filter for us to only display the commands related to installing packages with “install”.
Luckily, this information is available, but we can’t access it directly through the yum command. Instead, we have to go to the backend database where YUM stores its transaction history, and extract it from there.
Accessing the Yum SQLite Database
Instead of a text file, YUM stores its transaction data in an SQLite file. This data is located in the directory /var/lib/yum/history.
When we list the files found at this location, we can see the one with the “SQLite” extension, like this:
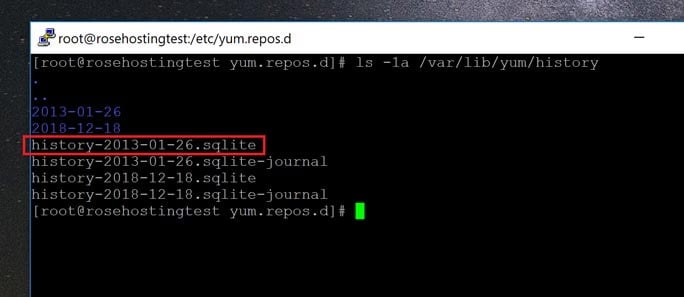
Just like with a regular database, we can query it using the built-in sqlite3 package that comes pre-installed with Linux. What we want is to find all rows where the “cmdline” contains the word “install”. Here’s the command:
sqlite3 /var/lib/yum/history/history-2013-01-26.sqlite "select tid, cmdline from trans_cmdline WHERE cmdline LIKE '%install%'"
Replace history-2013-01-26.sqlite with the name of the SQLite file you got in the previous screenshot. Upon running this command, we see the following:
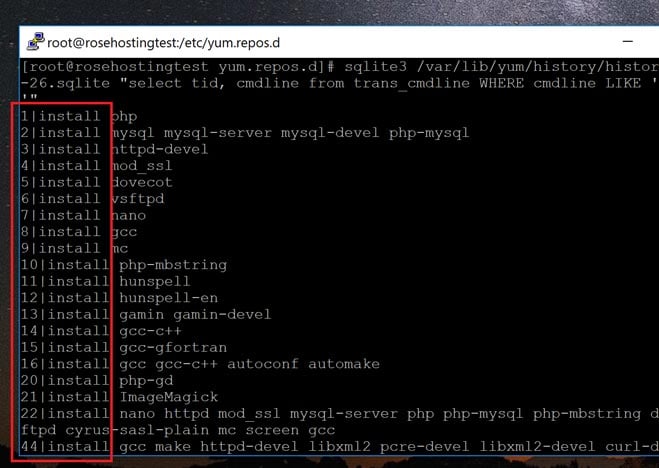
And that’s all that we need – this gives us all of the commands executed that manually installed a package. Using this, you can get an idea of what packages you’re still using, and which ones you no longer need. You can also check any other SQLite files if needed in case there’s more than one.
The downside of this method is that there’s no way to tell if these packages are still being used. You may already have uninstalled them, or some other package might have done it for you. Of course, you can cross-reference the packages with the “remove” command, but it can become a hassle.
That’s why YUM is now being replaced with DNF – the new package manager that’s already well entrenched in the Fedora environment. With it, you can get a list of user-installed packages as well as a lot of other cool features that you can’t yet get with YUM.
But for now, if you’ve been using YUM, this tutorial will help you get a grip on the user-installed-packages in CentOS.
Of course, you don’t have to do any of this if you use one of our Outsourced Server Support Services, in which case you can simply ask our expert Linux admins to find out which packages were installed manually through YUM for you. They are available 24×7 and will take care of your request immediately.
PS. If you liked this post on how to see your installed package history, please share it with your friends on the social networks using the share shortcut buttons on the left, or simply leave a comment in the comments section below. Thanks.
