
 SOGo is a free and open-source collaborative software with a focus on simplicity and scalability. It provides an AJAX-based Web interface and supports multiple native clients through the use of standard protocols such as CalDAV, CardDAV, and GroupDAV, as well as Microsoft ActiveSync. It also offers address book management, calendaring, and Web-mail clients along with resource sharing and permission handling.
In this tutorial, we will show you how to install SOGo on an Ubuntu 20.04 based virtual private server.
Prerequisites
- An Ubuntu 20.04 VPS (we’ll be using our SSD 2 VPS plan)
- Access to the root user account (or access to an admin account with root privileges)
Step 1: Log in to the Server & Update the Server OS Packages
First, log in to your Ubuntu 20.04 server via SSH as the root user:
ssh root@IP_Address -p Port_number
You will need to replace ‘IP_Address‘ and ‘Port_number‘ with your server’s respective IP address and SSH port number. Additionally, replace ‘root’ with the username of the admin account if necessary.
Before starting, you have to make sure that all Ubuntu OS packages installed on the server are up to date. You can do this by running the following commands:
apt-get update -y
apt-get upgrade -y
Step 2: Install and Configure MariaDB Server
SOGo uses MariaDB, MySQL, or PostgreSQL as a database backend. So you will need to install the database server in your server.
You can install the MariaDB server by running the following command:
apt-get install mariadb-server -y
Once installed, log in to the MariaDB shell with the following command:
mysql
After login, create a database and use it for SOGo with the following command:
MariaDB [(none)]> CREATE DATABASE sogo;
MariaDB [(none)]> GRANT ALL ON sogo.* TO 'sogo'@'localhost' IDENTIFIED BY 'your-secure-password';
Next, change the database to SOGo and create a required table and insert some values with the following command:
MariaDB [(none)]> USE sogo;
MariaDB [sogo]> CREATE TABLE sogo_users (c_uid VARCHAR(10) PRIMARY KEY, c_name VARCHAR(10), c_password VARCHAR(32), c_cn VARCHAR(128), mail VARCHAR(128));
MariaDB [sogo]> INSERT INTO sogo_users VALUES ('admin1', 'admin1', MD5('your-secure-password'), 'SOGouser', '[email protected]');
Next, flush the privileges and exit from the MariaDB with the following command:
MariaDB [sogo]> flush privileges;
MariaDB [sogo]> exit;
Now, the MariaDB database server is installed and configured.
Step 3: Install SOGo
By default, SOGo is not available in the Ubuntu 20.04 standard repository. So you will need to download their packages from the SOGo official website. All packages are available at Sope and Sogo
You can download all the packages using the following command:
wget https://packages.inverse.ca/SOGo/nightly/5/ubuntu/pool/focal/s/sogo/sogo-activesync_5.0.1.20201101-1_amd64.deb
wget https://packages.inverse.ca/SOGo/nightly/5/ubuntu/pool/focal/s/sogo/sogo-dbg_5.0.1.20201101-1_amd64.deb
wget https://packages.inverse.ca/SOGo/nightly/5/ubuntu/pool/focal/s/sogo/sogo-dev_5.0.1.20201101-1_amd64.deb
wget https://packages.inverse.ca/SOGo/nightly/5/ubuntu/pool/focal/s/sogo/sogo_5.0.1.20201101-1_amd64.deb
wget https://packages.inverse.ca/SOGo/nightly/5/ubuntu/pool/focal/s/sope/libsbjson2.3-dev_4.9.r1664.20201016_amd64.deb
wget https://packages.inverse.ca/SOGo/nightly/5/ubuntu/pool/focal/s/sope/libsbjson2.3_4.9.r1664.20201016_amd64.deb
wget https://packages.inverse.ca/SOGo/nightly/5/ubuntu/pool/focal/s/sope/libsope-appserver4.9-dev_4.9.r1664.20201016_amd64.deb
wget https://packages.inverse.ca/SOGo/nightly/5/ubuntu/pool/focal/s/sope/libsope-appserver4.9_4.9.r1664.20201016_amd64.deb
wget https://packages.inverse.ca/SOGo/nightly/5/ubuntu/pool/focal/s/sope/libsope-core4.9-dev_4.9.r1664.20201016_amd64.deb
wget https://packages.inverse.ca/SOGo/nightly/5/ubuntu/pool/focal/s/sope/libsope-core4.9_4.9.r1664.20201016_amd64.deb
wget https://packages.inverse.ca/SOGo/nightly/5/ubuntu/pool/focal/s/sope/libsope-gdl1-4.9-dev_4.9.r1664.20201016_amd64.deb
wget https://packages.inverse.ca/SOGo/nightly/5/ubuntu/pool/focal/s/sope/libsope-gdl1-4.9_4.9.r1664.20201016_amd64.deb
wget https://packages.inverse.ca/SOGo/nightly/5/ubuntu/pool/focal/s/sope/libsope-ldap4.9-dev_4.9.r1664.20201016_amd64.deb
wget https://packages.inverse.ca/SOGo/nightly/5/ubuntu/pool/focal/s/sope/libsope-ldap4.9_4.9.r1664.20201016_amd64.deb
wget https://packages.inverse.ca/SOGo/nightly/5/ubuntu/pool/focal/s/sope/libsope-mime4.9_4.9.r1664.20201016_amd64.deb
wget https://packages.inverse.ca/SOGo/nightly/5/ubuntu/pool/focal/s/sope/libsope-xml4.9-dev_4.9.r1664.20201016_amd64.deb
wget https://packages.inverse.ca/SOGo/nightly/5/ubuntu/pool/focal/s/sope/libsope-xml4.9_4.9.r1664.20201016_amd64.deb
wget https://packages.inverse.ca/SOGo/nightly/5/ubuntu/pool/focal/s/sope/libsope4.9-dev_4.9.r1664.20201016_all.deb
wget https://packages.inverse.ca/SOGo/nightly/5/ubuntu/pool/focal/s/sope/sope4.9-appserver_4.9.r1664.20201016_amd64.deb
wget https://packages.inverse.ca/SOGo/nightly/5/ubuntu/pool/focal/s/sope/sope4.9-dbg_4.9.r1664.20201016_amd64.deb
wget https://packages.inverse.ca/SOGo/nightly/5/ubuntu/pool/focal/s/sope/sope4.9-gdl1-mysql_4.9.r1664.20201016_amd64.deb
wget https://packages.inverse.ca/SOGo/nightly/5/ubuntu/pool/focal/s/sope/sope4.9-gdl1-postgresql_4.9.r1664.20201016_amd64.deb
wget https://packages.inverse.ca/SOGo/nightly/5/ubuntu/pool/focal/s/sope/sope4.9-libxmlsaxdriver_4.9.r1664.20201016_amd64.deb
wget https://packages.inverse.ca/SOGo/nightly/5/ubuntu/pool/focal/s/sope/sope4.9-stxsaxdriver_4.9.r1664.20201016_amd64.deb
Once all the packages are downloaded, run the following command to install them:
dpkg -i *.deb
Next, run the following command to install all missing dependencies:
apt-get install -f
Once SOGo is installed, start the SOGo service and enable it to start at system reboot:
systemctl start sogo
systemctl enable sogo
Step 4: Install and Configure Apache
Next, you will need to install the Apache webserver for SOGo. You can install it with the following command:
apt-get install apache2 -y
Next, enable all required modules with the following command:
a2enmod proxy proxy_http headers rewrite
a2enconf SOGo.conf
Next, edit the SOGo virtual host configuration file:
nano /etc/apache2/conf-enabled/SOGo.conf
Find the following lines:
  RequestHeader set "x-webobjects-server-port" "443"
  RequestHeader set "x-webobjects-server-url" "https://%{HTTP_HOST}e" env=HTTP_HOST
And, replaced them with the following:
  RequestHeader set "x-webobjects-server-port" "80"
  RequestHeader set "x-webobjects-server-url" "http://%{HTTP_HOST}e" env=HTTP_HOST
Save and close the file then restart the Apache service to apply the changes:
systemctl restart apache2
Step 5: Configure SOGo
Next, you will need to configure SOGo to use MariaDB for authentication. You can do it by editing the SOGo main configuration file:
nano /etc/sogo/sogo.conf
Add the following lines at the end of the file as per your database settings:
SOGoProfileURL = "mysql://sogo:your-secure-password@localhost:3306/sogo/sogo_user_profile";
OCSFolderInfoURL = "mysql://sogo:your-secure-password@localhost:3306/sogo/sogo_folder_info";
OCSSessionsFolderURL = "mysql://sogo:your-secure-password@localhost:3306/sogo/sogo_sessions_folder";

SOGoPasswordChangeEnabled = YES;

SOGoUserSources =
  (
    {
      type = sql;
      id = users;
     viewURL = "mysql://sogo:[email protected]:3306/sogo/sogo_users";
     canAuthenticate = YES;
     isAddressBook = NO;
      userPasswordAlgorithm = md5;
    }
  );

  SOGoPageTitle = SOGo;
  SOGoVacationEnabled = YES;
  SOGoForwardEnabled = YES;
  SOGoSieveScriptsEnabled = YES;
  SOGoMailAuxiliaryUserAccountsEnabled = YES;
  SOGoTrustProxyAuthentication = NO;
  SOGoXSRFValidationEnabled = YES;

  SOGoSuperUsernames = (admin1, admin2); // This is an array - keep the parents!
Save and close the file when you are finished then restart the SOGo service to apply the changes:
systemctl restart sogo
Step 6: Access SOGo Web UI
Now, open your web browser and type the URL http://your-domain.com/SOGo to access the SOGo web interface. You will be redirected to the SOGo login page as shown below:
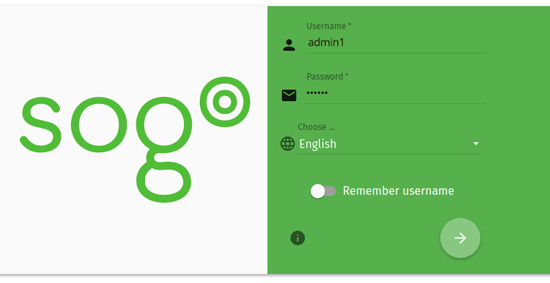
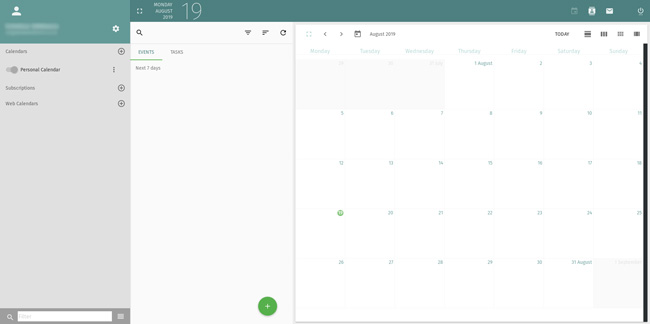
Provide username as admin1 and password as “your-secure-password” then click on the > button. You will be redirected to the SOGo dashboard:
That’s it. You have successfully installed SOGo on your Ubuntu 20.04 based VPS.
 If you use one of our Server Management Services, you don’t have to install SoGo yourself, you can ask our system administrators and they will install SoGo on Ubuntu 20.04 or any other OS of your choice.
PS. If you liked this post please share it with your friends on the social networks using the buttons on the left or simply leave a reply below. Thanks.

Hello.
Thank you for tutorial.
I get error 501 when i try to open url.
Can you please help me.
Please check and make sure your web server is properly configured, then clear your browser’s cache and try again.
As of Jan 2022 the wget package links are different:
wget https://packages.inverse.ca/SOGo/nightly/5/ubuntu/pool/focal/s/sogo/sogo-activesync_5.5.0.20220201-1_amd64.deb
Ran into this error while installing:
The following packages have unmet dependencies:
libsope4.9-dev : Depends: libsope-mime4.9-dev but it is not installable
sogo-activesync : Depends: libwbxml2-0 (>= 0.11.2) but it is not going to be installed
E: Unmet dependencies. Try ‘apt –fix-broken install’ with no packages (or specify a solution).
Try to run “apt –fix-broken install” this will attempt to fix the issue, this issue occurs when some part of your installation is broken or corrupted.
apt –fix-broken install <- That command does not exist in Apt.
It should exist as it is suggested by your system.
SOGo configuration is wrong.
“`
SOGoProfileURL = “mysql://sogo:your-secure-password@localhost:5432/sogo/sogo_user_profile”;
OCSFolderInfoURL = “mysql://sogo:your-secure-password@localhost:5432/sogo/sogo_folder_info”;
OCSSessionsFolderURL = “mysql://sogo:your-secure-password@localhost:5432/sogo/sogo_sessions_folder”;
“`
Here port should be 3306 and not 5432, that is a postgresql port.
Thank you for pointing that out, this has been corrected.
Is this method preferable to the automated build scripts on the logo site i.e. using dpkg? I assume therefore we could now apply this method to Ubuntu 22 LTS which would give me longer lifespan of the mail server. Sorry, thinking out loud a bit!
Hello,
Great tutorial. However, I’m facing a problem. I followed the entire tutorial, but when I want to log in to the dashboard, it says ‘welcome SOGouser,’ and then I’m sent back to the login interface. I can’t seem to find a solution for it. Did I do something wrong?
Please make sure your Apache configuration matches the hostname defined in your SOGo.