

Neos CMS is an open-source and PHP-based content management system created by over 100+ contributors around the world. It is highly extensible and follows a content repository pattern. Neos CMS can be integrated with other modern front-end technologies using JSON or GraphQL export formats. With Neos CMS, you can create your blog and website without any programming knowledge.
This tutorial will explain how to install Neos CMS with Apache on Ubuntu 20.04.
Prerequisites
- A fresh Ubuntu 20.04 VPS.
- Access to the root user account (or access to an admin account with root privileges)
Log in to the Server & Update the Server OS Packages
First, log in to your Ubuntu 20.04 server via SSH as the root user:
ssh root@IP_Address -p Port_number
You will need to replace ‘IP_Address‘ and ‘Port_number‘ with your server’s respective IP address and SSH port number. Additionally, replace ‘root‘ with the username of the admin account if necessary.
Before starting, you have to make sure that all Ubuntu 20.04 OS packages installed on the server are up to date. You can do this by running the following commands:
apt-get update -y
Install Apache, MySQL and PHP
First, install the Apache web server and MySQL 8 on your server:
apt-get install apache2 mysql-server -y
After installing both packages, run the following command to install PHP with all required extensions:
apt-get install php7.4 libapache2-mod-php7.4 php7.4-common php7.4-mysql php7.4-gmp php7.4-curl php7.4-intl php7.4-mbstring php7.4-xmlrpc php7.4-gd php7.4-bcmath php7.4-xml php7.4-cli php7.4-gmagick php7.4-zip curl unzip git -y
Once all the packages are installed the start the Apache and MySQL service with the following command:
systemctl start apache2
systemctl start mysql
Create MySQL Database and User
Neos CMS uses MySQL or MariaDB as a database backend. So you will need to create a user and database for Neos CMS.
First, connect to the MySQL with the following command:
mysql
Next, create a database and user with the following command:
mysql> CREATE DATABASE neos CHARACTER SET utf8mb4 COLLATE utf8mb4_unicode_ci;
mysql> CREATE USER 'neos'@'localhost' IDENTIFIED BY 'securepassword';
Next, grant all the privileges on neos database with the following command:
mysql> GRANT ALL PRIVILEGES ON neos.* TO 'neos'@'localhost';
Next, flush the privileges and exit from the MySQL shell using the following command:
mysql> FLUSH PRIVILEGES;
mysql> EXIT;
Install Neos CMS
Before starting, you will need to install the Composer to your server. Run the following command to install Composer:
curl -sS https://getcomposer.org/installer | php
mv composer.phar /usr/local/bin/composer
chmod +x /usr/local/bin/composer
Next, change the directory to Apache webroot and download the Neos CMS using the Composer:
cd /var/www/html/
composer create-project --no-dev neos/neos-base-distribution neoscms
Next, install the required module and update the Composer with the following command:
composer require guzzlehttp/psr7 "^1.8.2"
composer update
Next, set proper permission and ownership to the neoscms directory:
chown -R www-data:www-data /var/www/html/neoscms/
chmod -R 755 /var/www/html/neoscms/
Configure Apache for Neos CMS
Next, create an Apache virtual host configuration file for Neos CMS:
nano /etc/apache2/sites-available/neoscms.conf
Add the following lines:
<VirtualHost *:80>
     ServerAdmin [email protected]
     DocumentRoot /var/www/html/neoscms/Web
     ServerName neos.yourdomain.com
     <Directory /var/www/html/neoscms/Web/>
          Options FollowSymlinks
          AllowOverride All
          Require all granted
     </Directory>

     ErrorLog ${APACHE_LOG_DIR}/neos_error.log
     CustomLog ${APACHE_LOG_DIR}/neos_access.log combined

     <Directory /var/www/html/neoscms/Web/>
            RewriteEngine on
            RewriteBase /
            RewriteCond %{REQUEST_FILENAME} !-f
            RewriteRule ^(.*) index.php [PT,L]
    </Directory>
</VirtualHost>
Save the file when you are done. Then, enable the Apache virtual host and rewrite module with the following command:
a2ensite neoscms.conf
a2enmod rewrite
Next, reload the Apache service to apply the configuration changes:
systemctl restart apache2
Access Neos CMS Installation Wizard
Now, you can access the Neos CMS web installation wizard using the URL http://neos.yourdomain.com as shown below:
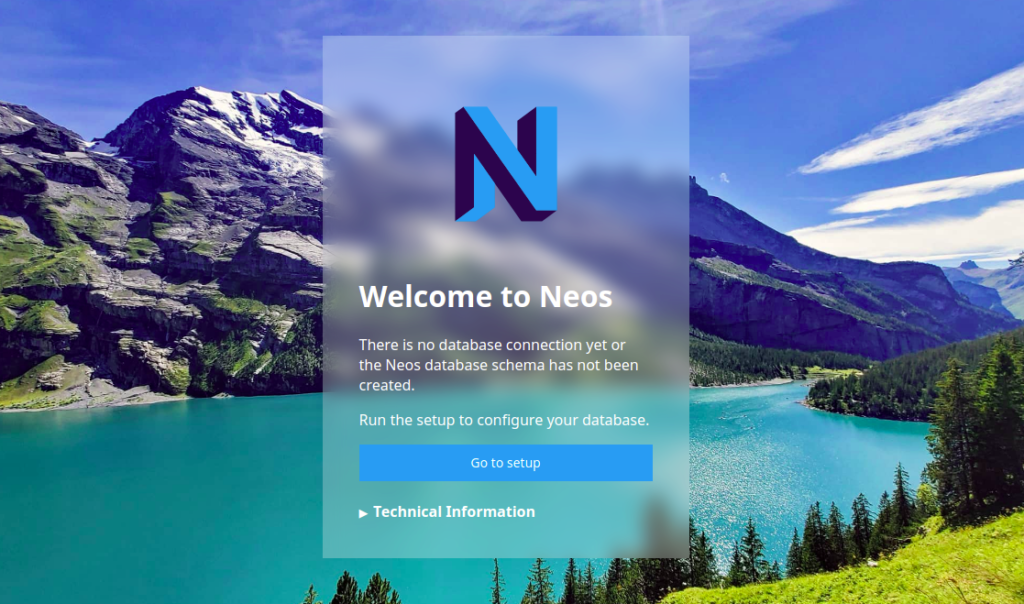
Click on Go to setup button. You will be asked to provide a setup password as shown below:
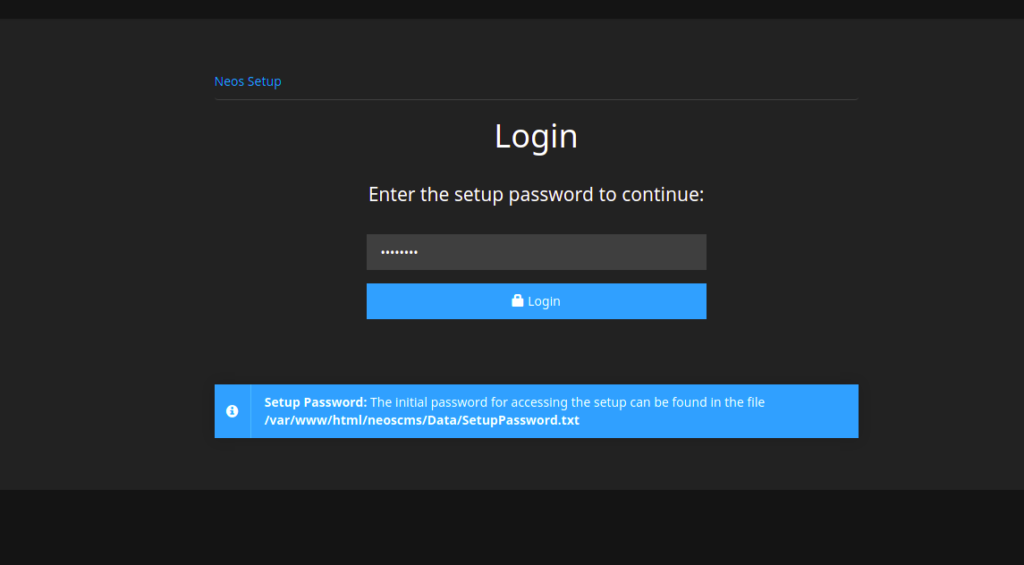
Type the password from the SetupPassword.txt file and click on the Login button. You should see the requirements check page:
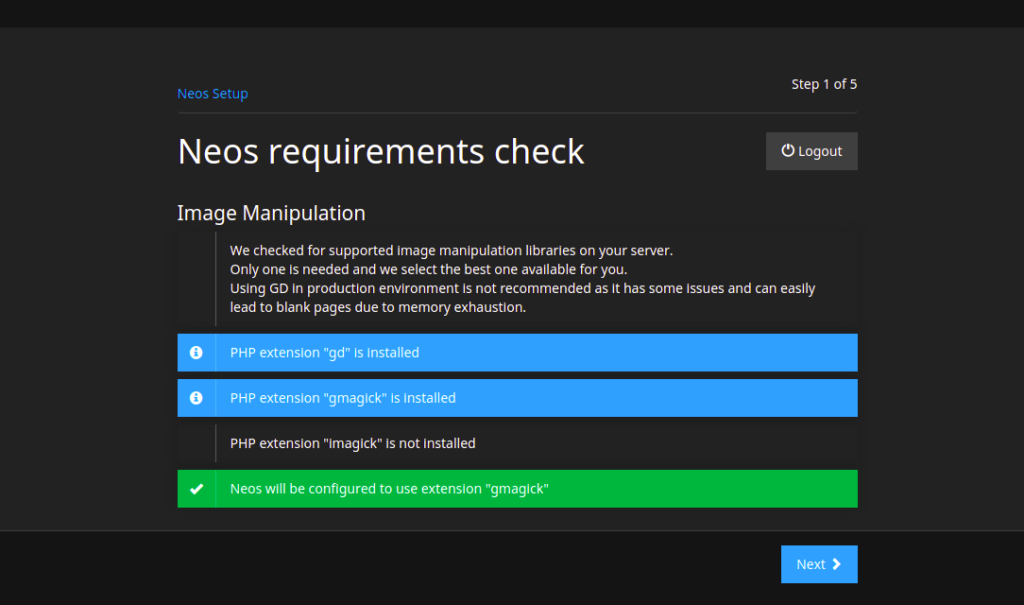
Click on the Next button. You should see the database configuration page:
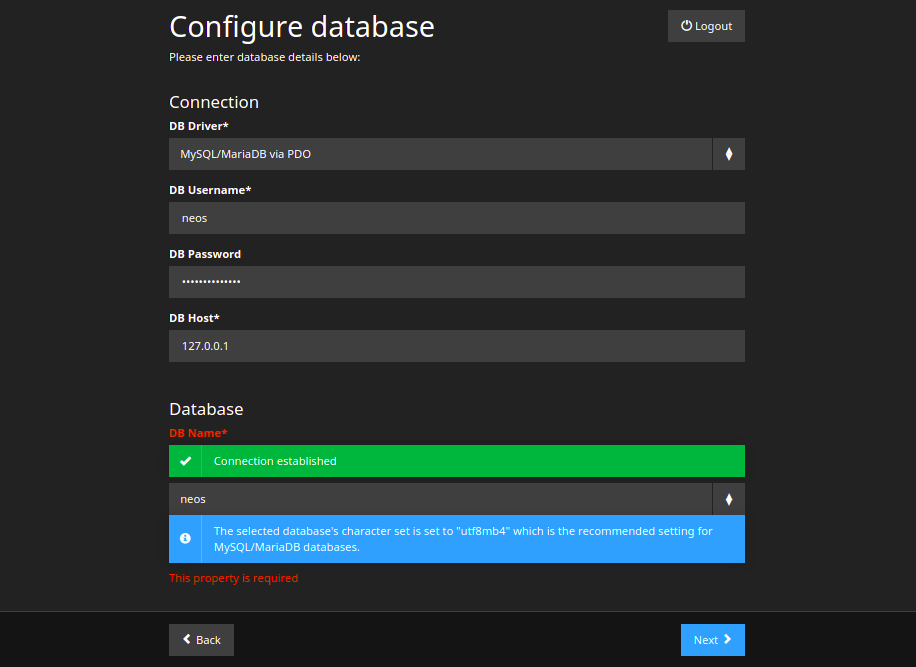
Provide your database details and click on the Next button. You should see the administrator account setup page:
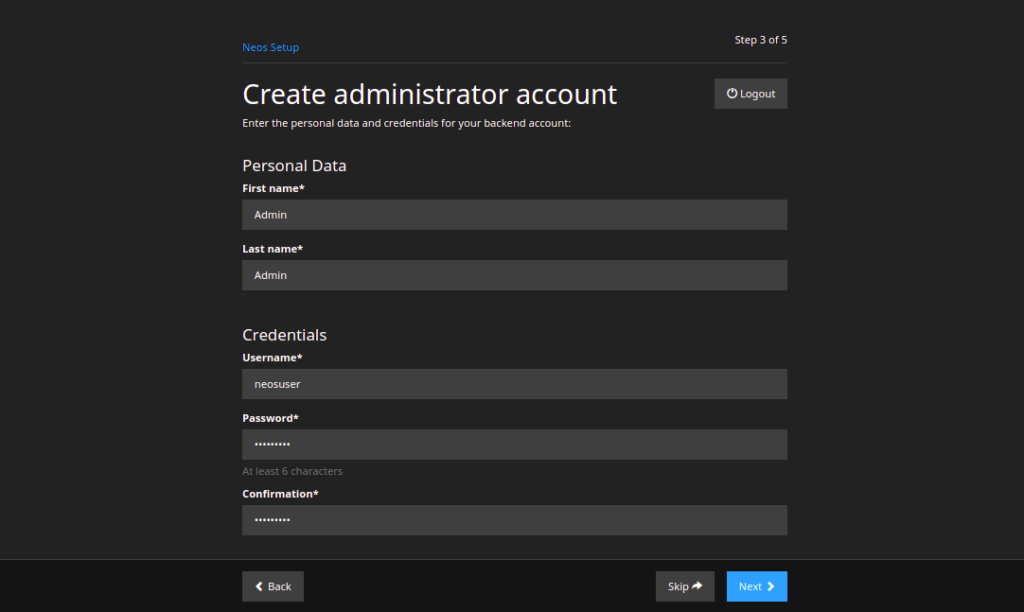
Provide your admin username, password and click on the Next button. You should see the site configuration page:

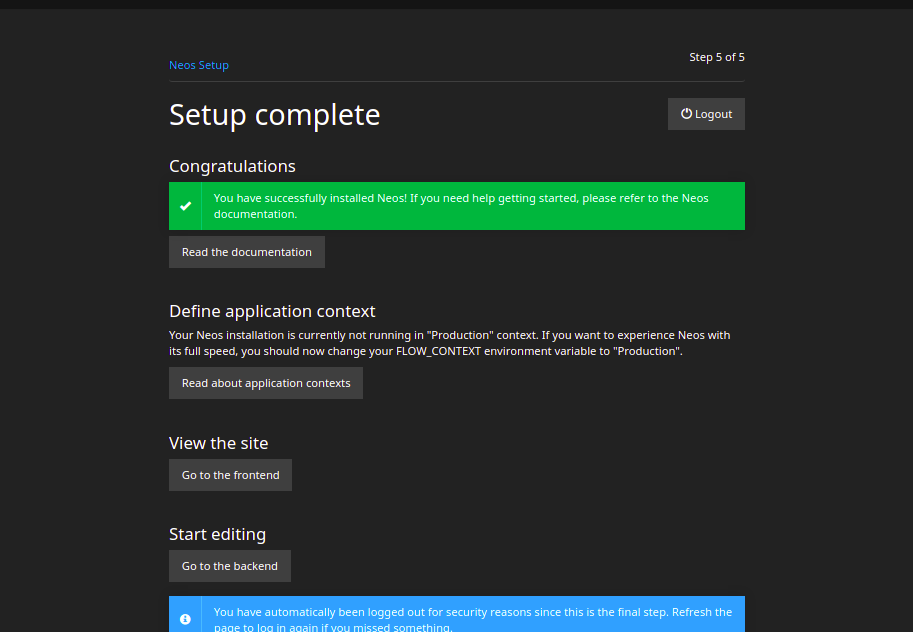
Provide your Sitename and click on the Next button. Once the installation is completed, you should see the following page:
Click on the go to the backend. You should see the Neos CMS login page:

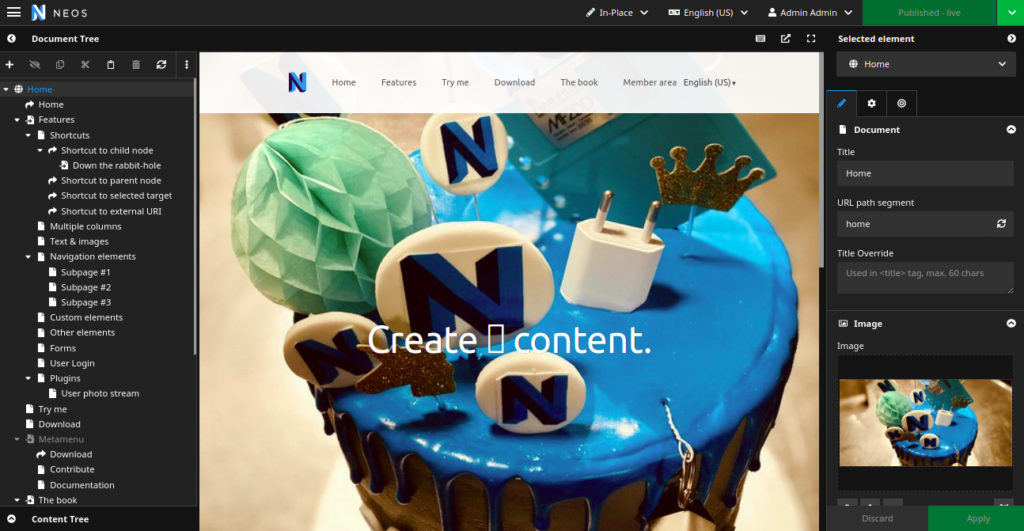
Provide your admin username, password and click on the Login button. You will be redirected to the Neos CMS dashboard:
Of course, you don’t need to do any of this if your server is covered by our Managed Linux Support services in which case you can simply ask our expert Linux admins to install Neos CMS onto your Ubuntu 20.04 server for you. They are available 24×7 and will take care of your request immediately.
PS. If you liked this post, please share it with your friends on the social networks using the buttons below, or simply leave a comment in the comment section. Thanks
