In this tutorial, we will guide you through the steps of installing Dotclear on a CentOS 7 server, with Apache web server, PHP and MySQL.

Dotclear comes with a lot of handy features out of the box, such as:
- Fast and easy publication system
- Fully customizable themes, without changing or editing any code
- User-friendly administrative panel
- Flexible template system
- Built-in anti spam system
- Lots of themes and plugins
- Complete trackback support
- SEO friendly
- and many more…
Requirements
- For the purposes of this tutorial you will need a server running CentOS 7.
- System user with root privileges
- PHP version 5.6 or newer with mbstring, iconv, simpleXML, SPL PHP extensions enabled
- MySQL, PostgreSQL or SQLite database server
- Apache or Nginx web server
Step 1. Log in and Update the System
In order to start installing Dotclear on your CentOS 7 server, you have to login to the server via SSH as user root
ssh root@IP_Address -p Port_Number
Don’t forget to replace ‘IP_Address‘ and ‘Port_Number‘ with your server’s actual IP address and SSH port number.
Once you are in, run the following command to update all installed packages on your server
yum -y update
Step 2. Install the Apache Web Server
A web server is required to serve the Dotclear files, so in the next step we will install Apache web server, which is the most popular web server in the world. It can easily be installed from the official CentOS 7 repositories using the ‘yum’ package manager. Run this command to install Apache:
yum -y install httpd
After the installation is completed, run the following commands to start the Apache web server and enable it to automatically start after a server reboot
systemctl start httpd
systemctl enable httpd
To verify that the installation is OK and that the web server is properly running, issue the following command:
systemctl status httpd
Output
httpd.service - The Apache HTTP Server
   Loaded: loaded (/usr/lib/systemd/system/httpd.service; enabled; vendor preset: disabled)
   Active: active (running) since Thu 2019-04-25 04:18:22 CDT; 39s ago
     Docs: man:httpd(8)
           man:apachectl(8)
 Main PID: 703 (httpd)
   Status: "Total requests: 0; Current requests/sec: 0; Current traffic:   0 B/sec"
   CGroup: /system.slice/httpd.service
           ââ703 /usr/sbin/httpd -DFOREGROUND
           ââ883 /usr/sbin/httpd -DFOREGROUND
           ââ884 /usr/sbin/httpd -DFOREGROUND
Step 3. Install the MariaDB Database Server
Dotclear uses a databse to store and retrieve the website information. For this purpose we will install and use MariaDB database server which is a drop-in replacement for MySQL. The installation of MariaDB is easy and it can be done using the following commands
yum -y install mariadb mariadb-server
Once the MariaDB database server is installed, start it and enable it to automatically start after a server reboot
systemctl start mariadb
systemctl enable mariadb
Check if MariaDB is up and running:
systemctl status mariadb
The output will look something like this:
mariadb.service - MariaDB database server
   Loaded: loaded (/usr/lib/systemd/system/mariadb.service; enabled; vendor preset: disabled)
   Active: active (running) since Fri 2019-04-26 06:09:18 CDT; 33s ago
  Process: 22143 ExecStartPost=/usr/libexec/mariadb-wait-ready $MAINPID (code=exited, status=0/SUCCESS)
  Process: 22110 ExecStartPre=/usr/libexec/mariadb-prepare-db-dir %n (code=exited, status=0/SUCCESS)
 Main PID: 22141 (mysqld_safe)
   CGroup: /system.slice/mariadb.service
           ââ22141 /bin/sh /usr/bin/mysqld_safe --basedir=/usr
Next, run the mysql_secure_installation post-installation script provided by MariaDB to strengthen the security of the database server and set a root password. You can use the following options:
Set root password? [Y/n] Y
Remove anonymous users? [Y/n] Y
Disallow root login remotely? [Y/n] Y
Remove test database and access to it? [Y/n] Y
Reload privilege tables now? [Y/n] Y
If it at any point asks you to enter the current MySQL/MariaDB root password, just press the [Enter] key, as no password is set by default.
Step 4. Create a MariaDB User and Database
In this step, we will create a new MariaDB user and database which will be used for the Dotclear installation. Log in to the MariaDB server CLI as the root user and issue the following commands
mysql -u root -p

MariaDB [(none)]> CREATE DATABASE dotclear;
MariaDB [(none)]> GRANT ALL PRIVILEGES ON dotclear.* TO dotclearuser@localhost IDENTIFIED BY 'PASSWORD';
MariaDB [(none)]> FLUSH PRIVILEGES;
MariaDB [(none)]> \q
Don’t forget to replace ‘PASSWORD‘ with an actual, strong password.
Step 5. Download Dotclear
Go to Dotclear’s download page and download the latest stable release of the application. At the moment of writing this article it is version 2.14.3. We’ve included the download link in the command below for you:
wget http://download.dotclear.org/latest.zip
Unpack the downloaded ZIP archive to the document root directory of your web server:
uunzip latest.zip -d /var/www/html/
All Dotclear files will be extracted in a new ‘dotclear’ directory. Make sure that the Apache user has access to the Dotclear files:
chown -R apache:apache /var/www/html/dotclear/
Step 6. Create an Apache Virtual Host
Next, we will create Apache virtual host directive in order to be able to access Dotclear with a domain name. We will use yourdomain.com as a domain name. You have to replace all occurrences of this domain name in the configuration file.
Create Apache configuration with the following content
nano /etc/httpd/conf.d/dotclear.conf

<VirtualHost *:80>
    ServerAdmin admin@yourdomain.com
    ServerName yourdomain.com ServerAlias www.your_domain.com DocumentRoot /var/www/html/dotclear <Directory /var/www/html/dotclear> Options Indexes FollowSymLinks AllowOverride All </Directory> ErrorLog ${APACHE_LOG_DIR}/yourdomain.com_error.log CustomLog ${APACHE_LOG_DIR}/yourdomain.com_access.log combined </VirtualHost>
Save the configuration file and restart the Apache web server for the changes to take effect
systemctl restart httpd
Step 7. Complete the Installation
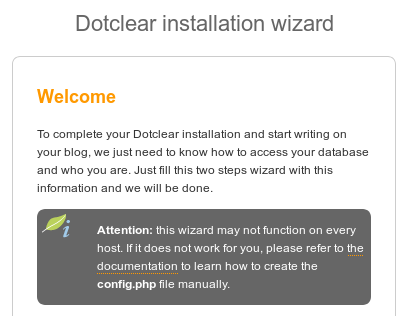
Finally, all the requirements are installed on the server and we can continue with the installation through Dotclear’s web-based installation wizard. Open your preferred web browser, navigate to http://yourdomain.com and follow the on-screen instructions in order to complete the Dotclear installation and configuration. The installation wizard will check if your server meets all the requirements and you will be prompted to enter the details of the MariaDB database we have created earlier in this tutorial.
For more details on how to configure and use Dotclear, please check their official documentation.

PS. If you enjoyed reading this blog post on how to install Dotclear on CentOS 7, feel free to share it on social networks using the share shortcuts, or simply leave a comment in the comments section. Thank you.


