
In this tutorial, we will explain step-by-step how to install SuiteCRM on Debian 13. SuiteCRM is an open-source CRM (Customer Relationship Management) platform written in PHP. The key features and functions of SuiteCRM include sales automation, marketing automation, customer service, data management, and customization. In this blog post, we will also install the LAMP stack, which is required for SuiteCRM to work.
Installing SuiteCRM on Debian 13 with the LAMP stack is a straightforward process that may take up to 15 minutes. Let’s get things done!
Prerequisites
- A server running Debian 13 OS
- User privileges: root or non-root user with sudo privileges
- A valid domain with a pointed A record to the server IP address
Step 1. Update the System
Before we start installing the LAMP stack and SuiteCRM, we assume you have a freshly installed OS, so that we will update the system packages to their latest versions. To do that, execute the following command:
sudo apt update -y && sudo apt upgrade -y
Step 2. Install the LAMP stack
LAMP stack stands for Linux, Apache, MySQL, and PHP. SuiteCRM software cannot work without this stack, because without it we cannot create a database, install SuiteCRM, or configure the domain name. First, we will install the Apache web server. To do that, execute the following command:
sudo apt install apache2 -y
Once installed, start and enable the Apache service:
sudo systemctl start apache2 && sudo systemctl enable apache2
Check the status of the service:
sudo systemctl status apache2
You should get the following output:</p
root@host:~# sudo systemctl status apache2
● apache2.service - The Apache HTTP Server
     Loaded: loaded (/usr/lib/systemd/system/apache2.service; enabled; preset: enabled)
     Active: active (running) since Wed 2025-12-10 19:48:37 CST; 24s ago
 Invocation: 59b4435ce5774ca594893f546af0e77a
       Docs: https://httpd.apache.org/docs/2.4/
   Main PID: 9360 (apache2)
      Tasks: 55 (limit: 4640)
     Memory: 5.2M (peak: 5.6M)
        CPU: 113ms
     CGroup: /system.slice/apache2.service
Next in the LAMP stack is PHP, with its extensions. To install it, execute the following command:
sudo apt install php libapache2-mod-php php-mysql php-cgi php-mysqli php-pear php-phpseclib php-mbstring php-zip php-gd php-curl php-common php-intl php-soap php-ldap php-imap php-pear php-dev -y
Once installed, execute the following command to check the PHP version:
php -v
You should get the following output:
root@host:~# php -v
PHP 8.4.11 (cli) (built: Aug  3 2025 07:32:21) (NTS)
Copyright (c) The PHP Group
Built by Debian
Zend Engine v4.4.11, Copyright (c) Zend Technologies
    with Zend OPcache v8.4.11, Copyright (c), by Zend Technologies
The last component of the LAMP stack will be the MariaDB database service. To install it, execute the command below:
sudo apt install mariadb-server -y
Once installed, start and enable the MariaDB service:
sudo systemctl start mariadb && sudo systemctl enable mariadb
Check the status of the service:
sudo systemctl status mariadb
You should get the following output:
root@host:~# sudo systemctl status mariadb
● mariadb.service - MariaDB 11.8.3 database server
     Loaded: loaded (/usr/lib/systemd/system/mariadb.service; enabled; preset: enabled)
     Active: active (running) since Wed 2025-12-10 19:59:18 CST; 15s ago
 Invocation: 084116f7a45a4ddfabbfea838072df7f
       Docs: man:mariadbd(8)
             https://mariadb.com/kb/en/library/systemd/
   Main PID: 24128 (mariadbd)
     Status: "Taking your SQL requests now..."
      Tasks: 13 (limit: 30624)
     Memory: 125M (peak: 129.7M)
        CPU: 7.485s
     CGroup: /system.slice/mariadb.service
Step 3. Create SuiteCRM Database and User
To create the SuiteCRM database, database user, and assign the privileges, log in to the MariaDB terminal and execute the following commands:
CREATE USER 'suitecrmuser'@'localhost' IDENTIFIED BY 'StrongPasswordHere';

CREATE DATABASE suitecrDB;

GRANT ALL PRIVILEGES ON suitecrDB.* TO 'suitecrmuser'@'localhost';

FLUSH PRIVILEGES;

EXIT;
Step 4. Download and Install SuiteCRM
Download the SuiteCRM into the Apache document root:
mkdir /var/www/html/suitecrm

cd /var/www/html/suitecrm

https://suitecrm.com/download/166/suite89/565627/suitecrm-8-9-1.zip

unzip /var/www/html/suitecrm/suitecrm-8-9-1.zip -d /var/www/html/suitecrm

rm suitecrm-8-9-1.zip
Next is to set the correct permissions:
chown -R www-data:www-data /var/www/html/suitecrm/

find . -type f -exec chmod 644 {} \;

find . -type d -exec chmod 755 {} \;
Step 5. Create Apache Virtual Host File
The Apache Configuration file for our SuiteCRM installation is required to access it via a domain name. To create the file, execute the following command:
sudo touch /etc/apache2/sites-available/suitecrm.conf
Open the file and paste the following lines of code
<VirtualHost *:80>
ServerName yourdomainhere.com
DocumentRoot /var/www/html/suitecrm/public

<Directory /var/www/html/suitecrm>
AllowOverride All
</Directory>

ErrorLog ${APACHE_LOG_DIR}/error.log
CustomLog ${APACHE_LOG_DIR}/access.log combined

</VirtualHost>
Save the file and close it.
Enable the Apache configuration files for SuiteCRM along with the rewrite module.
sudo a2enmod rewrite

sudo a2ensite suitecrm.conf

sudo a2dissite 000-default.conf
Check the Apache2 syntax:
apachectl -t
You should receive the following output:
root@host:/var/www/html/suitecrm# apachectl -t
Syntax OK
If the syntax is OK, restart the Apache service.
systemctl restart apache2
That’s it. Now you can access the SuiteCRM at http://yourdomainhere.com
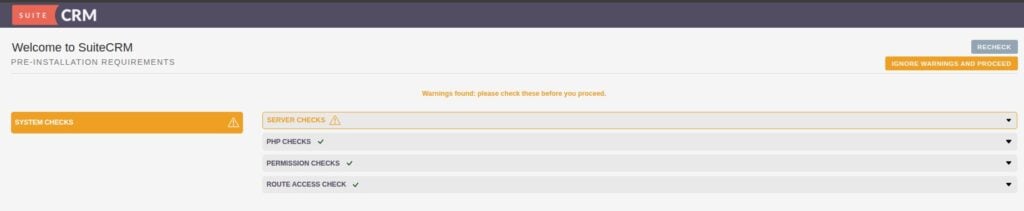
Step 6. Finish the SuiteCRM Installation
Once you access the domain in the browser, you will see a screen that performs a pre-install prerequisites check. If there are no errors, we are good to go, and ignore all warnings.
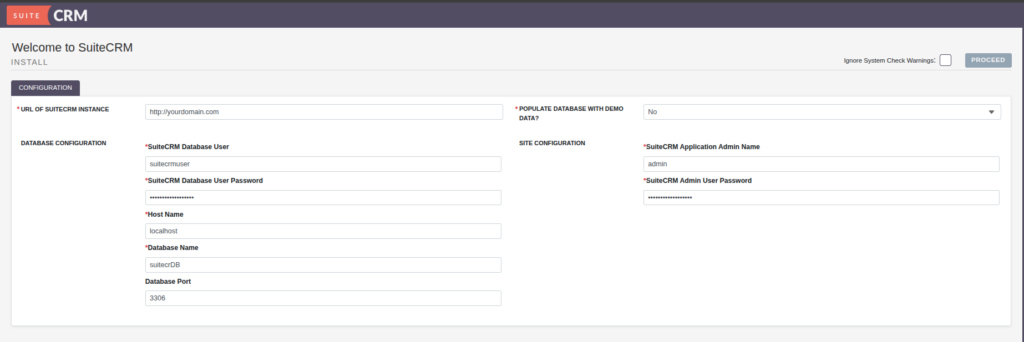
On the second screen, we need to enter the database credentials we set before in step 3 and also create an administrator username and password:
Enter the administrator credentials you set above, and click on the “Log In” button. You should see the following screen:
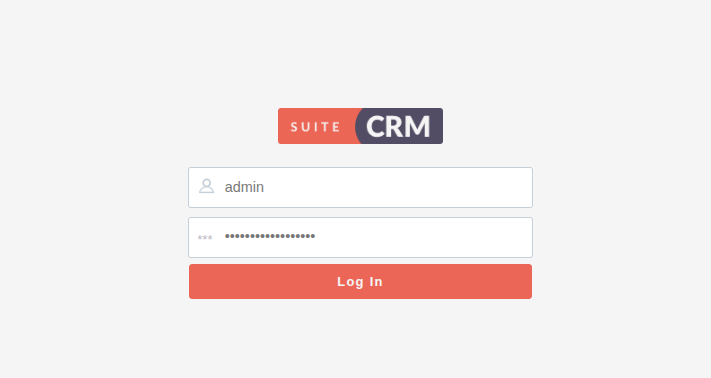
You should get the following welcome SuiteCRM screen:

That’s it. You successfully installed SuiteCRM on Debian 13.
If you have any difficulties with this installation, our Linux admins can help with any aspect. You need to sign up for one of our monthly server management or per-incident server support plans. Do not hesitate to contact us anytime you want. We are available 24/7.
If you liked this post on how to install SuiteCRM on Debian 13, please share it with your friends or leave a comment below.
