Asset management is the process of managing and maintaining a company’s assets to maximize their value and use. However, manual asset management can be time-consuming and costly. Therefore, a solution is needed to help companies manage their assets effectively and efficiently. This is the basis for the birth of asset management applications.
Snipe-IT is an open-source IT asset management tool built on Laravel. It is a free application designed to help small and medium businesses better manage their assets. The application has an easy-to-use interface and can help users organize their inventory quickly and easily. Snipe-it also has a feature to monitor the status and condition of assets. This tutorial will show you how to install Snipe-IT on Ubuntu 24.04.
Prerequisites
- Ubuntu 24.04 VPS
- SSH root access or a regular system user with sudo privileges
Conventions
# – given commands should be executed with root privileges either directly as a root user or by use of sudo command
$ – given commands should be executed as a regular user
Step1. Update the System
First of all, we need to log in to our Ubuntu 24.04 VPS through SSH:
ssh root@IP_Address -p Port_number
You must replace ‘IP_Address‘ and ‘Port_number‘ with your server’s IP address and SSH port number. Additionally, replace ‘root’ with the username of the system user with sudo privileges. Subsequently, let us ensure that we are operating on Ubuntu 24.04. You may verify this by executing the command provided below.
# lsb_release -a
You should get this as the output:
No LSB modules are available.
Distributor ID: Ubuntu
Description:    Ubuntu 24.04.1 LTS
Release:        24.04
Codename:       noble
Then, run the following command to make sure that all installed packages on the server are updated to their latest available versions:
# apt update
Step 2. Install PHP
According to the Snipe-IT documentation page, it requires PHP version 8.1.0 or higher. At the time of this writing, Ubuntu 24.04 ships with PHP 8.3. In this step, we will install PHP 8.3 and the required extensions.
# apt install php-{bcmath,common,ctype,curl,fileinfo,fpm,gd,iconv,intl,mbstring,mysql,soap,xml,xsl,zip,cli}
That’s it. PHP and its extensions are installed.
Step 3. Install Composer
Composer is a tool for dependency management in PHP. We need to use Composer to manage Snipe-IT components and their dependencies. On Ubuntu 24.04, the latest version of Composer in the default repository is version 2.7.1. We will install Composer from the getcomposer.org website to get the latest stable version. Let’s execute the following command below to download the Composer installer using wget:
# wget -O composer-setup.php https://getcomposer.org/installer
Once downloaded, we need to execute the following command to install and setup composer on our Ubuntu machine:
# php composer-setup.php --install-dir=/usr/local/bin --filename=composer
Verify the installation and check the installed build version of Composer:
# composer -V
The command above will return an output like this.
Composer version 2.8.1 2024-10-04 11:31:01
PHP version 8.3.6 (/usr/bin/php8.3)
As you can see, we have installed the more recent composer version.
Step 4. Install MariaDB and Create a Database
The latest stable version of Snipe-IT is based on the Laravel 10 framework. Although Laravel supports MySQL/MariaDB, PostgreSQL, SQLite, and MSSQL, Snipe-IT only supports MySQL/MariaDB. In this step, we will install the MariaDB server from the Ubuntu repository. To install the MariaDB server, execute this command:
# apt install mariadb-server
Once installed on an Ubuntu machine, MariaDB will automatically run. Now, we can proceed with creating a new database and a user for our Snape-IT website.
# mysql
Run these commands in MySQL shell.
mysql> CREATE DATABASE snipeit;
mysql> GRANT ALL on snipeit.* to snipeit@localhost identified by 'm0d1fyth15';
mysql> FLUSH PRIVILEGES;
mysql> \q
Make sure to replace the password “m0d1fyth15” in the command above with a stronger one.
Step 4. Download Snipe-IT
Navigate to your web server’s root directory using the command below.
# cd /var/www/html
Then, clone the Snipe-IT GitHub repository and save the contents in the snipe-it directory using the command below.
# git clone https://github.com/snipe/snipe-it snipe-it
If the command returns an error message about git, you must install git first and then rerun the command.
# apt install git -y
Next, go to the Snipe-IT directory created using the command below.
# cd snipe-it
Copy the .env.example configuration file to .env and modify the content.
# cp .env.example .env
Open the config file using any file editor you like and enter the database information we created in the previous step.
# nano .env
Under basic app settings, enter your app URL and timezone, e.g.
APP_URL=http://snipeit.yourdomain.com
APP_TIMEZONE='America/New_York'
Then, under database settings, enter your database credentials, e.g.
DB_DATABASE=snipeit
DB_USERNAME=snipeit
DB_PASSWORD=m0d1fyth15
Save the file, then exit from the file editor.
Set the ownership and permissions for the Snipe-IT data directory.
# chown -R www-data: /var/www/html/snipe-it
Next, update Snipe-IT dependencies.
# composer update --no-plugins --no-scripts
After updating the composer, we must install all application dependencies by executing the following command.
# composer install --no-dev --prefer-source --no-plugins --no-scripts
In the /var/www/snipe-it/.env the configuration file you created previously, generate the Laravel APP Key-value using the command below.
# php artisan key:generate
Press Y and hit ENTER. The command will generate a key and write it as the APP_KEY value in your .env file.
Step 4. Install and Configure Nginx
As informed earlier, Snipe-IT is based on Laravel 10. Laravel supports multiple web servers like Apache, Nginx, or Litespeed. In this article, we are going to install and configure nginx.
# apt install nginx
Once installed, if your server did not have a web server installed, nginx will automatically start, and it’s already configured to run upon reboot. So we can continue to create a new nginx server block for our Snipe-IT website.
# nano /etc/nginx/conf.d/snipeit.conf
Insert the following into the file, and replace snipeit.yourdomain.com with your domain or subdomain name pointing to your server IP address.
server {
        listen 80;
        server_name snipeit.yourdomain.com;
        root /var/www/html/snipe-it/public;

        index index.php;

        location / {
                try_files $uri $uri/ /index.php?$query_string;

        }

        location ~ \.php$ {
				include fastcgi.conf;
                include snippets/fastcgi-php.conf;
                fastcgi_pass unix:/run/php/php8.3-fpm.sock;
				fastcgi_split_path_info ^(.+\.php)(/.+)$;
        		fastcgi_param SCRIPT_FILENAME $document_root$fastcgi_script_name;
        		include fastcgi_params;
        }

}
Save the file then exit. We need to restart nginx to apply the changes we made.
# systemctl restart nginx
Step 5. Install Snipe-IT
Let’s open http://snipeit.yourdomain.com and complete the installation through the web browser. This is the domain/subdomain we configured earlier in nginx. Make sure the domain/subdomain is already pointing to your server.
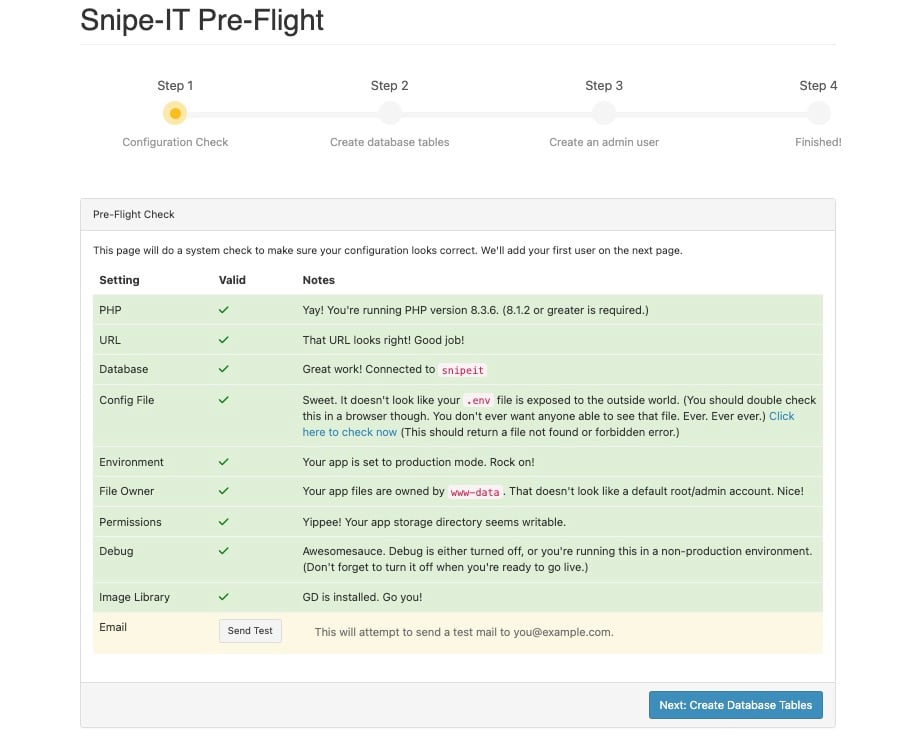
Click on Next: Create Database Tables to continue
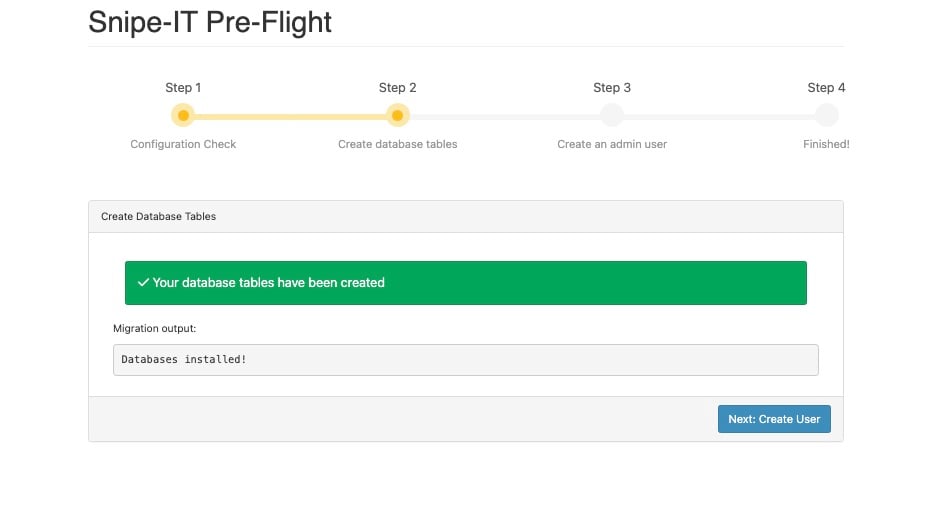
Database tables has been imported, now click on Next: Create User to continue.
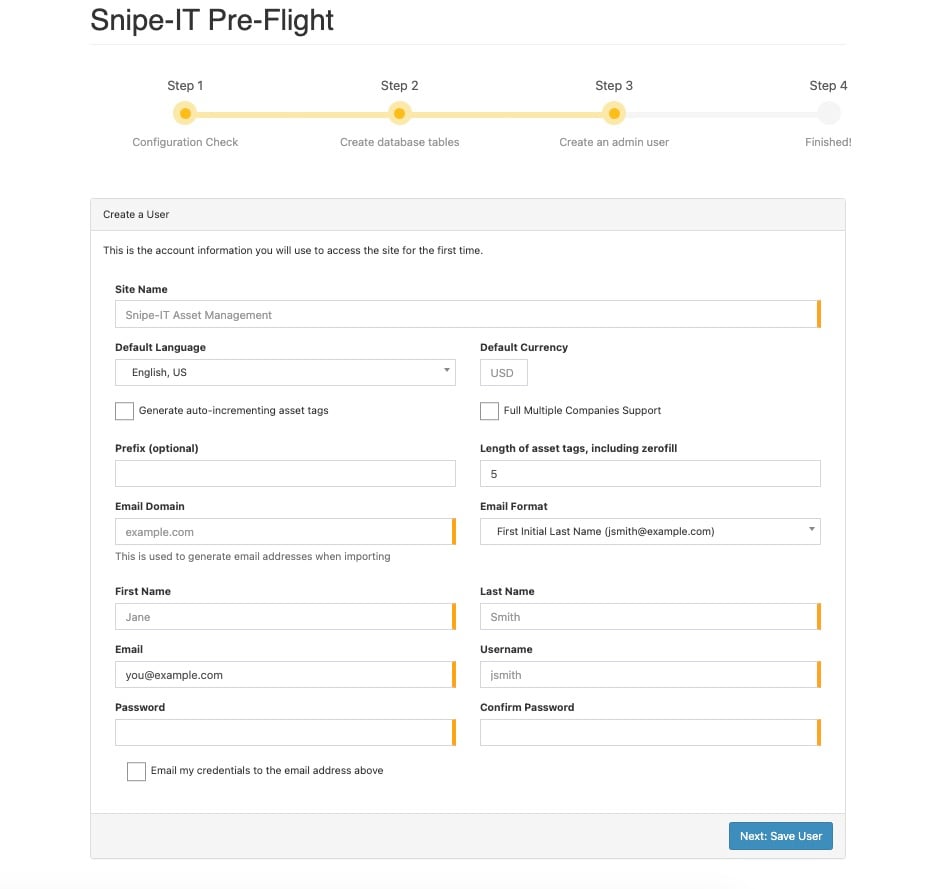
Fill all the fields in this window, then click on Next: Save User
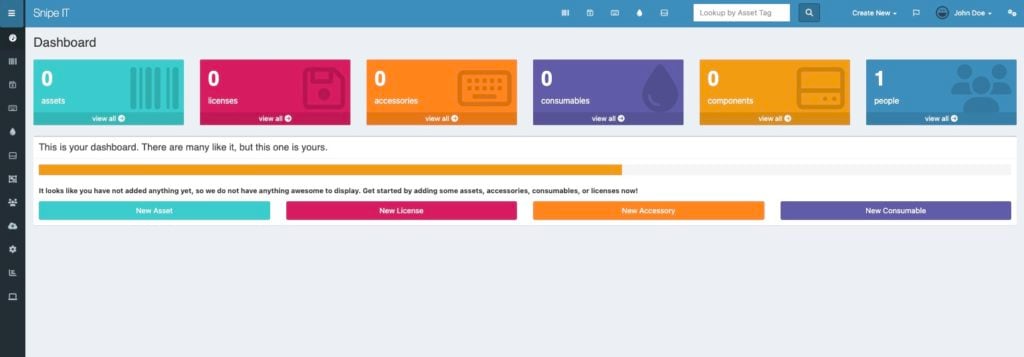
You will be brought to the website dashboard.
That’s it! You have successfully installed Snipe-IT. Now, it is time to configure your Snipe-IT website by customizing it in the dashboard. To start working on your website, you can read the Snipe-It documentation page.
If you have an active server management service with us, you don’t have to follow this post and install Snipe-IT on your Ubuntu 24.04 machine. You can log in to the client area and submit a ticket to request our admins install Snipe-IT on your Ubuntu server. Our experienced administrators are available 24×7 and will take care of your request immediately.
If you liked this post on how to install Snipe-IT On Ubuntu 24.04, please share it with your friends or leave a reply below.


Very good install guide for snipeIT!! Worked out of the box!
very helpful
500 – Server Error.
In this case, you’d need to check the server configuration and logs for more information about this.
If you use nginx as web server and php fpm from REMI , u need to grant acces for apache (yes apache cause php-fpm from REMI is working default as apache user).
Just grant
sudo chown -R apache:apache /var/www/html/snipe-it-master
sudo chmod -R 775 /var/www/html/snipe-it-master/storage
sudo chmod -R 775 /var/www/html/snipe-it-master/bootstrap/cache
For me it helped and snipe-it started. Before i also got 500 error