
This blog post explains how to install phpMyAdmin on the Debian 13 operating system. phpMyAdmin is an open-source, web-based tool used for administering MySQL and MariaDB database systems. phpMyAdmin is written in PHP and offers a great GUI that simplifies the processes for creating, modifying, and deleting databases and tables easily. The application works in the browser, and when accessed, it connects to the database server. To function correctly, phpMyAdmin requires the LAMP stack, so we must install it first before we set up phpMyAdmin.
Installing phpMyAdmin with the LAMP stack is a straightforward process that may take up to 15 minutes. Let’s get started!
Prerequisites
- A server running Debian 13 OS
- User privileges: root or non-root user with sudo privileges
- A valid domain with a pointed A record to the server
Step 1. Update the System
Before we begin the LAMP stack installation, we will update the system packages to their latest versions. To do that, execute the following command:
sudo apt update -y && sudo apt upgrade -y
Step 2. Install Apache Web server
First, the LAMP stack for installation will be the Apache Web server. To install Apache, execute the following command:
sudo apt install apache2 -y
Once installed, start and enable the Apache service:
sudo systemctl start apache2 && sudo systemctl enable apache2
Check the status of the service:
sudo systemctl status apache2
You should get the following output:</p
root@host:~# sudo systemctl status apache2
● apache2.service - The Apache HTTP Server
     Loaded: loaded (/usr/lib/systemd/system/apache2.service; enabled; preset: enabled)
     Active: active (running) since Thu 2025-05-29 01:04:16 CDT; 3min 43s ago
 Invocation: 81c847d196544470b3ed34005618c02a
       Docs: https://httpd.apache.org/docs/2.4/
   Main PID: 10993 (apache2)
      Tasks: 55 (limit: 4640)
     Memory: 5.1M (peak: 5.4M)
        CPU: 137ms
     CGroup: /system.slice/apache2.service
             ├─10993 /usr/sbin/apache2 -k start
             ├─10995 /usr/sbin/apache2 -k start
             └─10997 /usr/sbin/apache2 -k start

May 29 01:04:16 host.test.vps systemd[1]: Starting apache2.service - The Apache HTTP Server...
Step 3. Install PHP with Modules
Next in the LAMP stack will be the PHP 8.4 version, along with its PHP extensions, which are necessary for phpMyAdmin to function correctly. To install PHP with its extensions, execute the following command:
sudo apt install php php-cgi php-mysqli php-pear php-mbstring libapache2-mod-php php-common php-phpseclib php-mysql -y
Once installed, execute the following command to check the PHP version:
php -v
You should get the following output:
root@host:~# php -v
PHP 8.4.6 (cli) (built: Apr 14 2025 16:59:47) (NTS)
Copyright (c) The PHP Group
Zend Engine v4.4.6, Copyright (c) Zend Technologies
    with Zend OPcache v8.4.6, Copyright (c), by Zend Technologies
Step 4. Install MariaDB Database Server
The last component of the LAMP stack is the MariaDB database service. To install it, execute the command below:
sudo apt install mariadb-server -y
Once installed, start and enable the MariaDB service:
sudo systemctl start mariadb && sudo systemctl enable mariadb
Check the status of the service:
sudo systemctl status mariadb
You should get the following output:
root@host:~# sudo systemctl status mariadb
● mariadb.service - MariaDB 11.8.1 database server
     Loaded: loaded (/usr/lib/systemd/system/mariadb.service; enabled; preset: enabled)
     Active: active (running) since Thu 2025-05-29 01:23:07 CDT; 13s ago
 Invocation: 7a90da2638434545bb8180ee1aad899e
       Docs: man:mariadbd(8)
             https://mariadb.com/kb/en/library/systemd/
   Main PID: 16726 (mariadbd)
     Status: "Taking your SQL requests now..."
      Tasks: 14 (limit: 30624)
     Memory: 296.7M (peak: 386.8M)
        CPU: 12.848s
     CGroup: /system.slice/mariadb.service
             └─16726 /usr/sbin/mariadbd
Now, let’s create a database and a user that we will use for logging into phpMyAdmin later. To do that, log into the MariaDB console using the mysql command in the terminal and execute the following commands:
CREATE USER 'user'@'localhost' IDENTIFIED BY 'YourStrongPassword';

CREATE DATABASE database;

GRANT ALL PRIVILEGES ON database.* TO 'user'@'localhost';

FLUSH PRIVILEGES;

EXIT;
Step 5. Download and install phpMyAdmin
The LAMP stack is already installed, so we can proceed with installing phpMyAdmin. First, we will download it into the Apache document root:
cd /var/www/html

wget https://www.phpmyadmin.net/downloads/phpMyAdmin-latest-all-languages.tar.gz
Once downloaded, extract the archive, rename it, and set the correct permissions:
tar -xvzf phpMyAdmin-latest-all-languages.tar.gz

rm phpMyAdmin-latest-all-languages.tar.gz

mv phpMyAdmin-5.2.2-all-languages phpmyadmin

chown -R www-data:www-data phpmyadmin/
Step 6. Create Apache Virtual Host File
Now, the last step would be creating a Virtual Host file so we can configure the phpMyAdmin to be accessible via a domain name. To do that, execute the following command:
sudo touch /etc/apache2/sites-available/phpmyadmin.conf
Open the file and paste the following lines of code
<VirtualHost *:80>
ServerName pma.yourdomain.com
DocumentRoot /var/www/html/phpmyadmin

<Directory /var/www/html/phpmyadmin>
AllowOverride All
</Directory>

ErrorLog ${APACHE_LOG_DIR}/error.log
CustomLog ${APACHE_LOG_DIR}/access.log combined

</VirtualHost>
Save the file and close it.
Enable the Apache configuration files for WordPress along with the rewrite module.
sudo a2enmod rewrite

sudo a2ensite phpmyadmin.conf
Check the Apache2 syntax:
apachectl -t
You should receive the following output:
root@host:/var/www/html/phpmyadmin# apachectl -t
Syntax OK
If the syntax is OK, restart the Apache service.
systemctl restart apache2
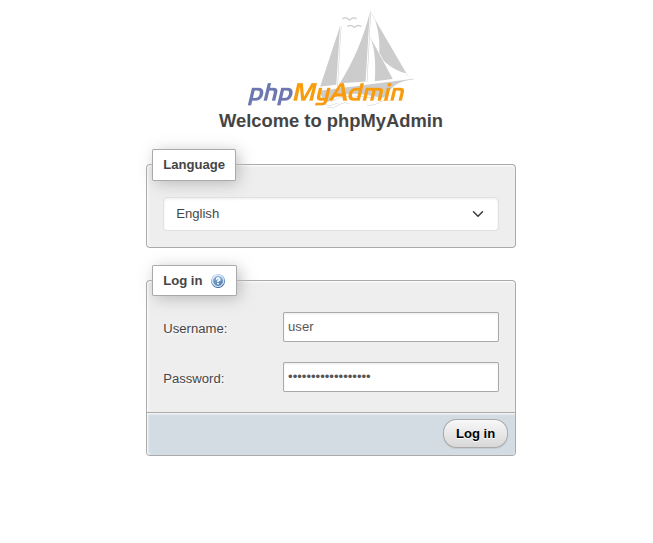
That’s it. Now you can access the phpMyAdmin at http://pma.yourdomain.com and log in with the database user and password created in step 4.
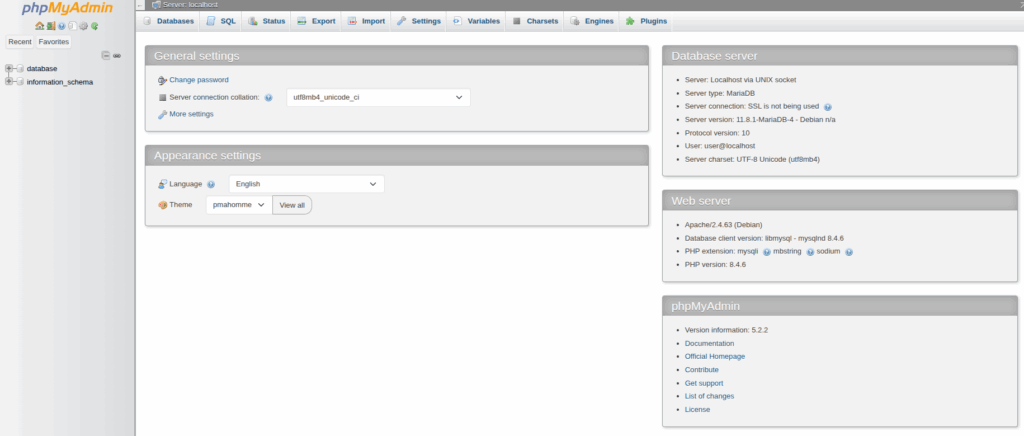
Once logged in, you will be redirected to the phpMyAdmin GUI:
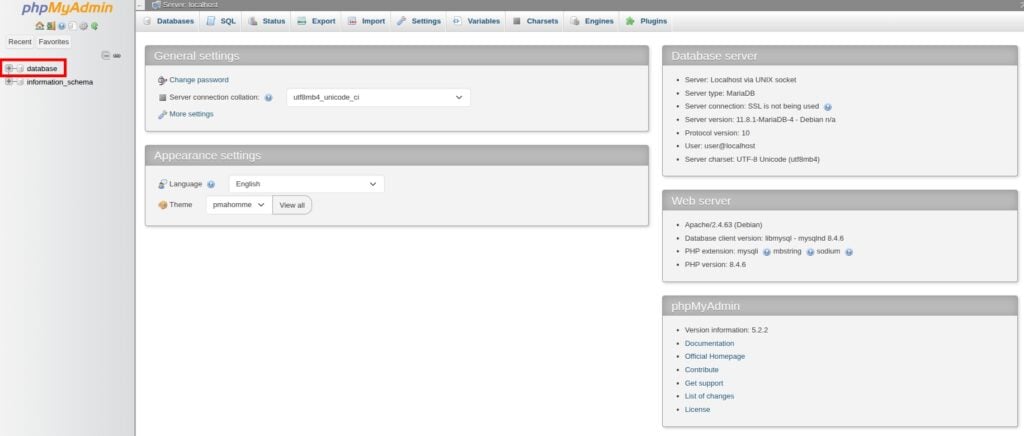
As you can see, in the top left corner, the database called “database” that we created in step 4 is listed.
That’s it. You successfully installed phpMyAdmin with the LAMP stack on Debian 13.
If you encounter difficulties with this installation, our Linux administrators will be happy to assist you with any aspect. You need to sign up for one of our monthly management or per-incident server support plans. Please do not hesitate to contact us at your convenience. We are available 24/7.
If you liked this post on how to install phpMyAdmin on Debian 13 OS, please share it with your friends or leave a comment below. Thanks.
