
Easy Hosting Control Panel (EHCP) is a free and open source control panel written in PHP, which can be used to host your websites on your virtual private server. Easy Hosting Control Panel provides a simple and easy to use interface, for creating and managing users, websites, MySQL databases, DNS management, ftp and email accounts, and much more. In this tutorial, we will show you how to install the Easy Hosting Control Panel on Ubuntu 16.04. Let’s get started.
1. Log in via SSH and update the system
Before we begin, you will need to login to your server via SSH as user root:
ssh root@IP_ADDRESS -p PORT_NUMBER
and replace “IP_ADDRESS” and “PORT_NUMBER” with your actual server IP address and SSH port number.
Let’s also make sure that your Ubuntu 16.04 server is up-to-date by running the following commands:
apt-get update
apt-get upgrade
2. Download EHCP
You can download the latest EHCP version from the official website with the following command:
wget -O ehcp.tgz ehcp.net/ehcp_yeni.tgz
and then extract the archive by executing:
tar -zxvf ehcp.tgz
3. Install EHCP
Next, we can enter the ehcp directory with:
cd ehcp
and run the installation script in order to start the EHCP installation:
./install.sh
The installation script will install all the necessary packages and services.
We will go through all the required steps and make sure the installation is completed properly.
During the installation process please read and follow all the instructions carefully.
Let’s start by pressing Enter to continue.
STAGE 1
=====================================================================

--------------------EHCP PRE-INSTALLER 0.38.5.b -------------------------
-----Easy Hosting Control Panel for Ubuntu, Debian and alikes--------
-------------------------www.ehcp.net--------------------------------
---------------------------------------------------------------------

Now, ehcp pre-installer begins, a series of operations will be performed and main installer will be invoked.
If any problem occurs, refer to www.ehcp.net forum section, or contact us, mail:
[email protected]
Please keep in mind, Ehcp 0.38.3 and later is for Ubuntu 16.04 and later. Ehcp is specifically tested for Ubuntu, but should also work on many Debian based distros.

For automated installs, use ./install.sh unattended (passwords are default in this case)
Please be patient, press enter to continue
Press Enter one more time:
Note that ehcp can only be installed automatically on Debian based Linux OS'es or Linux'es with apt-get enabled..(Ubuntu, Kubuntu, debian and so on) Do not try to install ehcp with this installer on redhat, centos and non-debian Linux's... To use ehcp on no-debian systems, you need to manually install..
This installer is for installing onto a clean, newly installed Ubuntu/Debian. If you install it on existing system, some existing packages will be removed after prompting, if they conflict with packages that are used in ehcp, so, be careful to answer yes/no when using in non-new system
Note that, this is just a utility.. use at your own risk.
Ehcp also sends some usage data to developer for statistical/improvement purposes

Outline of install process:
1- Update apt-get repo info (apt-get update)
2- Install Php (That will run Main installer)
3- Run Main installer (Run install_1.php and install_2.php to install other server related software, such as mysql/mariadb, apache, nginx, etc.)

Press enter to continue
The main installer will show you which EHCP version you are installing. You can press Enter again in order to continue:
-----------------------EHCP MAIN INSTALLER---------------------------
------Easy Hosting Control Panel for Ubuntu, Debian and alikes ------
--------------------------www.ehcp.net-------------------------------

---------------------------------------------------------------------
ehcp version 0.38.5.b
ehcp installer version 0.38.5.b
Unattended:

Starting Ehcp install, please read prompts/questions carefully !
Some install/usage info and your name/email is sent to ehcp developers for statistical purposes and for improvements
Ehcp now also has professional version and support, as described at http://ehcp.net/?q=node/1518

press enter to continue:
--------------
You will then be asked to either enter a new or leave the password for the MySQL “root” user unchanged.
You will also be asked to enter your name, email address and set up the MySQL and admin user password for the “ehcp” account. Make sure you replace STRONGPASSWORD with an actual strong password.
EHCP INSTALL - INPUTS/SETTINGS SECTION:

THIS SECTION IS VERY IMPORTANT FOR YOUR EHCP SECURITY AND PASSWORD SETTINGS.
PLEASE ANSWER ALL QUESTIONS CAREFULLY

Please enter your name:rosehosting
Please enter your/admin email (used to send your panel info, ehcp news)- Enter an already working email:[email protected]
mysql root pass being checked ...

Your mysql root pass is identified as empty. Enter NEW PASSWORD for mysql user of `ehcp` (default 1234):
Please pay attention that, you cannot use sign # in your password: STRONGPASSWORD
Enter ehcp panel admin NEW PASSWORD (default 1234): STRONGPASSWORD
Enter ehcp panel admin NEW PASSWORD AGAIN: STRONGPASSWORD

============== MYSQL PASSWORD SETTINGS COMPLETE ... see troubleshoot if your ehcp does not work ==============
Next, you will be asked for your Hostname, IP address and preferred language. You can just leave them all to the default settings by pressing Enter on each of the questions:
Enter your hostname, IP address, preferred language etc. If you want to leave defaults, just press Enter. In my case, I go with defaults.

Your hostname seems to be host, if it is different, enter it now, leave blank if correct

Hostname is set as host
Your ip seems to be 111.222.333.444, if it is different or you want to use a different (external) ip, enter it now, leave blank if correct

LANGUAGE SELECTION:

ehcp currently supports English,Turkish,German,Spanish,French (some of these partial) except installation
enter language file you want to use (en/tr/german/spanish/nl/fr/lv/pt_br [default en]):

Do you want to install some additional programs which are not essential but useful for a hosting environment, such as ffmpeg,... etc.. ? Answer no if you have small ram or you need a light/fast system (y/[n])
At some point during the installation you will be asked to configure the roundcube database. Press “Yes” and then enter a password for the roundcube database user.
The database for phpmyadmin also needs to be configured. When asked about it, select “Yes” and then enter a password for the phpmyadmin database user.
After you enter the password you will also be asked to choose the web server which will be configured to run phpMyAdmin. Since we have an Apache web server on our VPS we chose the “apache2” option (you can press SPACE on your keyboard to choose which server you would like and then press OK).
Next, we need to select the mail server configuration type based on our needs. In our case, we went with the default one “Internet Site” option.
We also need to enter the mail name of the server. This name should be a fully qualified domain name (FQDN).
Lastly, you will be asked to create directories for web-based administration. Select “Yes” to continue.
With this last step, the installation should be completed. The following output should appear on your screen:
ehcp run/restart complete..

if your server is behind a router/modem in your network, you need to Open/redirect necessary ports on your modem/router:
these ports need to be opened/redirected :
20,21,22,25,53,80,110,143 (tcp+udp)

ehcp install finished up to now. we are continuing on simplifying the install process.
sory for any inconvenience. you can contact email/msn: [email protected]
you may join us in developing this control panel.

You may visit http://www.ehcp.net
You may support by donating cash, buying a pro license, doing php coding, html design, graphic design...
You may support by donating free dedicated or virtual servers for this project...

CURRENTLY WE NEED A DEDICATED SERVER WITH 8 CORE, 8GRAM, 500G hdd at least (or, you may consider to buy a pro license or donate..)

ehcp : Finished all operations.. go to your panel at http://yourip/ now...
3. Access EHCP dashboard
After the installation is complete, you can access the control panel through your browser with “http://your-ip-address”
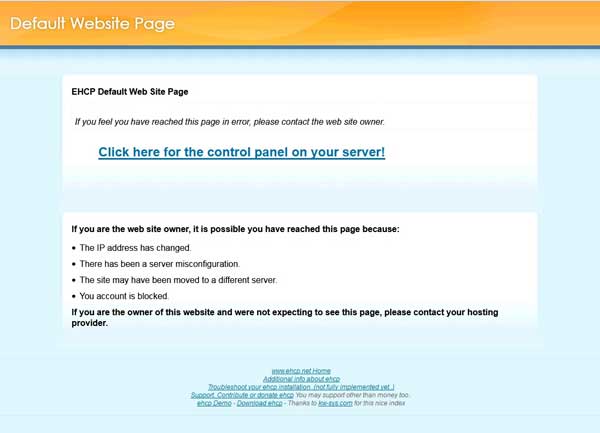
Once you open this page you can then click the link that says’ “Click here for the control panel on your server!”
This will take you the EHCP login screen. You can log in using “admin” as username and the password you have set during the installation. If you haven’t set any password you will need to use the default one “1234”.
That’s it. EasyHosting Control Panel has been successfully installed on your Ubuntu 16.04 server.
We can install, configure, set up and optimize Easy Hosting Control Panel on Ubuntu 16.04 for you if you are one of our Linux server support customer. Our expert Linux administrators are available 24×7 and will take care of your request immediately.
PS. If you liked this post on how to install Easy Hosting Control Panel on Ubuntu 16.04, please share it with your friends on the social networks using the buttons on the left or simply leave a reply below. Thanks.

Thank you very much. Please remove “www” from: wget -O ehcp.tgz www.ehcp.net/ehcp_yeni.tgz, else it will not work.
Best regards.
Hi Kalle,
The post has been updated.
Thanks!
u got all the pages but i cant login says that my user name and password is incorrect
please give suggestion
Please use the following:
Username: admin
Password: Password that you set during the installation
How to reset the password i added its not working apperntly
Please use the following command in your console and enter the new password twice:
passwd admin
hi how to access ehcp from windows browser
you should be able to log in with any browser, including any windows browser by typing
http://your-ip-addressHow can i change IP address with domain name? I want to access through the domain name instead of IP address.
You need to point the DNS A record of your domain to your server IP address.