
In this tutorial, we are going to install CodeIgniter on Ubuntu 26.04. CodeIgniter is a lightweight PHP framework designed to help developers build web applications faster and with cleaner code. It follows the MVC (Model-View-Controller) structure, which separates application logic from presentation, making projects easier to manage and scale. Developers often use it for creating dynamic websites, business platforms, APIs, and content management systems. One reason it became popular is its speed, small footprint, and simple setup compared to heavier frameworks. It also includes built-in tools for database handling, security, session management, and form validation, helping developers focus on building features rather than writing repetitive code from scratch each time.
Installing CodeIgniter on Ubuntu 26.04 is a straightforward process that typically takes around 10 minutes. Let’s get started!
Prerequisites
- A server with Ubuntu 26.04 as the OS
- User privileges: root or non-root user with sudo privileges
- A valid domain with a pointed A record to the server
Step 1. Update the System
Before we start with the installation of the Docker service, we will update the system packages to their latest versions available:
apt update -y && apt upgrade -y
Step 2. Install LAMP Stack
CodeIgniter is commonly used with the LAMP stack because it is a PHP framework designed to run efficiently on Linux servers with Apache and MySQL, enabling the development of dynamic web applications.
First, we will install the Apache web server. To do that, execute the following command:
apt install apache2 -y
Once installed, start and enable the Apache service:
systemctl start apache2 && systemctl enable apache2
Check the status of the service:
systemctl status apache2
You should get the following output:</p
root@host:~# systemctl status apache2
● apache2.service - The Apache HTTP Server
     Loaded: loaded (/usr/lib/systemd/system/apache2.service; enabled; preset: enabled)
     Active: active (running) since Sat 2026-05-09 02:01:51 CDT; 27s ago
 Invocation: d5ed51162185403ba9fe61efdf94066b
       Docs: https://httpd.apache.org/docs/2.4/
   Main PID: 85361 (apache2)
     Status: "Total requests: 0; Idle/Busy workers 100/0;Requests/sec: 0; Bytes served/sec:   0 B/sec"
      Tasks: 55 (limit: 3770)
     Memory: 5.7M (peak: 5.9M)
        CPU: 179ms
     CGroup: /system.slice/apache2.service
Next in the LAMP stack will be PHP with its extensions. To install it, execute the following command:
apt install php libapache2-mod-php php-intl php-mysql php-cgi php-mysqli php-pear php-phpseclib php-mbstring php-zip php-gd php-curl php-common -y
Once installed, execute the following command to check the PHP version:
php -v
You should get the following output:
root@host:~# php -v
PHP 8.5.4 (cli) (built: Apr  1 2026 09:36:11) (NTS)
Copyright (c) The PHP Group
Built by Ubuntu
Zend Engine v4.5.4, Copyright (c) Zend Technologies
    with Zend OPcache v8.5.4, Copyright (c), by Zend Technologies
The last component of the LAMP stack will be the MySQL database service. To install it, execute the command below:
apt install mysql-server -y
Once installed, start and enable the MySQL service:
systemctl start mysql && systemctl enable mysql
Check the status of the service:
systemctl status mysql
You should get the following output:
root@host:/var/lib# systemctl status mysql
● mysql.service - MySQL Community Server
     Loaded: loaded (/usr/lib/systemd/system/mysql.service; enabled; preset: enabled)
     Active: active (running) since Sat 2026-05-09 02:19:27 CDT; 10s ago
 Invocation: 7718549c261e4dad8fecc038219c48ed
   Main PID: 101731 (mysqld)
     Status: "Server is operational"
      Tasks: 35 (limit: 3770)
     Memory: 480.6M (peak: 480.6M)
        CPU: 3.020s
     CGroup: /system.slice/mysql.service
             └─101731 /usr/sbin/mysqld
Step 3. Install Composer
CodeIgniter uses Composer to manage libraries, dependencies, and package updates automatically, making development faster and more organized. To install Composer, execute the command below:
curl -sS https://getcomposer.org/installer | php -- --install-dir=/usr/local/bin --filename=composer
Once the installation is complete, you should receive the following output:
All settings correct for using Composer
Downloading...

Composer (version 2.9.7) successfully installed to: /usr/local/bin/composer
Use it: php /usr/local/bin/composer
Step 4. Create Codeigniter Database and User
To create the Codeigniter database, database user, and assign the privileges, log in to the MySQL terminal and execute the following commands:
CREATE USER 'codeigniterUser'@'localhost' IDENTIFIED BY 'YourStrongPasswordHere';

CREATE DATABASE codeigniterDB;

GRANT ALL PRIVILEGES ON codeigniterDB.* TO 'codeigniterUser'@'localhost';

FLUSH PRIVILEGES;

EXIT;
Step 5. Install Codeigniter
In this step, we will use Composer to install CodeIgniter inside the Apache web root directory:
mkdir /var/www/html/codeigniter

cd /var/www/html/codeigniter

composer create-project codeigniter4/appstarter my-app
After the installation is completed, update the ownership and file permissions with the commands below:
chown -R www-data:www-data /var/www/html/codeigniter/

find . -type f -exec chmod 644 {} \;

find . -type d -exec chmod 755 {} \;
When the permissions are properly configured, proceed by editing the env configuration file using the following command:
nano /var/www/html/codeigniter/my-app/env
Locate the following lines and modify them to match the database details configured earlier.
#--------------------------------------------------------------------
# ENVIRONMENT
#--------------------------------------------------------------------

CI_ENVIRONMENT = production

#--------------------------------------------------------------------
# APP
#--------------------------------------------------------------------

app.baseURL = yourdomain.com

#--------------------------------------------------------------------
# DATABASE
#--------------------------------------------------------------------
database.default.hostname = localhost
database.default.database = codeigniterDB
database.default.username = codeigniterUser
database.default.password = YourStrongPasswordHere
database.default.DBDriver = MySQLi
database.default.DBPrefix =
database.default.port = 3306
Step 6. Create Apache Virtual Host File
To access the CodeIgniter application through a domain name, you need to create a new Apache virtual host configuration file by running the command below:
touch /etc/apache2/sites-available/codeigniter.conf
Next, open the configuration file and add the following content:
<VirtualHost *:80>
ServerName yourdomainhere.com
DocumentRoot /var/www/html/codeigniter/my-app/public/

<Directory /var/www/html/codeigniter/my-app>
AllowOverride All
</Directory>

ErrorLog ${APACHE_LOG_DIR}/error.log
CustomLog ${APACHE_LOG_DIR}/access.log combined

</VirtualHost>
After adding the configuration, save the file and exit the editor.
Now enable the new virtual host configuration together with the Apache rewrite module:
a2enmod rewrite

a2ensite codeigniter.conf

a2dissite 000-default.conf
Before restarting Apache, verify that the configuration syntax is correct:
apachectl -t
If everything is configured properly, you should see output similar to this:
root@host:/var/www/html/codeigniter# apachectl -t
Syntax OK
Once the syntax check passes successfully, restart the Apache service to apply the changes:
systemctl restart apache2
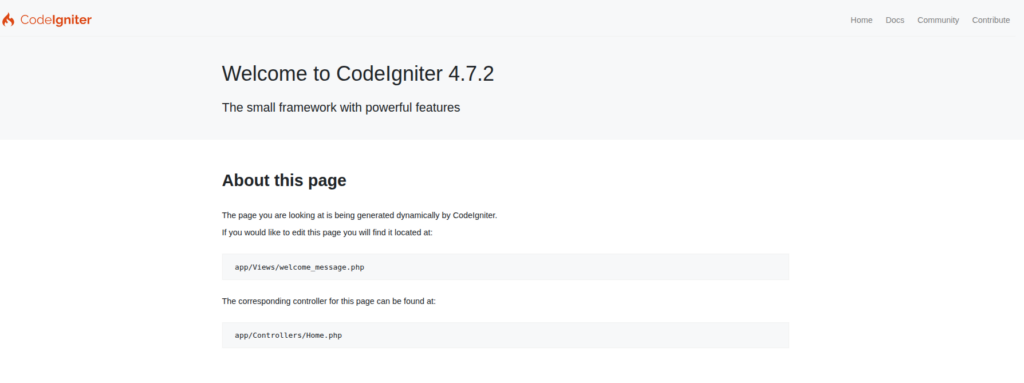
You can now open your browser and access the CodeIgniter application at http://yourdomainhere.com
Conclusion
That’s it. You successfully installed CodeIgniter on Ubuntu 26.04.
If you have difficulties with this installation, our Linux admins will help you with any aspect. You need to sign up for one of our monthly server management or per-incident server support plans. Do not hesitate to contact us anytime. We are available 24/7.
If you liked this post about installing CodeIgniter on Ubuntu 26.04, please share it with your friends or leave a comment below.
