

This blog post covers how to install Odoo 19 on Debian 13. Odoo is an open-source business management software that offers a variety of features, including accounting, CRM, e-commerce, and inventory, all in a single platform. The key benefits of using Odoo include integrated modules that connect with a wide range of business applications, its modular design, customization for specific business requirements, a centralized database, deployment options, a user-friendly, intuitive interface, and more. Odoo stores information in the PostgreSQL database management system, which will also be explained in this post.
Installing Odoo 19 on Debian 13 is a straightforward process that may take up to 15 minutes. Let’s get started!
Prerequisites
- A server running Debian 13 OS
- User privileges: root or non-root user with sudo privileges
Step 1. Update the system
Before we start installing Odoo and its prerequisites, we need to update the packages to their latest versions. To do that, execute the following command:
sudo apt update -y && sudo apt upgrade -y
Step 2. Install Python along with its Dependencies
The latest Python 3.13 is already included in the default Debian 13 repo. To install Python 3.13, along with other Odoo prerequisites, execute the following command:
sudo apt install python3 python3-venv python3-pip python3-psycopg2 wget build-essential libfreetype-dev libxml2-dev libzip-dev libsasl2-dev node-less libjpeg-dev zlib1g-dev libpq-dev libxslt1-dev libldap2-dev libtiff5-dev libopenjp2-7-dev libcap-dev npm node-less -y
To verify the installation of Python 3, execute the command below:
python3 -V
You should get output similar to this:
root@host:~# python3 -V
Python 3.13.5
Step 3. Install Wkhtmltopdf
Wkhtmltopdf is required and is used to convert HTML pages to PDF files in Odoo 19 and lower Odoo versions, too. To install it, execute the following commands one by one:
wget https://github.com/wkhtmltopdf/wkhtmltopdf/releases/download/0.12.4/wkhtmltox-0.12.4_linux-generic-amd64.tar.xz

tar xvf wkhtmltox*.tar.xz

sudo mv wkhtmltox/bin/wkhtmlto* /usr/bin
Once installed, check the wkhtmltopdf version with the command below:
wkhtmltopdf -V
You should get the following output:
root@host:~# wkhtmltopdf -V
wkhtmltopdf 0.12.4 (with patched qt)
Step 4. Install the PostgreSQL database service
To install the PostgreSQL database service, execute the command below:
sudo apt-get install postgresql -y
Start and enable the PostgreSQL service with the following:
sudo systemctl start postgresql && sudo systemctl enable postgresql
To check the status of the service
sudo systemctl status postgresql
You should get output similar to this
root@host:~# sudo systemctl status postgresql
● postgresql.service - PostgreSQL RDBMS
     Loaded: loaded (/usr/lib/systemd/system/postgresql.service; enabled; preset: enabled)
     Active: active (exited) since Tue 2025-10-28 05:29:38 CDT; 39s ago
 Invocation: 46a6923b93bc40ad8b10872c856a9306
   Main PID: 21895 (code=exited, status=0/SUCCESS)
   Mem peak: 1.7M
        CPU: 21ms

Oct 28 05:29:38 host.test.vps systemd[1]: Starting postgresql.service - PostgreSQL RDBMS...
Oct 28 05:29:38 host.test.vps systemd[1]: Finished postgresql.service - PostgreSQL RDBMS.
Step 5. Create Odoo System and Database User
Next, we will create an Odoo user under the odoo 19 name:
sudo useradd -m -U -r -d /opt/odoo19 -s /bin/bash odoo19
After this, we need an Odoo 19 database user, also, under the name of odoo 19:
sudo su - postgres -c "createuser -s odoo19"
Step 6. Download and Install Odoo 19
First, we need to log in as an Odoo 19 user:
su - odoo19
Download Odoo 19 files from the Odoo GitHub repository:
git clone https://www.github.com/odoo/odoo --depth 1 --branch 19.0 /opt/odoo19/odoo19
Once downloaded, create a Python virtual environment and install the Odoo 19 requirements with the following commands one by one:
python3.13 -m venv odoo19-venv
source odoo19-venv/bin/activate
pip install --upgrade pip
pip3 install wheel
pip3 install -r odoo19/requirements.txt

After requirements are installed, deactivate the environment with:
deactivate
Then press CTRL+D to log out of the odoo19 user. The screen should look like this:
(odoo19-venv) odoo19@host:~$ deactivate
odoo19@host:~$ ^C
odoo19@host:~$
logout

Next, we need to create the Odoo 19 custom addons directory, the Log file directory, along with the Log file for Odoo 19, and grant the correct permissions:
mkdir /opt/odoo19/odoo19-custom-addons
chown -R odoo19:odoo19 /opt/odoo19/odoo19-custom-addons
mkdir -p /var/log/odoo19/ && touch /var/log/odoo19/odoo19.log
chown -R odoo19:odoo19 /var/log/odoo19/
Step 7. Create Odoo configuration file
To create the Odoo 19 configuration file, execute the following command:
sudo nano /etc/odoo19.conf
Paste the following lines of code:
[options]
admin_passwd = StrongMasterPassword
db_host = False
db_port = False
db_user = odoo19
db_password = False
xmlrpc_port = 8069
logfile = /var/log/odoo19/odoo19.log addons_path = /opt/odoo19/odoo19/addons,/opt/odoo19/odoo19-custom-addons
Save the file and close it.
Step 8. Create Odoo Service file
Next, we need to create an Odoo 19 service file:
sudo nano /etc/systemd/system/odoo19.service
Paste the following lines of code:
[Unit]
Description=odoo19
[Service]
Type=simple
SyslogIdentifier=odoo19
PermissionsStartOnly=true
User=odoo19
Group=odoo19
ExecStart=/opt/odoo19/odoo19-venv/bin/python3 /opt/odoo19/odoo19/odoo-bin -c /etc/odoo19.conf
StandardOutput=journal+console
[Install]
WantedBy=multi-user.target
Save the file and close it.
Start and enable the odoo service for automatic start on system boot:
sudo systemctl start odoo19 && sudo systemctl enable odoo19
To check the status of the service:
sudo systemctl status odoo19
You should receive output similar to this:
root@host:~# sudo systemctl status odoo19
● odoo19.service - odoo19
     Loaded: loaded (/etc/systemd/system/odoo19.service; enabled; preset: enabled)
     Active: active (running) since Tue 2025-10-28 06:12:51 CDT; 5s ago
 Invocation: d4e0b0f708294643814921d16d927a4b
   Main PID: 24153 (python3)
      Tasks: 4 (limit: 4640)
     Memory: 80.6M (peak: 81.2M)
        CPU: 2.750s
     CGroup: /system.slice/odoo19.service
             └─24153 /opt/odoo19/odoo19-venv/bin/python3 /opt/odoo19/odoo19/odoo-bin -c /etc/odoo19.conf

Oct 28 06:12:51 host.test.vps systemd[1]: Started odoo19.service - odoo19.
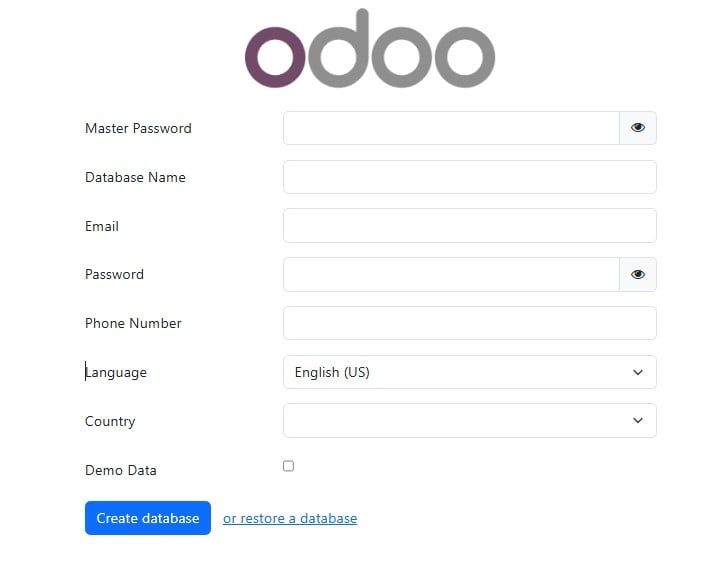
Now you can access your Odoo 19 at http://YourServerIPAddress:8069
That’s it. You learned how to install Odoo 19 on Debian 13.
If you have difficulties with this, our Linux admins will help you. Sign up for one of our monthly server management or per-incident server support plans and submit a support ticket.
If you liked this post about installing Odoo 19 on Debian 13, please share it with your friends or leave a comment below. Thanks.

Hello,
Thank you for your tutorial. I would like to point out that there is an error when creating the odoo19.conf file.
It is essential to put [option] at the beginning of the file, otherwise you will get an error message when launching the service.
sudo nano /etc/odoo19.conf
Paste the following lines of code:
[option]
admin_passwd = StrongMasterPassword
db_host = False
db_port = False
Apart from this oversight, everything worked fine on my freshly installed Debian 13.3.
Best regards,
Eric
Translated with DeepL.com (free version)
This was adjusted. Thanks for your feedback!