
 We’ll show you how to install WildFly 14 on Debian 9 with Apache as a reverse proxy. WildFly is free and open-source Java application server formerly known as JBoss. It is written in Java and used for building deploying and hosting Java applications and other web-based applications and services.
1. WildFly Requirements
In order to run WildFly on your Debian 9 server, you need the following requirements:
- Java SE 8 or later (we recommend that you use the latest update available) installed on your Debian 9 virtual server
- Debian 9 VPS with root access enabled.
2. Log in via SSH and Update your System
First, you will need to log in to your Debian 9 VPS via SSH as the root user:
ssh root@IP_ADDRESS -p PORT_NUMBER
and as usual, run the following commands to upgrade all installed OS packages on your VPS:
apt-get update
apt-get upgrade
3. Install Java
Java is not pre-installed on Debian 9 by default.
To install the Java Developer Kit (JDK), execute this command on the VPS:
apt-get install default-jdk
To find out what version of Java has been installed, run:
java -version
The output should look something like this:
openjdk version "1.8.0_181"
OpenJDK Runtime Environment (build 1.8.0_181-8u181-b13-1~deb9u1-b13)
OpenJDK 64-Bit Server VM (build 25.181-b13, mixed mode)
4. Install WildFly
cd /opt
wget http://download.jboss.org/wildfly/14.0.1.Final/wildfly-14.0.1.Final.tar.gz
tar -xvzf wildfly-14.0.1.Final.tar.gz
mv wildfly-14.0.1.Final wildfly
5. Create a WildFly User
Create a new system user named wildfly:
groupadd -r wildfly
useradd -r -g wildfly -d /opt/wildfly -s /sbin/nologin wildfly
6. Configure WildFly
Create a new WildFly configuration file:
vi /etc/default/wildfly
Add the following lines:
WILDFLY_USER="wildfly"
STARTUP_WAIT=180
SHUTDOWN_WAIT=30
WILDFLY_CONFIG=standalone.xml
WILDFLY_MODE=standalone
WILDFLY_BIND=0.0.0.0
so it will start WildFly 14 using the default web profile configuration in ‘standalone’ mode.
Create a WildFly startup script, named ‘launch.sh’:
vi /opt/wildfly/bin/launch.sh
Add the following lines:
#!/bin/sh

if [ "x$WILDFLY_HOME" = "x" ]; then
    WILDFLY_HOME=/opt/wildfly
fi

if [ "x$1" = "xdomain" ]; then
    echo 'Starting Wildfly in domain mode.'
    $WILDFLY_HOME/bin/domain.sh -c $2 -b $3
else
    echo 'Starting Wildfly in standalone mode.'
    $WILDFLY_HOME/bin/standalone.sh -c $2 -b $3
fi
Make the startup script executable:
chmod 755 /opt/wildfly/bin/launch.sh
Create a systemd init file for WildFly, named wildfly.service:
vi /etc/systemd/system/wildfly.service
Add the following lines:
[Unit]
Description=The WildFly Application Server
After=syslog.target network.target
Before=apache2.service

[Service]
Environment=LAUNCH_JBOSS_IN_BACKGROUND=1
EnvironmentFile=/etc/default/wildfly
User=wildfly
LimitNOFILE=102642
PIDFile=/var/run/wildfly/wildfly.pid
ExecStart=/opt/wildfly/bin/launch.sh $WILDFLY_MODE $WILDFLY_CONFIG $WILDFLY_BIND
StandardOutput=null

[Install]
WantedBy=multi-user.target
Run the following command to reload units from disk:
systemctl daemon-reload
Set the proper ownership of files and directories located in the /opt/wildfly directory:
chown wildfly:wildfly -R /opt/wildfly/
Start the WildFly service:
systemctl start wildfly
Enable WildFly to start automatically on boot:
systemctl enable wildfly
6. Set up a Reverse Proxy in Apache
In order to access your WildFly application only by using your domain name, without the port number in the URL, we need to set up Apache as a reverse proxy.
To do so, we will need to enable some additional proxy modules in Apache. We can do this using the following commands:
a2enmod proxy
a2enmod proxy_http
Once this is done, create a new Apache configuration file for your domain with the following command:
vi /etc/apache2/sites-available/your-domain.conf
And enter the following:
<VirtualHost *:80>
ServerName your-domain.com
ServerAlias www.your-domain.com

ProxyRequests Off
<Proxy *>
Order deny,allow
Allow from all
</Proxy>
ProxyPreserveHost On

ProxyPass / http://127.0.0.1:8080/
ProxyPassReverse / http://127.0.0.1:8080/

<Location />
Order allow,deny
Allow from all
</Location>
</VirtualHost>
Save the file and close it.
There are two ways to enable the ‘your-domain.conf’ configuration in Apache. We can use:
a2ensite your-domain.com.conf
Alternatively, we can accomplish the same using:
ln -s /etc/apache2/sites-available/your-domain.conf /etc/apache2/sites-enabled/your-domain.conf
Do not forget to replace your ‘your-domain.com’ with your actual domain name.
Disable the default Apache configuration file:
rm /etc/apache2/sites-enabled/000-default.conf
Restart Apache for the changes to take effect:
service apache2 restart
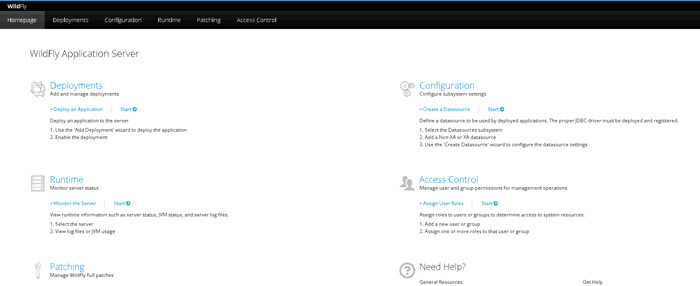
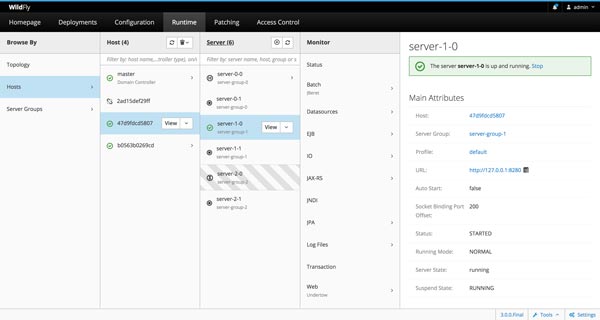
WildFly has a powerful web-based administration console. In order to access the WildFly management console, we have to add a new user. Run the add-user.sh script within the bin directory of the WildFly installation:
/opt/wildfly/bin/add-user.sh
Select: a) Management User , enter a username and password for the WildFly management user.
Edit the /opt/wildfly/standalone/configuration/standalone.xml WildFly configuration file and replace:
<interface name=”management”>
<inet-address value=”${jboss.bind.address.management:127.0.0.1}”/>
</interface>
<interface name=”public”>
<inet-address value=”${jboss.bind.address:0.0.0.0}”/>
</interface>
with:
<interface name=”management”>
<any-address/>
</interface>
<interface name=”public”>
<any-address/>
</interface>
Restart WildFly for the changes to take effect:
systemctl restart wildfly
Open http://your-domain.com and access the WildFly management console using the newly created user login credentials.
That’s it. If you followed all of the instructions properly you can now access your WildFly application using your domain name.
 Of course, you do not need to install WildFly 14 on your Debian 9 VPS yourself if you use our Premium Linux Server Management Services, in which case you can simply ask our expert admins to install it for you. They are available 24/7 and will cater to any requests or questions that you may have.
PS. If you liked this post, feel free to share it with your friends on social networks by using the share shortcuts, or simply leave a comment below. Thanks.

Hello, it would be nice to know how to have a redirect on the 443 connection and not on the 80
Maybe add a WorkingDirectory=…. to /etc/systemd/system/wildfly.service with some path that is writable by wildfly user.
Some of the apps need to write some files and dont have configurable paths for everything and certain features fail silently without logging anything (KIE Business Central + Execution Server) because they can’t create their files.
Thanks for the tutorial anyway!