

Joomla is a free and open-source content management system (CMS) built in PHP Joomla allows users to publish different kinds of websites, such as personal blogs, government applications, corporate intranets and extranets, small and large business websites, etc. 
In today’s article, we will guide you through the steps of installing the latest stable release of Joomla on an Ubuntu 20.04 VPS, with all necessary components, such as Apache web server, MySQL database server, and PHP.
Prerequisites
- Ubuntu 20.04 VPS. We will use one of our SSD 2 VPS hosting plans.
- system user with sudo privileges
- MySQL database server version 5.1 or newer (5.5.3 + is recommended)
- Apache web server version 2.0 or newer (2.4 + is recommended)
- PHP version 5.3.10 or newer (7.3 + is recommended)
Login and Update the VPS
Open your favorite terminal application and log in to your Ubuntu 20.04 VPS via SSH
ssh root@IP_address -p Port_number
Don’t forget to replace user, IP_address, and Port_number with your server’s actual IP address and port number.
Once you are in, run the following command to make sure that all installed packages on the VPS are up to date
apt update && apt upgrade
Install Apache web server
The first component we will install on the VPS is the Apache web server. We need it to serve the website content to the visitors. We can easily install the web server by running the following command
apt -y install apache2
After the command completes, start the Apache web server and enable it to start automatically after a server reboot
systemctl start apache2
systemctl enable apache2
Confirm that the web server is running
systemctl status apache2
Output:
● apache2.service - The Apache HTTP Server
  Loaded: loaded (/lib/systemd/system/apache2.service; enabled; vendor preset: enabled)
  Active: active (running)
  Docs: https://httpd.apache.org/docs/2.4/
  Main PID: 271961 (apache2)
  Tasks: 55 (limit: 4620)
  Memory: 5.7M
  CGroup: /system.slice/apache2.service
├─271961 /usr/sbin/apache2 -k start
Install PHP
Joomla is PHP based application and one of the requirements for its installation is PHP. Run the following command to install PHP 7.4 along with some other PHP dependencies
apt install php libapache2-mod-php php-mysql php-opcache php-xml php-gd php-mbstring php-curl php-xmlrpc php-intl php-soap php-zip
Wait for the installation process to complete and run the following command to check if the right version of PHP is installed
# php -v
PHP 7.4.3 (cli) (built: Jul 5 2021 15:13:35) ( NTS )
Copyright (c) The PHP Group
Zend Engine v3.4.0, Copyright (c) Zend Technologies
with Zend OPcache v7.4.3, Copyright (c), by Zend Technologies
From the output above we can confirm that PHP version 7.4.3 is properly installed on the Ubuntu 20.04 VPS.
Next, we will have to tweak some values in the PHP configuration file (php.ini). Open the PHP configuration file (/etc/php/7.4/apache2/php.ini) and modify the following values:
- memory_limit – Minimum: 64M Recommended: 128M or higher
- upload_max_filesize – Minimum: 30M
- post_max_size – Minimum: 30M
- max_execution_time: Recommended: 30
Save the php.ini file and restart the web server for the changes to take effect
sysemctl restart apache2
Install MySQL and create database
The Joomla installation requires a database to store data such as articles, users, menus, and categories. MySQL and PostgreSQL databases are supported, but in our example, we will use MySQL. Let’ proceed and install the MySQL database server
apt install -y mysql-server
Check the version of MySQL installed on our Ubuntu 20.04 VPS
mysql -V
mysql Ver 8.0.26-0ubuntu0.20.04.2 for Linux on x86_64 ((Ubuntu))
Next, we will run the mysql_secure_installation post-installation script to improve the security of the MySQL server and set the MySQL root password
mysql_secure_installation
Set a strong password for the MySQL root user when prompted and proceed with the next steps. You can use the following options:
remove anonymous users? (Press y|Y for Yes, any other key for No) : y
Disallow root login remotely? (Press y|Y for Yes, any other key for No) : y
Remove test database and access to it? (Press y|Y for Yes, any other key for No) : y
Reload privilege tables now? (Press y|Y for Yes, any other key for No) : y
Next, log in to the MySQL server as user root
mysql -u root -p
mysql> CREATE DATABASE joomladb;
mysql> CREATE USER 'joomlauser'@'localhost' IDENTIFIED BY 'STRONG_PASSWORD';
mysql> GRANT ALL PRIVILEGES ON joomladb.* TO 'joomlauser'@'localhost';
mysql> FLUSH PRIVILEGES;
mysql> exit
Replace STRONG_PASSWORD with an actual strong password.
Download Joomla
Download the latest stable release of Joomla from their website to your server. At the moment of writing this article, it is version 3.9.28.
wget https://downloads.joomla.org/cms/joomla3/3-9-28/Joomla_3-9-28-Stable-Full_Package.zip
Create a new directory for your Joomla website, inside the document root directory
mkdir /var/www/html/joomla
Unpack the downloaded ZIP package to the newly created directory
unzip Joomla_3-9-28-Stable-Full_Package.zip -d /var/www/html/joomla/
Change the ownership of the files inside the Joomla directory
chown -R www-data:www-data /var/www/html/joomla/
Create Apache virtual host
Next, in order to be able to access the Joomla website with a domain name, we will have to create an appropriate virtual host
vim /etc/apache2/sites-available/domain.com.conf
Enter the following content
<VirtualHost *:80>
    ServerName domain.com
    ServerAdmin [email protected]
    DocumentRoot /var/www/html/joomla
    <Directory /var/www/html/joomla>
         Allowoverride all
   </Directory>
</VirtualHost>
Where domain.com is your actual domain.
Disable the default Apache virtual host and enable the newly created one
a2dissite 000-default
a2ensite domain.com
Reload the web server for the changes to take effect
systemctl reload apache2
Complete Joomla Installation
Now that we have Joomla downloaded and all necessary components installed on our server, we can proceed and complete the Joomla installation using its web installation wizard. Open your favorite web browser, go to http://domain.com and Joomla’s web installation wizard will appear on your screen.
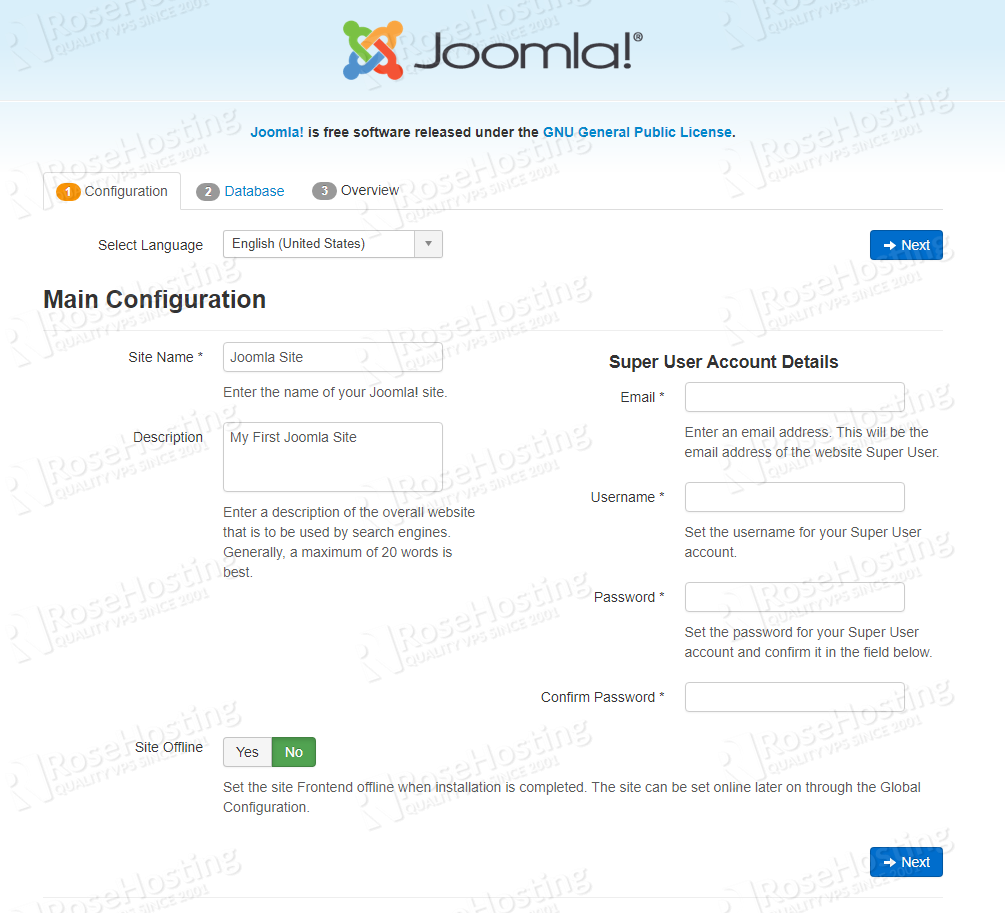
The first step of the installation is to enter the main details of your website such as the name of the website, website description, and create your superuser account
On the second step of the installation process, you will have to enter the information about the MySQL database we created in this tutorial. Enter the details as shown on the image below

The final step of the installation is actually an overview of all information we entered about the Joomla installation and it includes an option for installing sample data. Once you confirm that everything is OK, click the install button and you will see the final, success page.
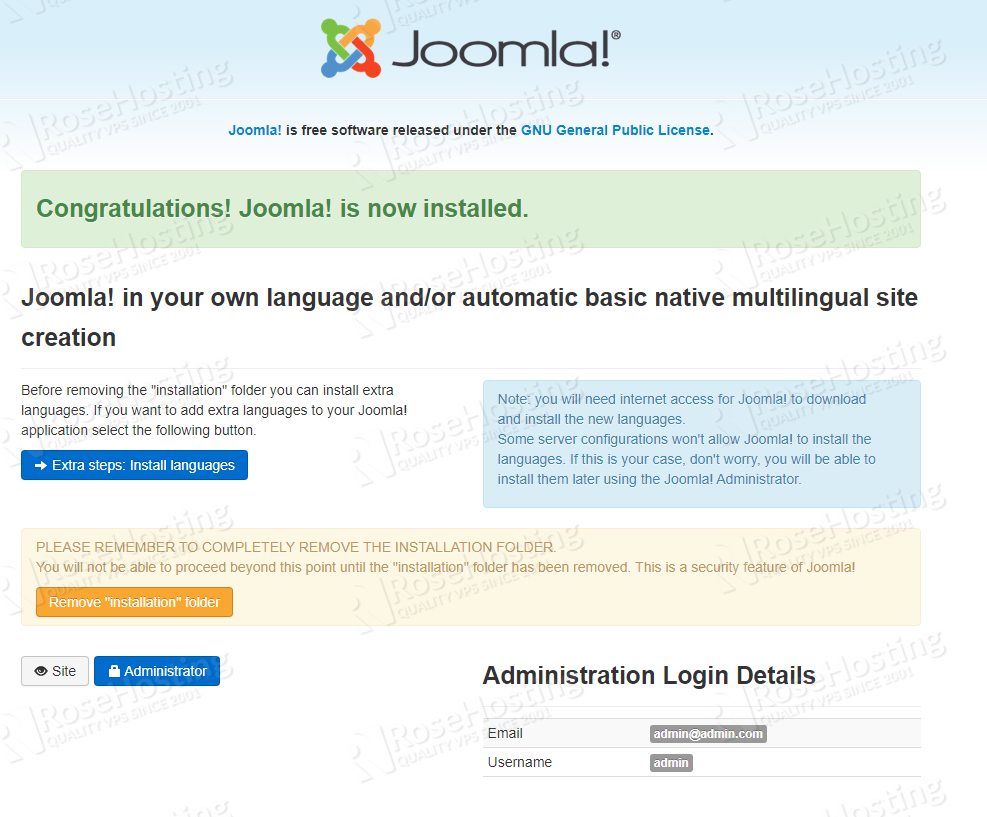
That’s all. The latest version of Joomla is successfully installed on your Ubuntu 20.04 website. You can check Joomla’s official documentation for more details on how to use and configure the application.
Of course, you don’t have to install Joomla 3.9 on Ubuntu 20.04 if you use one of our Joomla VPS hosting services, in which case you can simply ask our expert Linux admins to install Joomla on your Ubuntu 20.04 server, for you. They are available 24/7/365 and will take care of your request immediately. You can also consider reading our post on how to install Joomla 3.9 on Ubuntu 20.04. 
PS. If you liked this post on how to install Joomla 3.9 on Ubuntu 20.04, please share it with your friends on the social networks using the buttons on the left or simply leave a reply below. Thanks.

This worked great for installing 3-10-6.